|
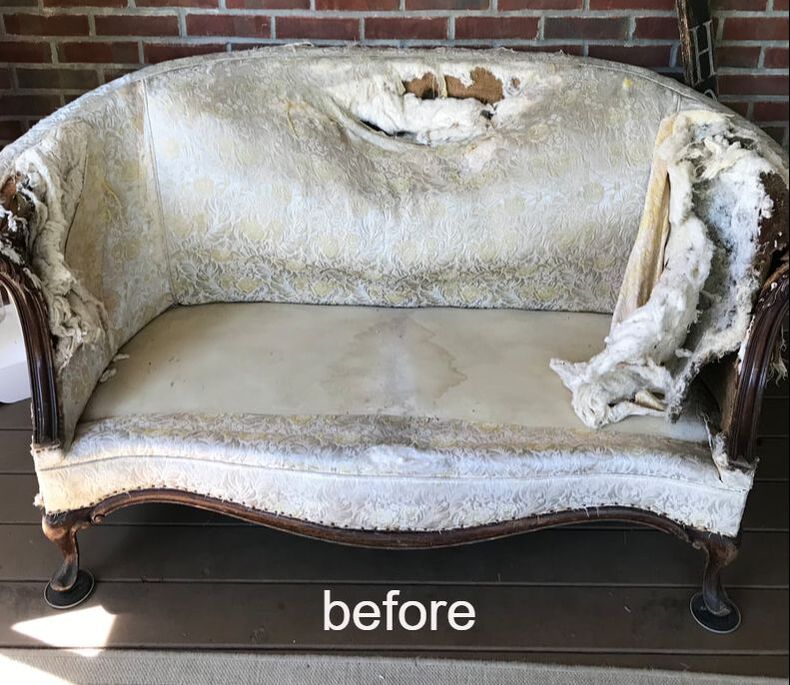
Wow! This post has been a long time coming. I started deconstructing my very worn antique loveseat July 2018 and finished just before July 2019. A lot happened in that year! Truth is, I moved this loveseat three times during that year with the final move being to a new house. I want to share the process with you but first let me start by saying. I didn't know what I was doing. I just started working at it and watched it evolve. And second, there are no "how to" rules regarding furniture deconstruction. It's ART and CREATIVITY! So borrow my ideas, learnings and deconstruct your furniture to suit your own style. Take a look at my finished deconstructed love seat in my new home!: 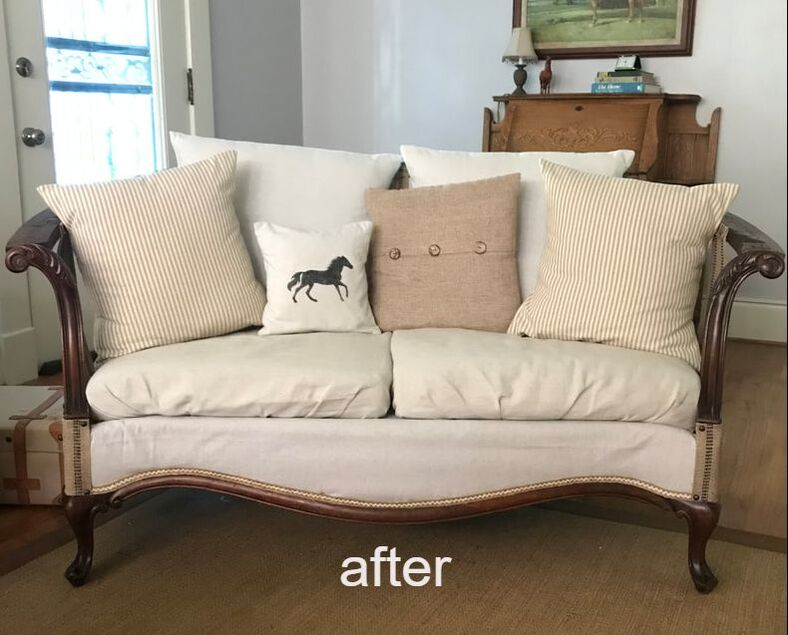 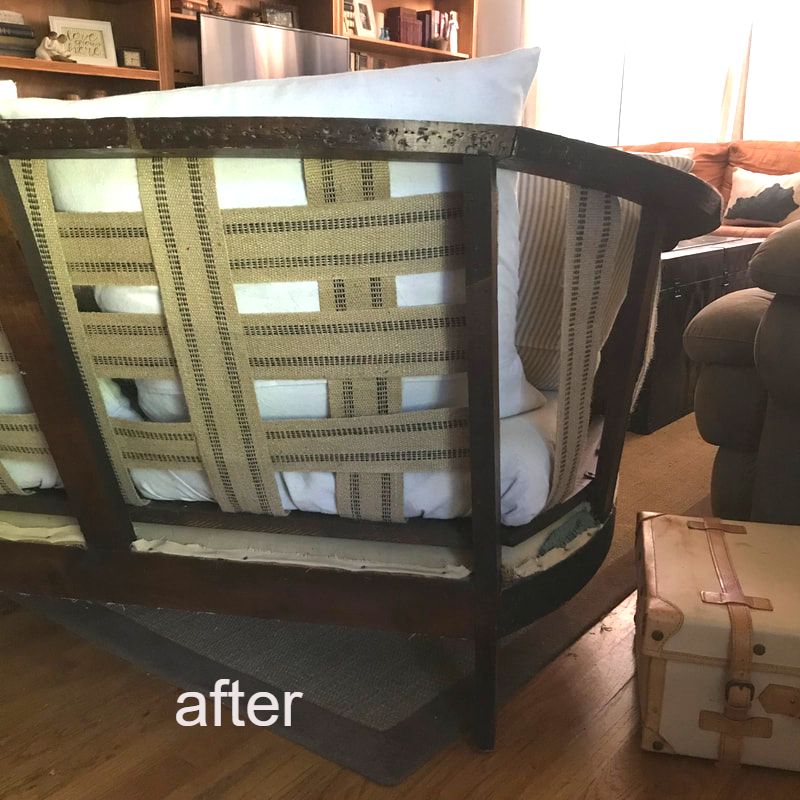 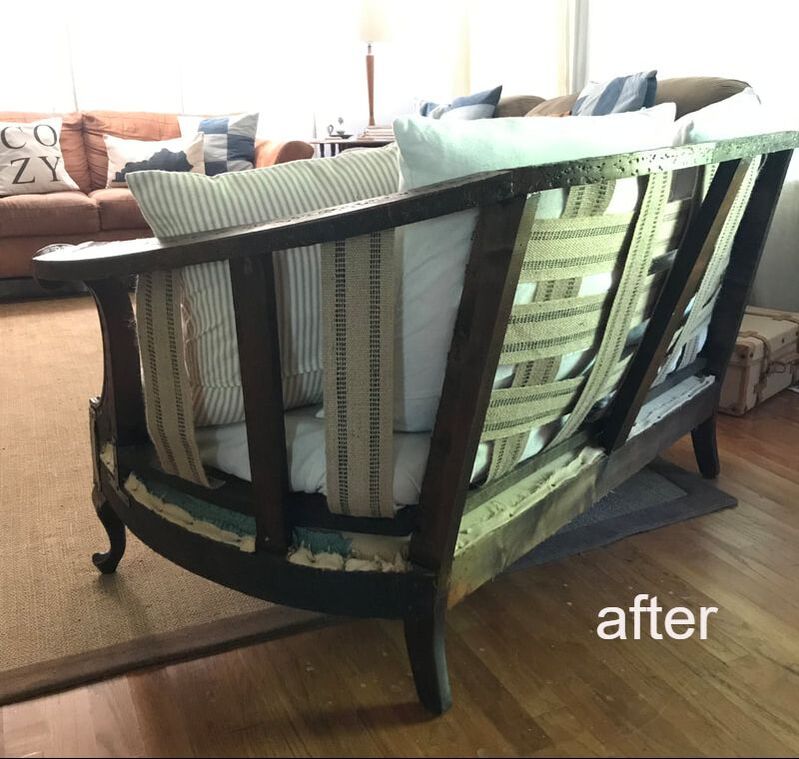 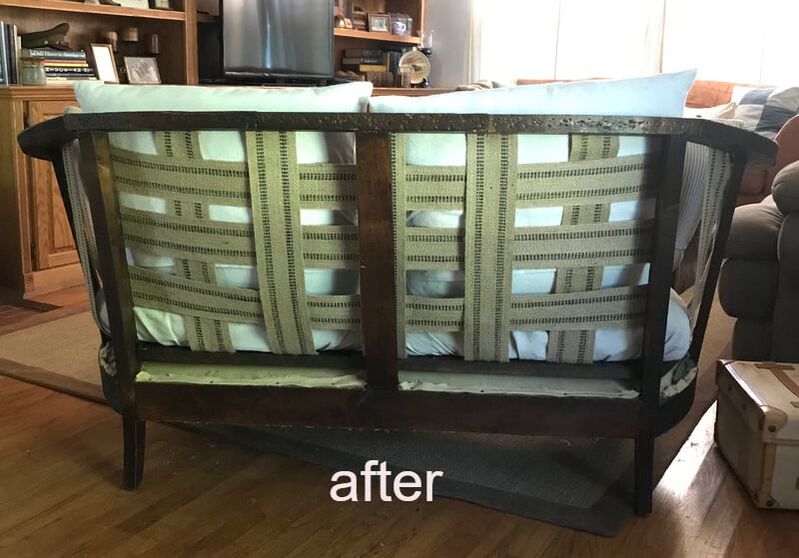 So here's how it all started... My teenage daughter said to me one afternoon, "Mom, when are you going to get rid of this thing!" To be honest, I was getting tired of it too. There it sat on the back screened in porch looking like it belonged by the curb. The dogs used it to lounge on. I would sit on it sometimes but yuck....it was dirty. The seat cushions weren't even salvageable. I knew there was a hidden treasure in there...somewhere.
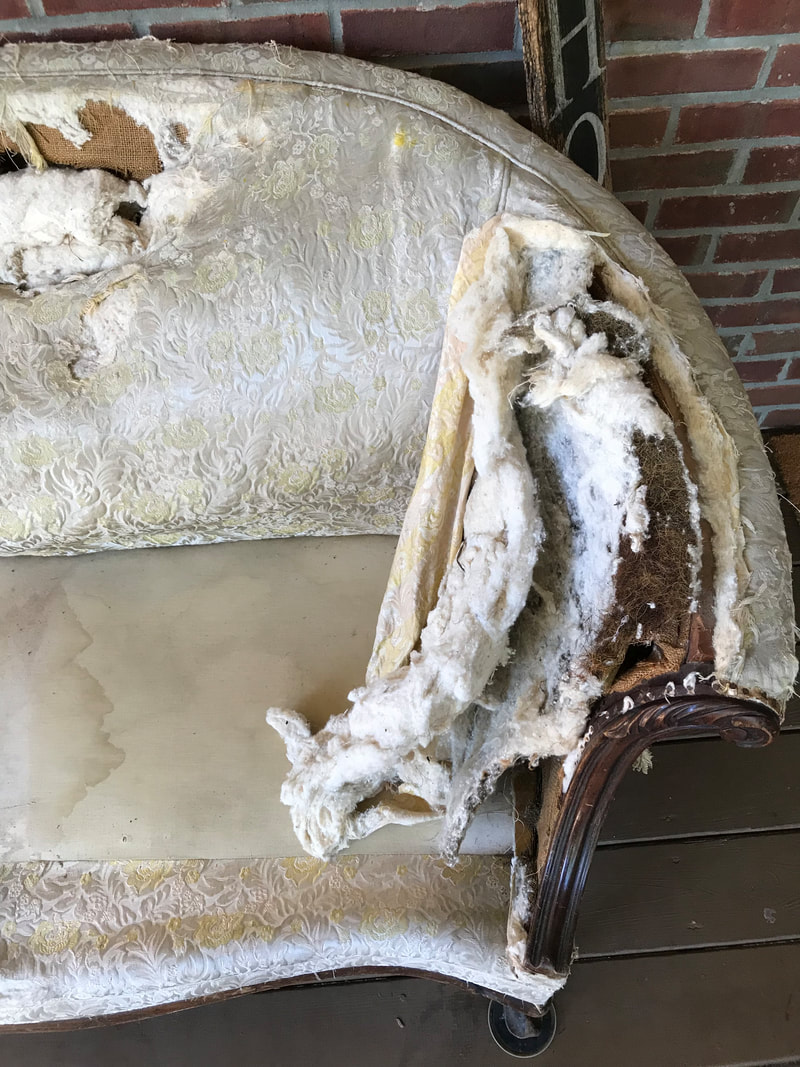
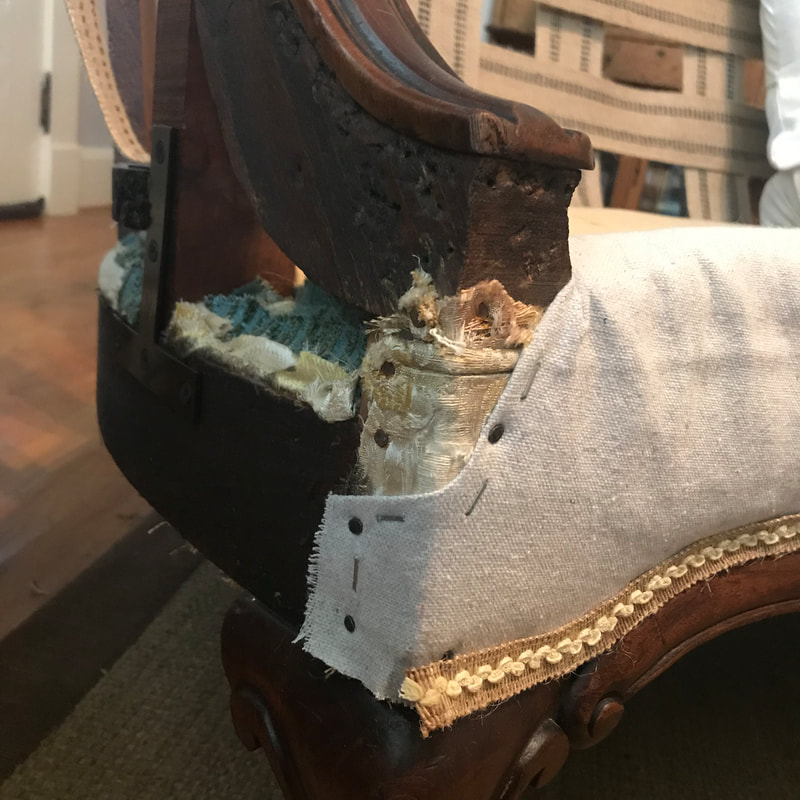
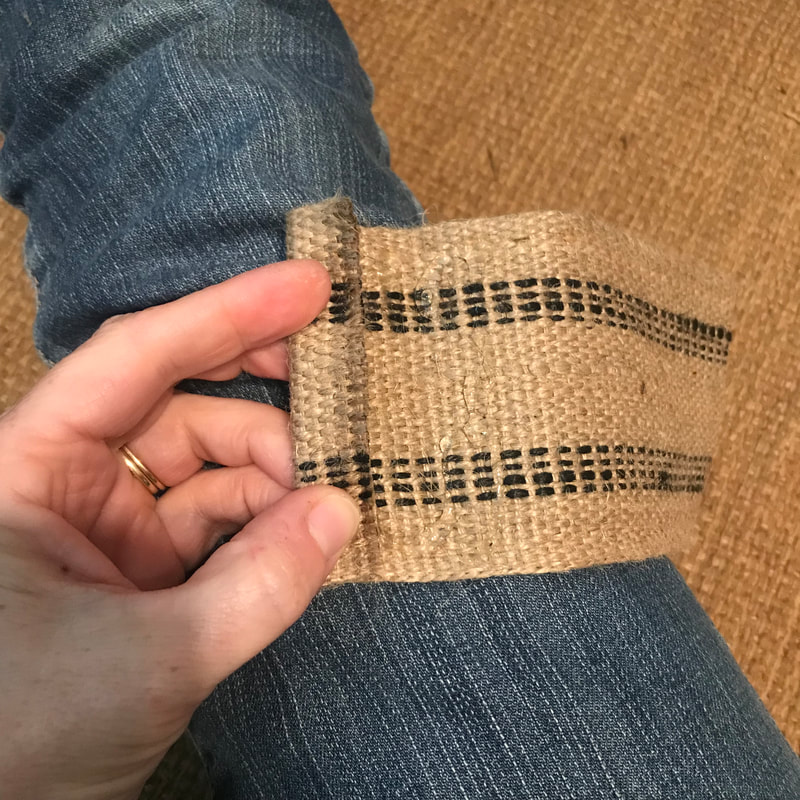
So on July 4, 2018, I began taking it apart! I started by removing all the damaged upholstery, stuffing and coils. I took lots of pictures which became my notes for this project. 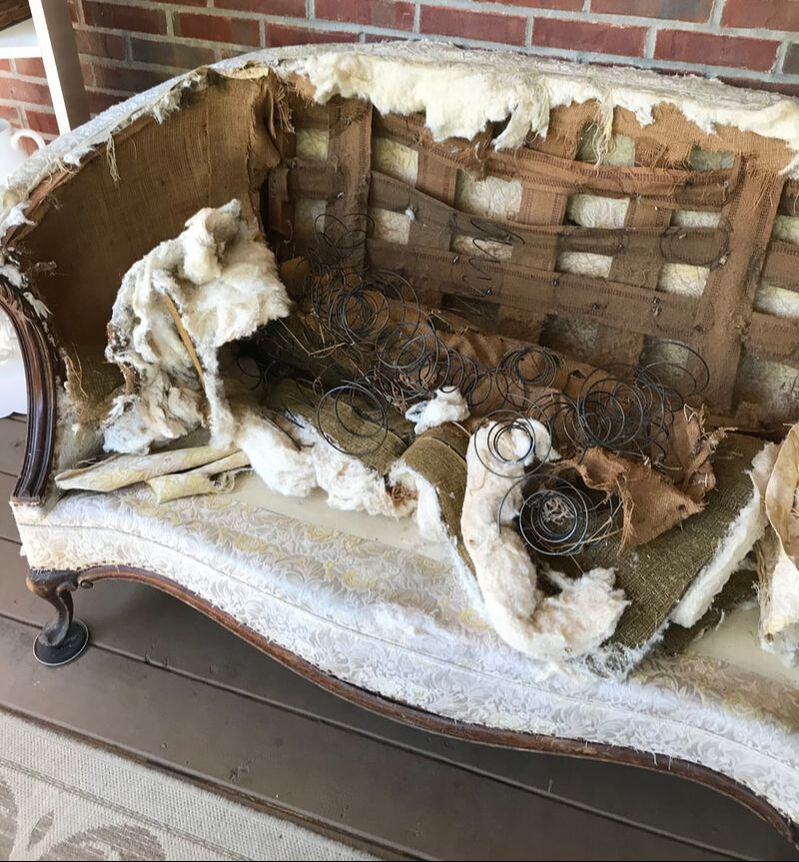 You never know what treasure lie beneath when you start working with an antique. A little pirate child must have used this furniture vessel as his ship...and it shows! 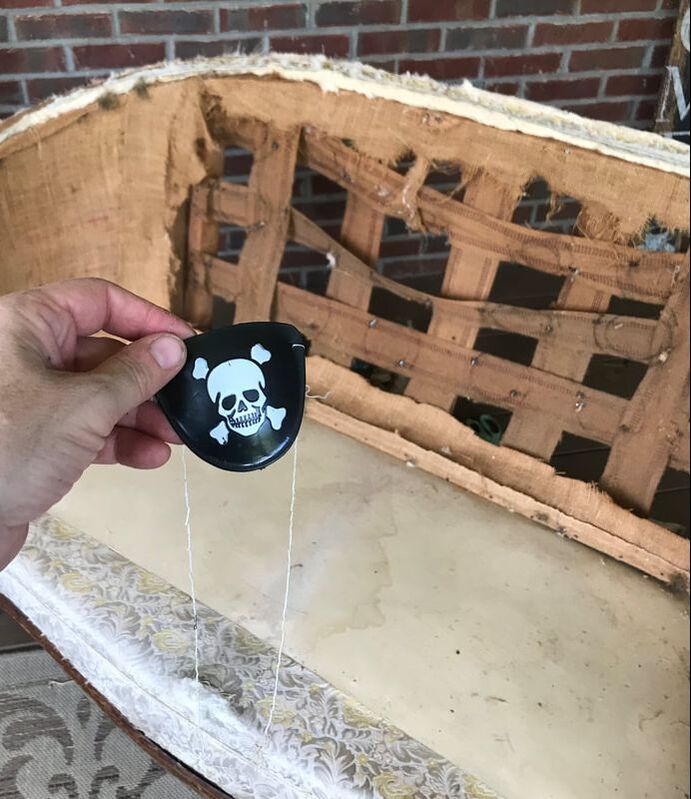 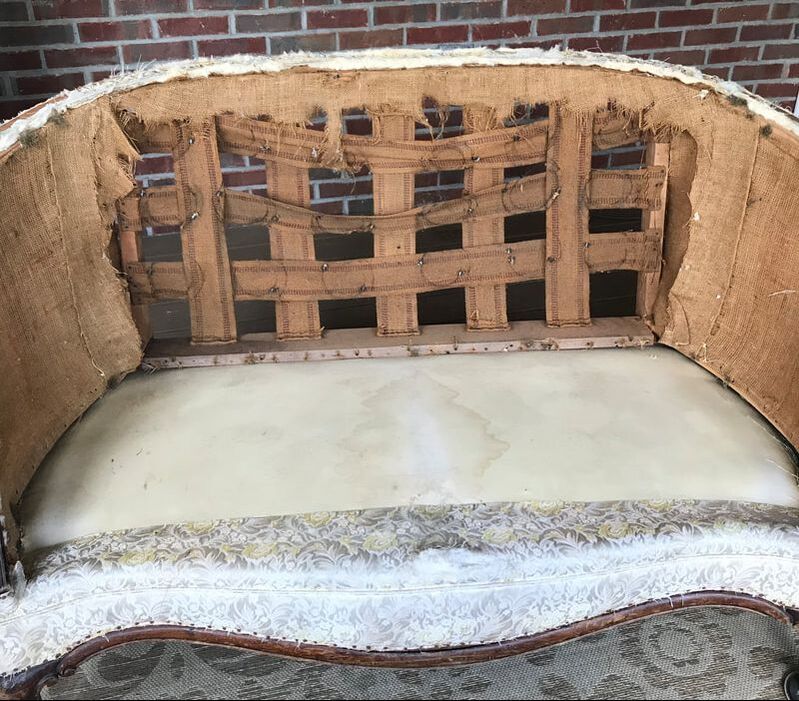 The base was in decent shape and the woodwork on the front...gorgeous! There were water stains on the upholstery but they would later be hidden by cushions. There was also a rip in the front which I would have to address. In addition, there where a few places the wood needed a little reinforcement too. For now, I would focus on the top portion. The old burlap and webbing housed so much dust that it had to go. I also removed all the tiny old nails from the wood. The best tools to get the nails out where a small set of pliers and a upholstery nail remover that I picked up for a few dollars at Joann's Fabric. 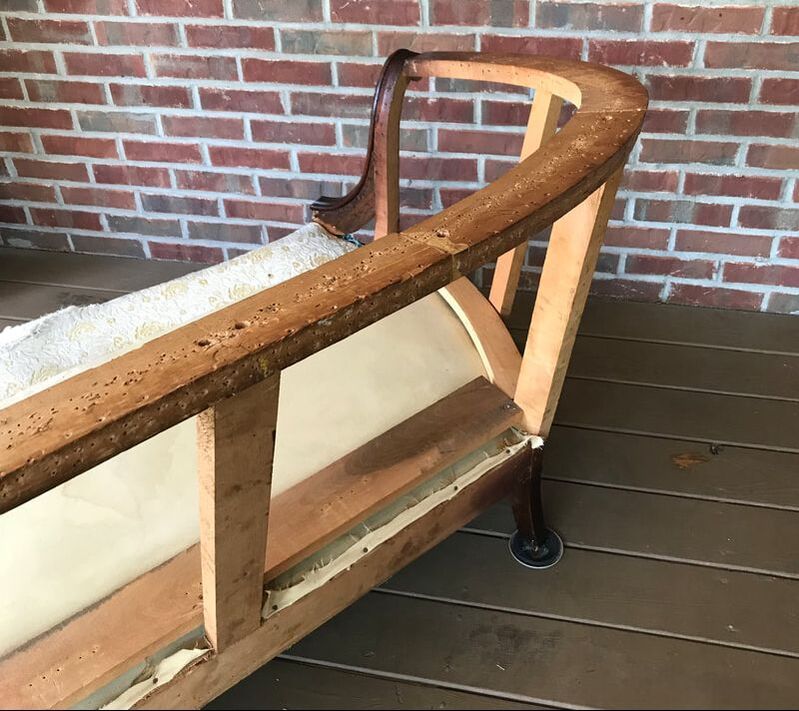 After some vacuuming and dusting, this is what I had... a slightly worn upholstered base and a top down to the frame. I didn't find this raw wood look on this particular piece very attractive so... 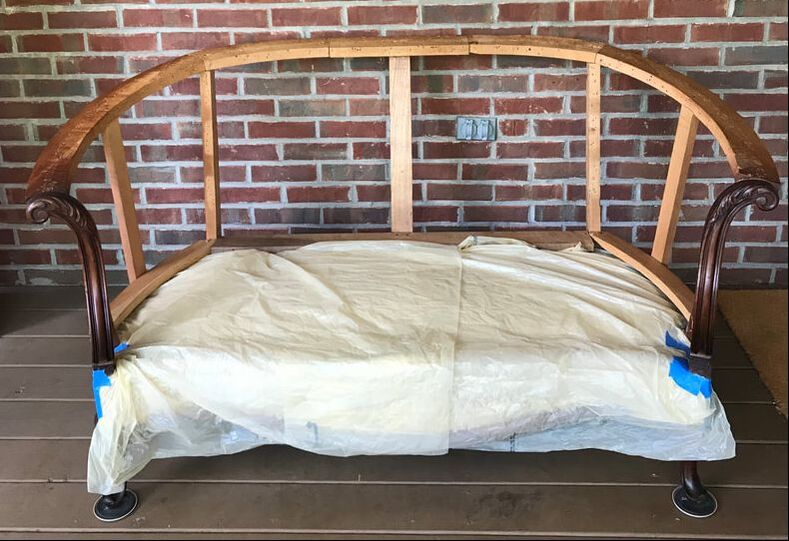 I covered the base with plastic and painter tape to work on the wood. 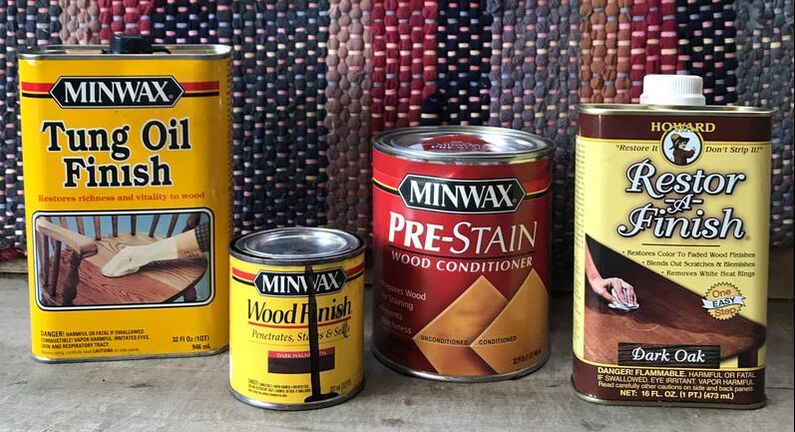 1. I used Minwax pre-stain wood conditioner to prepare the raw wood only. 2. Next I used Minwax Dark Walnut wood stain on the raw wood only. This gave all the wood a consistent color. It also made all the nail holes less noticeable and gave the raw wood a rich, healthy look. 3. Then I sealed the raw wood with Minwax Tung Oil Finish. 4. Finally, I used Restor-A-Finish in Dark Oak to restore the existing stained wood carving on the front. I followed all the packaging directions on these products. Here's what they did for this piece! 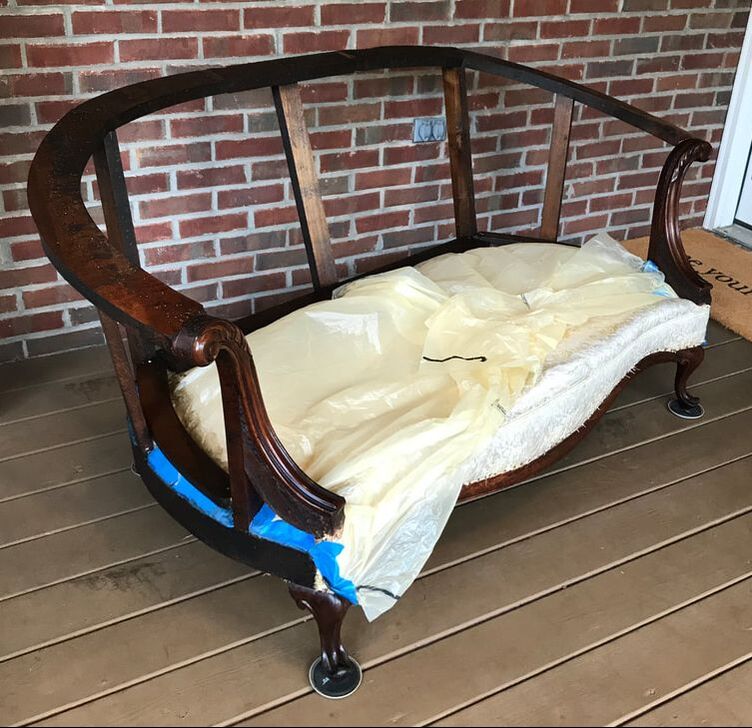 Wow! I was really please with the way these products brought out the natural beauty in the existing wood! I so valued the way the wood turned out that I moved my love seat project indoors! 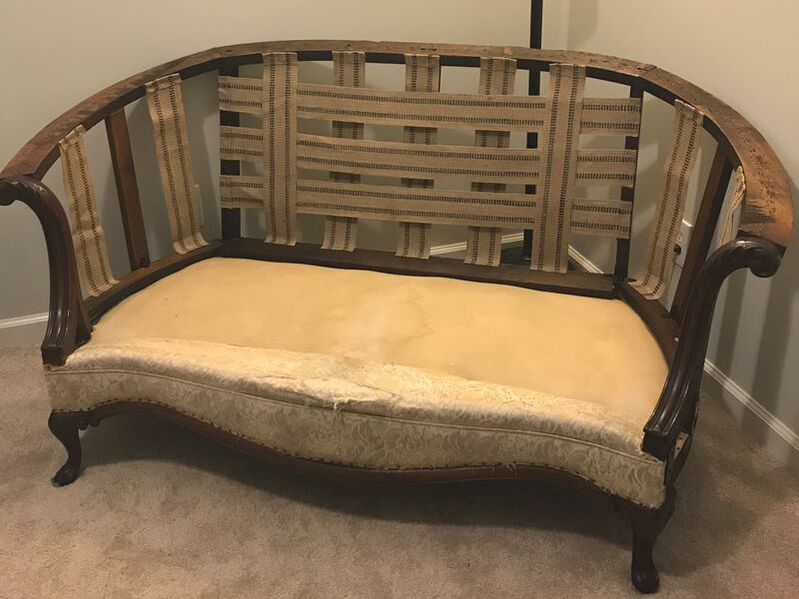 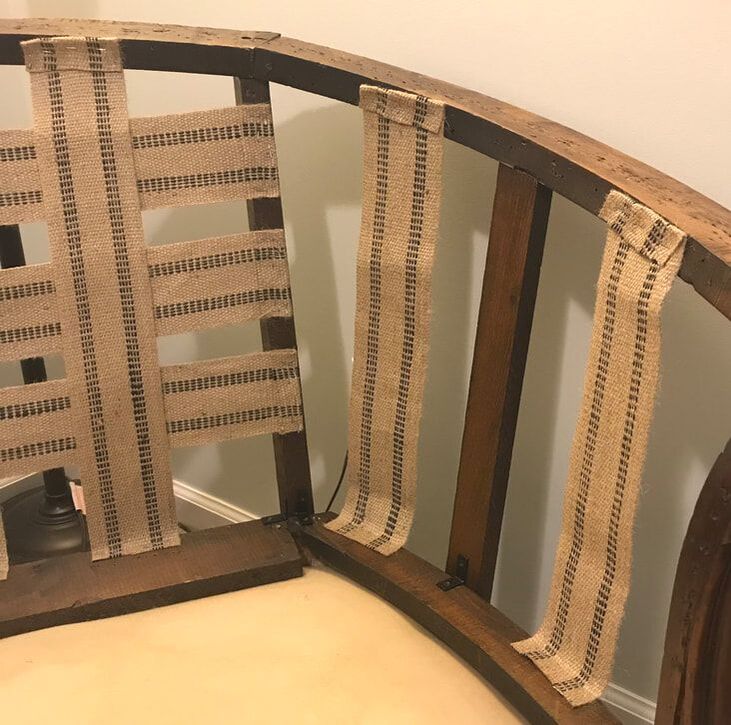 Remember how I said I took lots of pictures when I removed all the coils, burlap and stuffing? This really was important because I constructed the webbing in the back exactly how it was originally done. I figured they put it together the way they did for a reason and just followed the original blue print. With the sides, however, I put webbing in place also as I didn't think the burlap that was originally there would hold together in the arms without all the original stuffing. Webbing makes furniture secure and is the undergarment for all the rest. Two important things to know: 1. I should have secured the bottom of the webbing with a fold as I did with the top. A fold was included in the original webbing and I should have done this everywhere. I simply forgot when I was stapling the bottom onto the wood. This has not proven to be a problem so far. 2. 1/4 inch staples are completely worthless and do not hold webbing (or probably much else) in place. If stapling, use 1/2 inch or larger. Better yet, use upholstery tacks and skip staples altogether. Tacks really do the job and hold up under daily use. I am slowly replacing lose or missing staples with upholstery tacks. I should have used tacks in the first place for a sturdier piece of furniture. 1/2 inch upholstery tacks can be found at Hobby Lobby. 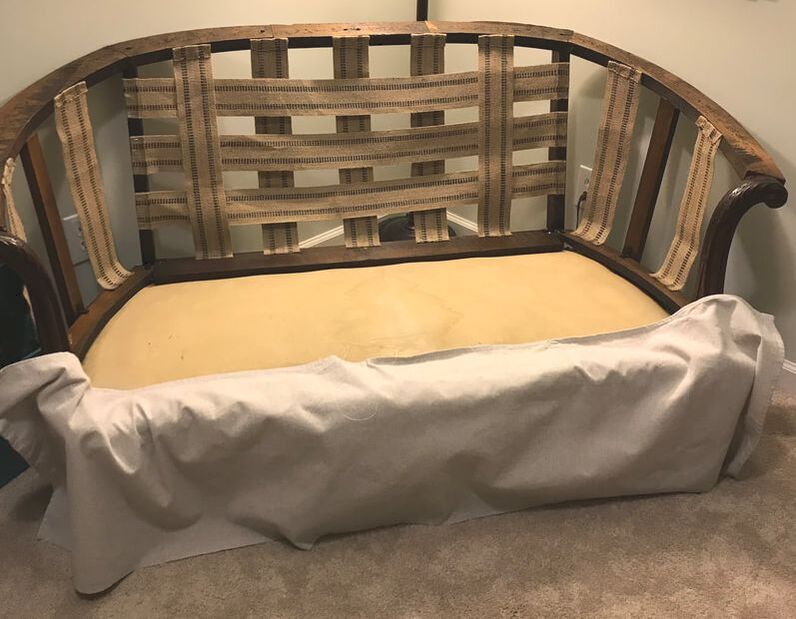 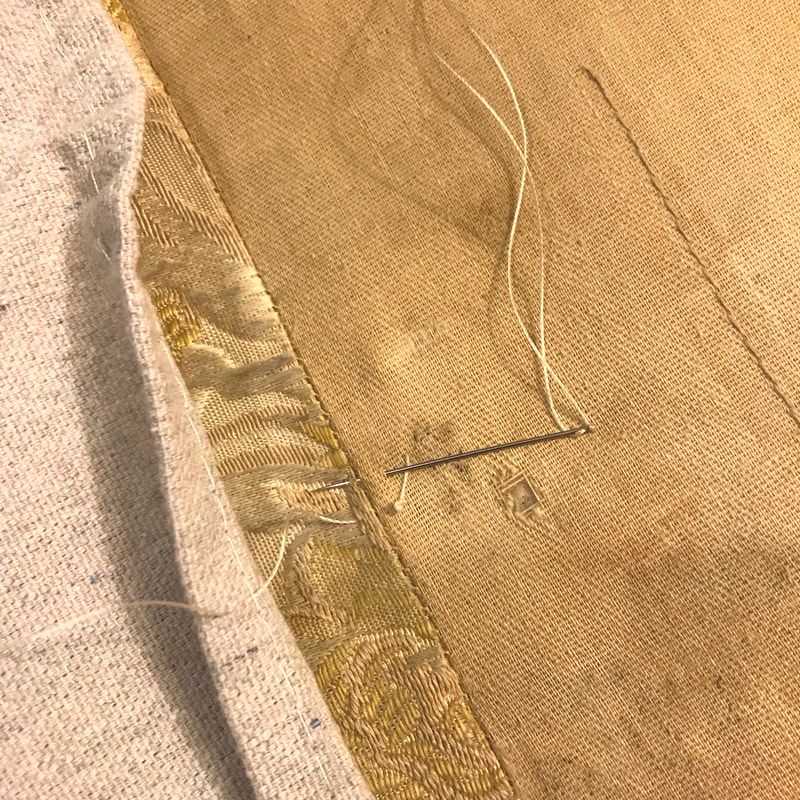 So remember that big gash in the front of the upholstery? I wanted to address this without tearing into the base of the loveseat. So I covered it! Using painter's drop cloth, I cut a long piece with a nice hem along one of the long sides. I then took heavy upholster's thread and a large needle to hand sew the fabric to the loveseat. Once I had it solidly attached, I cut the rest of the piece of draping fabric to fit the shape of the furniture. I then used mostly upholstery nails and a few staples to nail the fabric to the base just above the decorative wood. This creative fix has held in place well with daily use. The new fabric moves with the underlying old fabric and is securely attached. 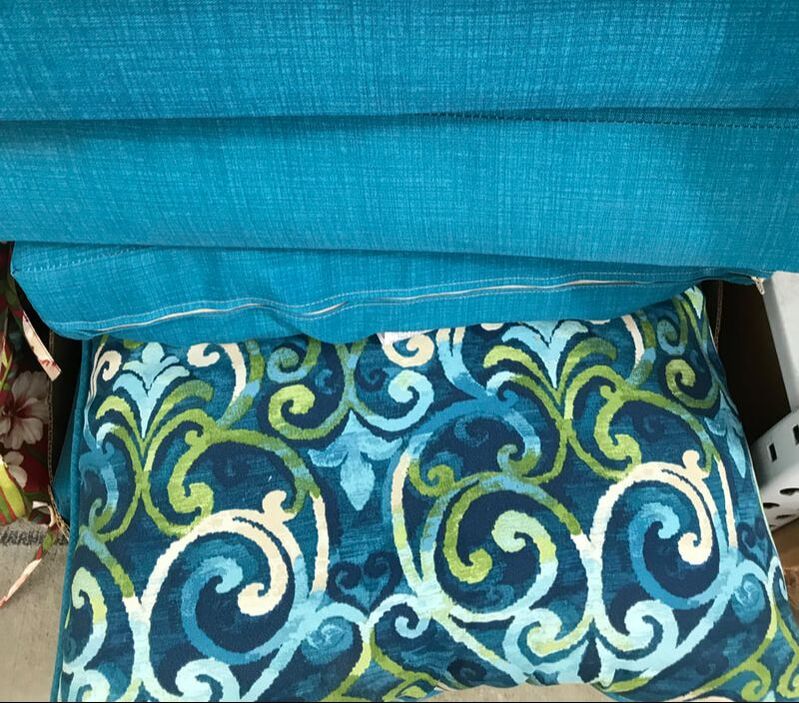 Yikes! I bet you weren't expecting to see this! It's the end of summer and I'm at Lowe's Home Improvement store browsing through clearance outdoor furniture cushions. I needed to replace the cushions and here was my solution. Outdoor furniture cushions are typically sturdy and, at the end of summer, they are often on sale. I couldn't make them for the cost here. But those outdoor colors...wow! You can find how I covered the large pillowsand the seat cushions here: https://www.ourgingercottage.com/decorating-on-a-dime/category/sewing-projects 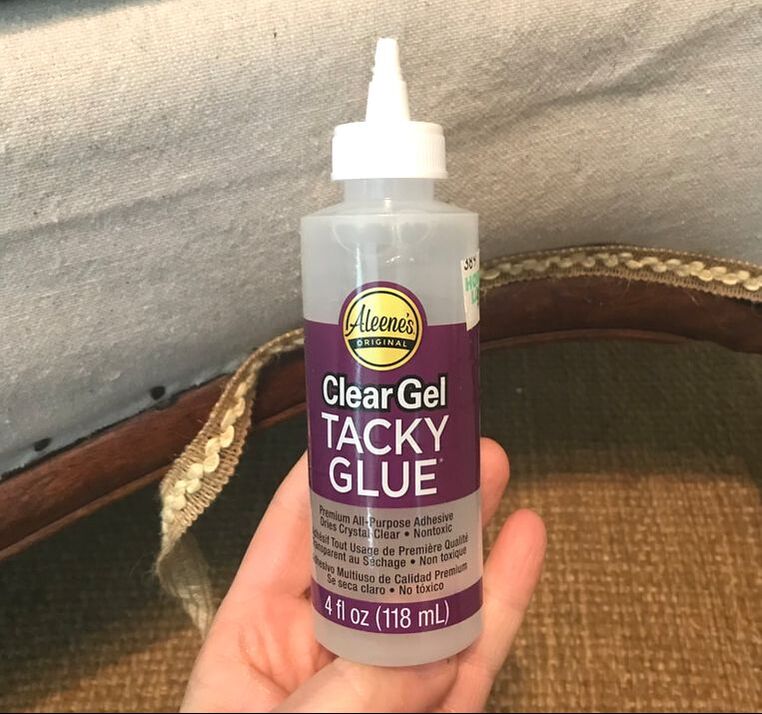 Finally, I attached trim I purchased at Hobby Lobby to the front to cover the upholstery tacks and staples which hold the fabric in place above the decorative wood. Aleene's Clear Gel Tacky Glue has held the trim on quite well with daily use. The Glue was also purchased at Hobby Lobby.
Okay...almost done but what do I do about this. Hmmm.
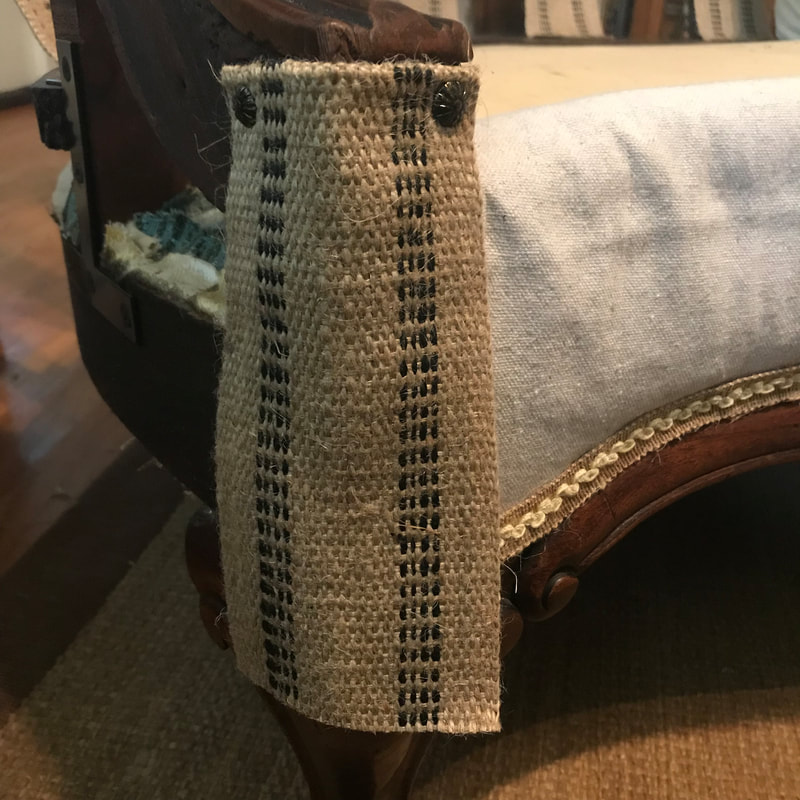
Looking good! I just took a few inches of the leftover upholstery webbing. I folded under one end about 1/2 inch. Then I nailed it in place with some decorative upholstery tacks from Hobby Lobby. I cut the webbing to the correct length, folded the end under about 1/2 inch and nail the bottom into place with 2 more decorative upholstery tacks. Tada! 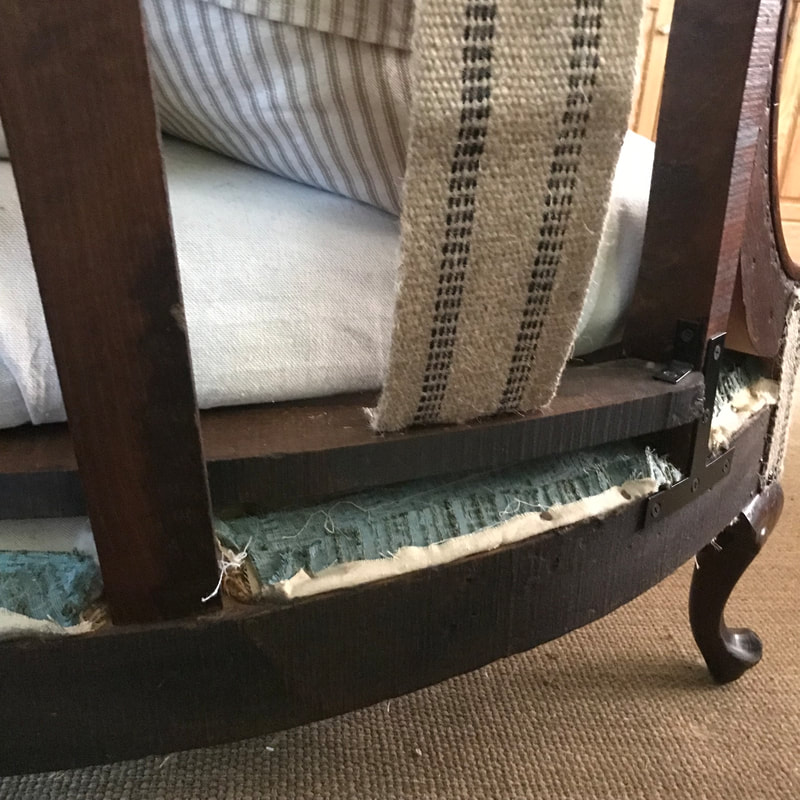 Some other things I should mentioned.
I loved the unique and aged color of this light teal fabric peaking out around the back of the base. I left it and the original nails alone. I kind of wonder if this piece has been reupholstered before and the teal is the original...just a thought. Looks like I need to trim a few threads sticking out but I love this raw look of dark wood, old fabric and webbing around the back. Also pictured here are a few places we felt we should reinforce the old wood. When I say "we", I am referring to my wonderful husband's participation in this project. We used black hardware to give it an industrial look but it's almost invisible on the dark wood so as not to highlight the repair. So what do you think? Ready to tackle your own furniture deconstruction?! My advice is be resourceful and creative!
2 Comments
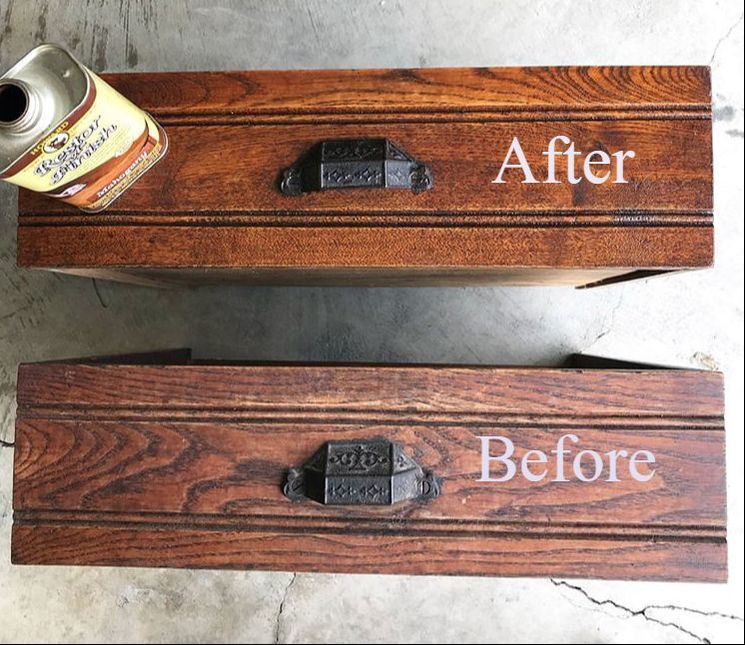
 You admire that piece of furniture every time you are at your relative's house. And then the day finally comes. Their need to downsize equals welcoming a family treasure into your home. I've found myself in this spot several times. Once I receive an old furniture friend into my home, it's often in need of some TLC. And that's exactly what I gave the beautiful hand-carved antique cupboard above...TLC with Restor-A-Finish. (No, I am not being paid by this company. The product simply works so I want to tell everyone about it.) It's often hard to know what to do with old furniture that has a tired, worn and scratched finish. There are usually three options.: 1. Refinish. This requires hours of work, sweat (sometimes blood) and a well ventilated work space that can be tied up until you finish the project. 2. Paint. This is a popular choice right now. However, I don't think it's always best in the long run. Once the painting fade ends...then what? (Have you ever tried to remove paint from furniture? It's very difficult. I have an antique trunk that still has faint green deep down in wood grooves even after hours of stripping and sanding. It can never be returned to it's original glory.) I reserve painting to pieces that are not antiques. And if they are, they are so damaged that only paint can hide the damage and make them look lovely again. 3. Restor-A-Finish. This is a far less time consuming option. It works well if most of the finish is still in tact but lacks it's original luster, has light scratches or other areas of surface damage. To put it best and per the back of the product packaging, "unique finish-penetrating formula restores the original color and luster to wood finishes while blending out minor scratches and blemishes" and "permanently eliminates white heat rings, watermarks, scratches, color fade, oxidation, smoke damage...restores finish in one step - without removing any of the existing finish". Restor-A-Finish is exactly what my new-to-me cupboard needed, especially since it was so large, having two parts, with the bottom significantly more worn than the top. Besides, I really only had one afternoon to get it done. Here are some pictures of the worse wear: 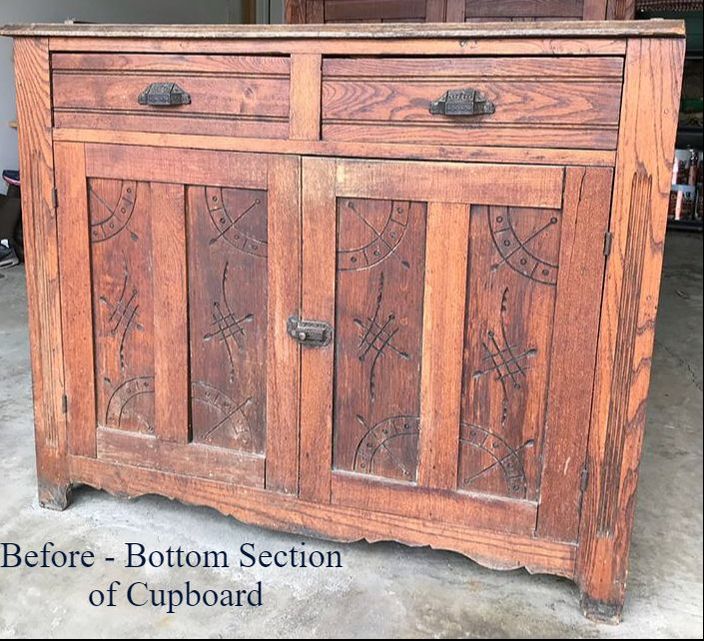 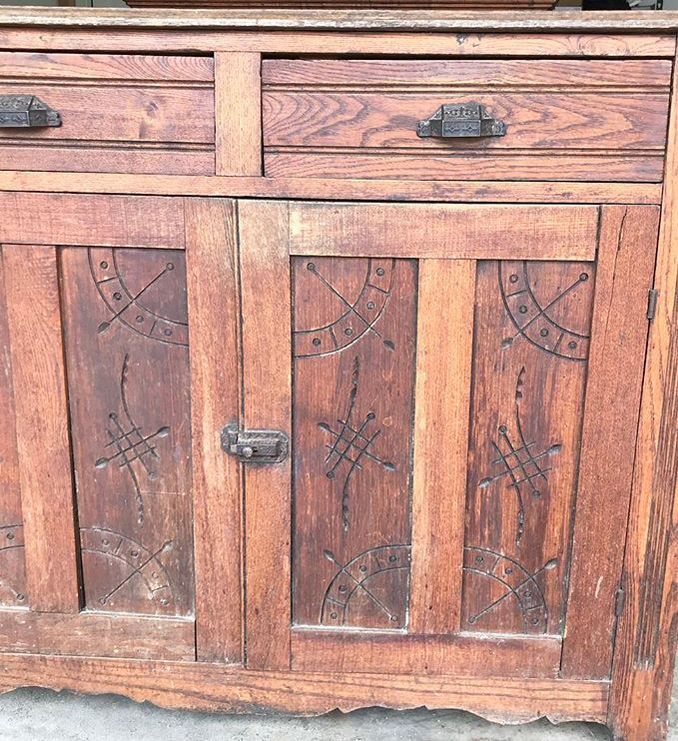 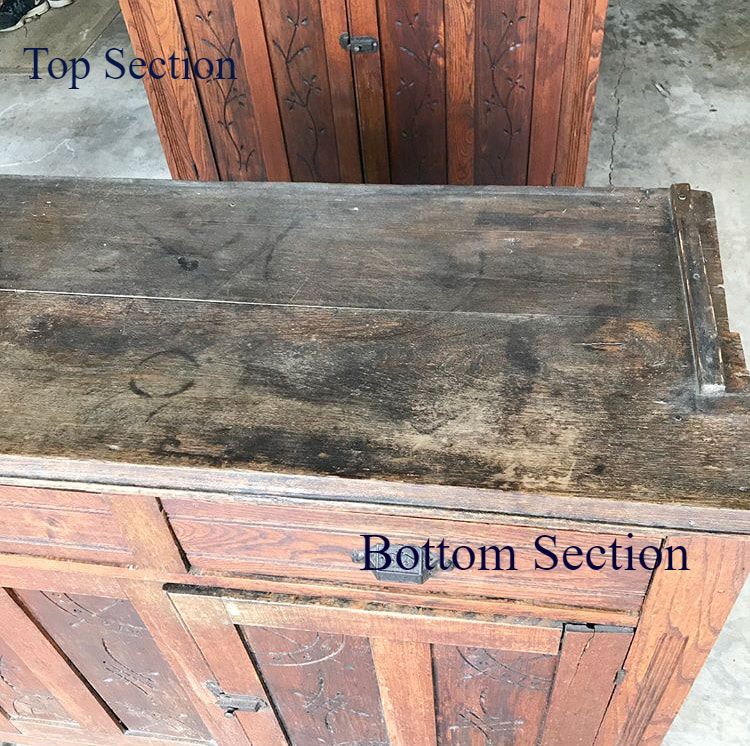 You can see the top section of the cupboard in the background of the second image of BEFORE pictures. Like I said, it wasn't too bad and just needed a little attention. However, the top and front of the bottom section were in awful shape. It was time to get to work! Materials Needed:
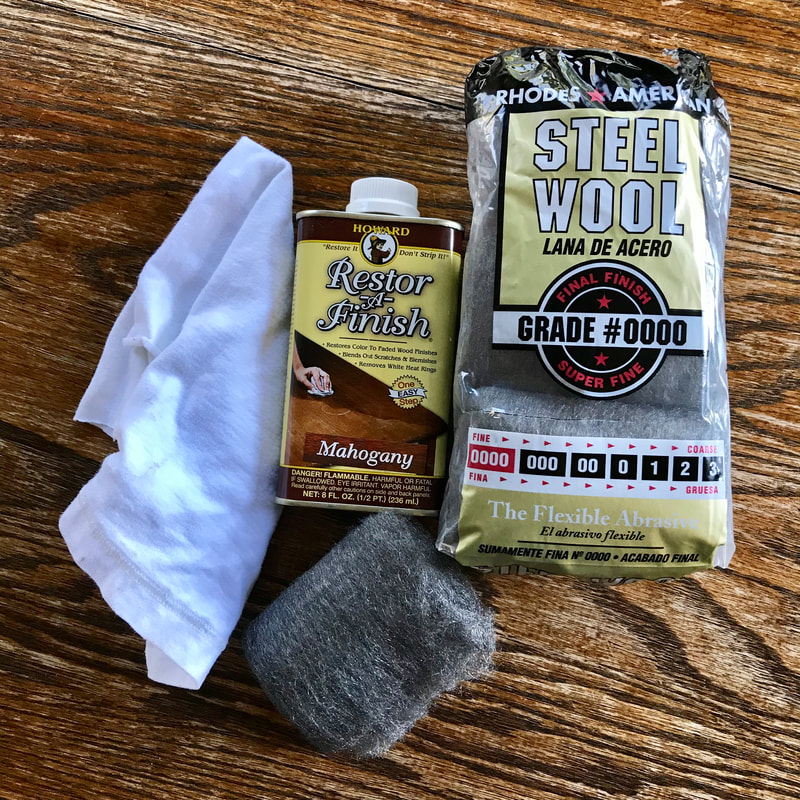 How to use Restor-A-Finish:
 Even though the top section of the cupboard was in significantly better shape than the bottom section, the top was still dull and had numerous scuffs. I used Restor-A-Finish on both sections so the final results would be uniform. Below are some more pictures of how I transformed my worn and scratched cupboard with Restor-A-Finish. 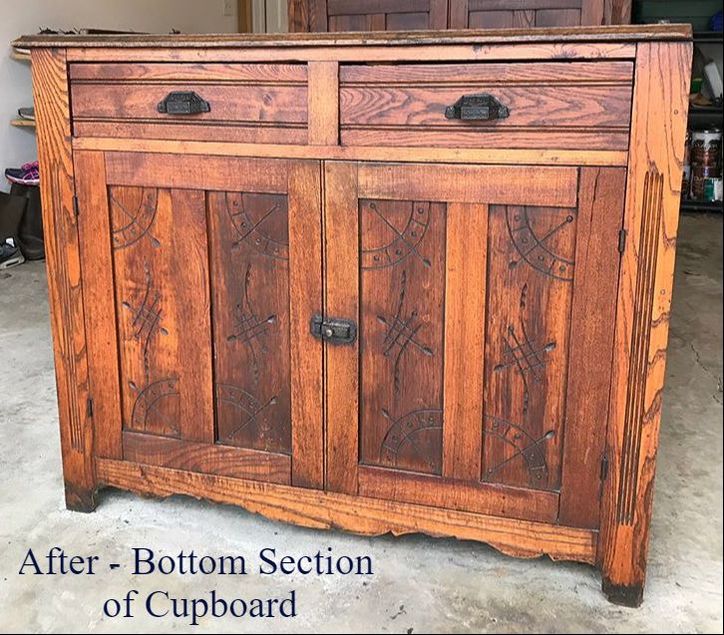 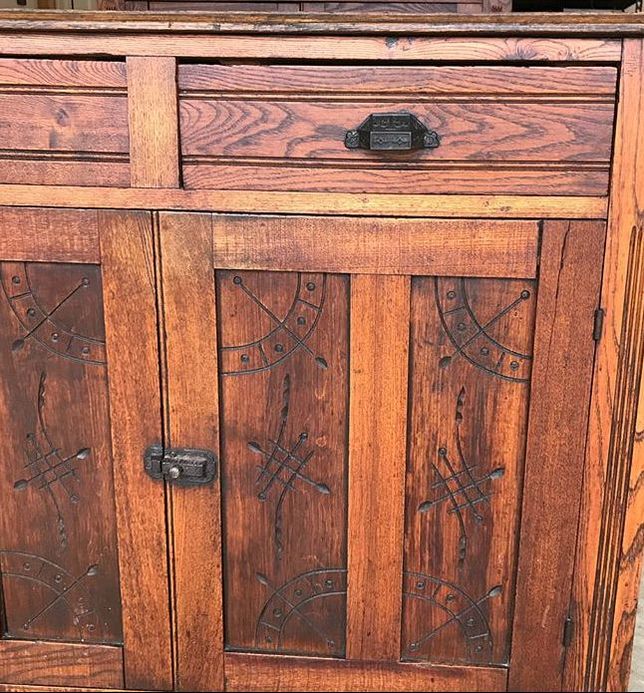 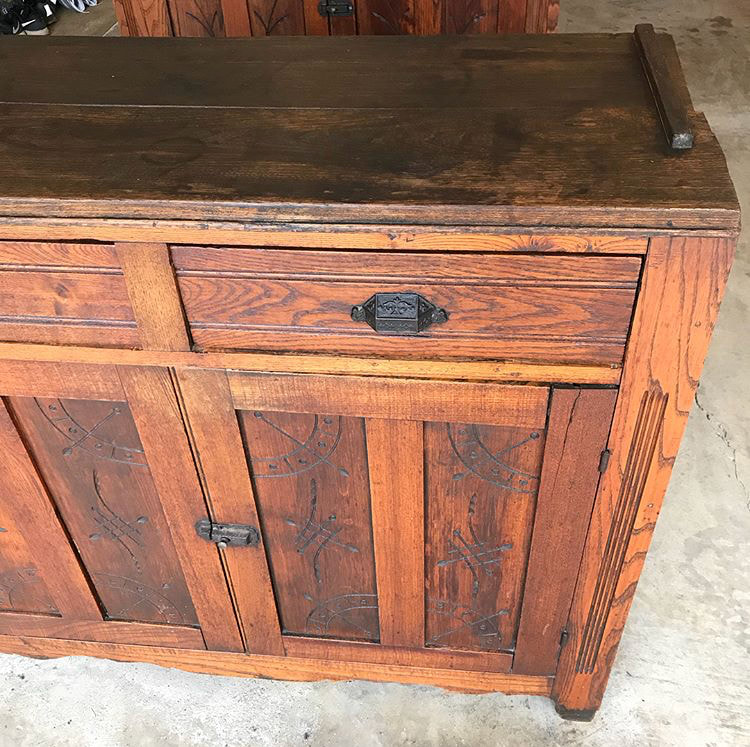 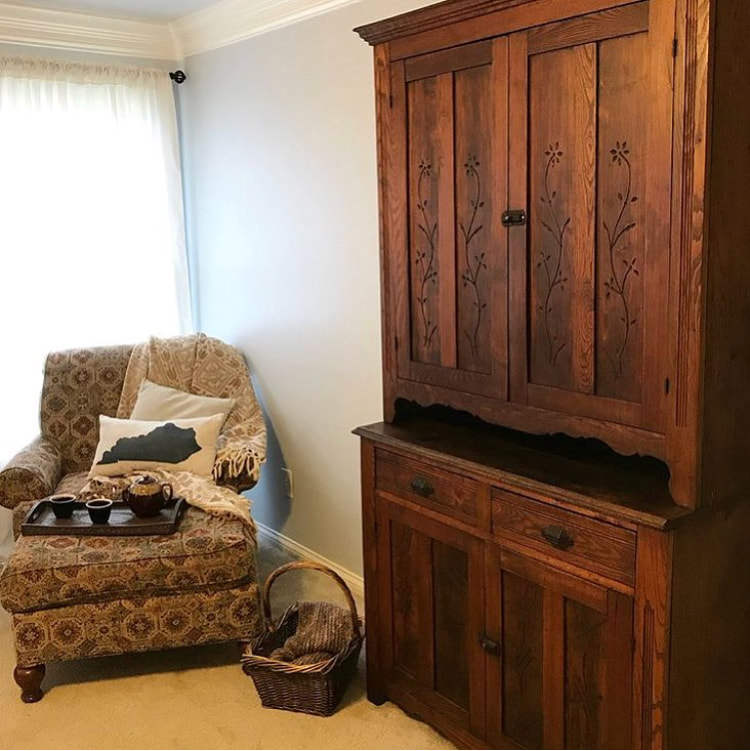 My beautiful, hand carved, antique cupboard went from worn out to a treasured family heirloom in a matter of two hours or less! We will enjoy it for years to come!
|
Sharingour HOME 
Categories
All
|