  I LOVE the chalkboard craze and really wanted one for my kitchen. So I began the search. However, at every store (in my budget), I could not find the right size and type of chalkboard that would look just right in my kitchen. I hunted but to no avail. Then it hit me, "It's time to stop the search and figure out how to make one". This, of course, is the eureka of every DIY enthusiast! I abandoned the chalkboard section of Hobby Lobby and found myself in the ready made frame section. And there, low and behold, I immediately spotted the perfect frame in the perfect size. (If you shop certain stores frequently, you soon realize you can wait for the next sale or use a 40% off coupon to get a bargain. So that is exactly what I did.) With the perfect frame in hand, I gathered all my supplies. 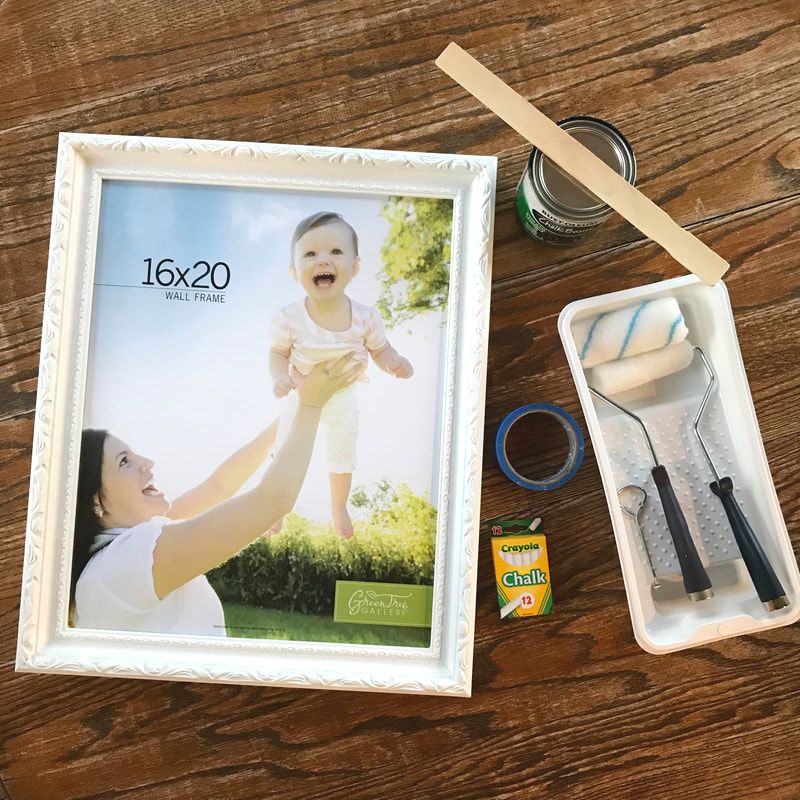 Materials Needed for your Chalkboard:
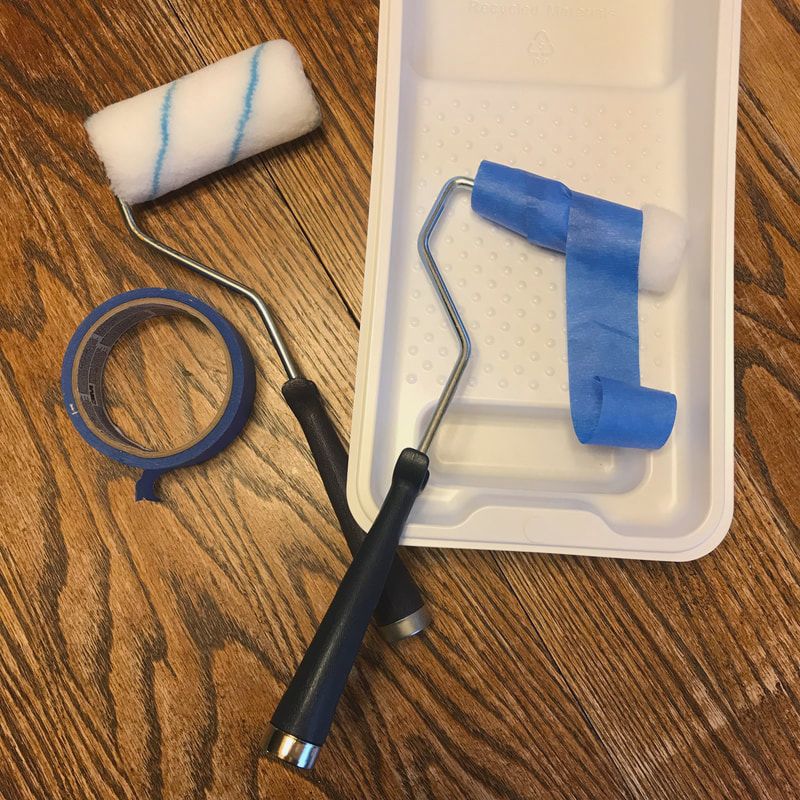 Creating your Chalkboard:
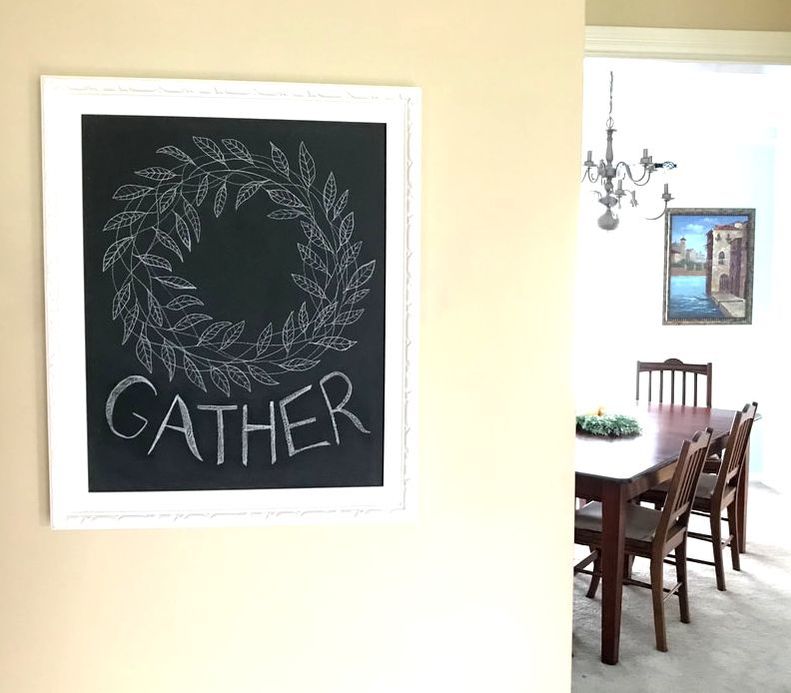
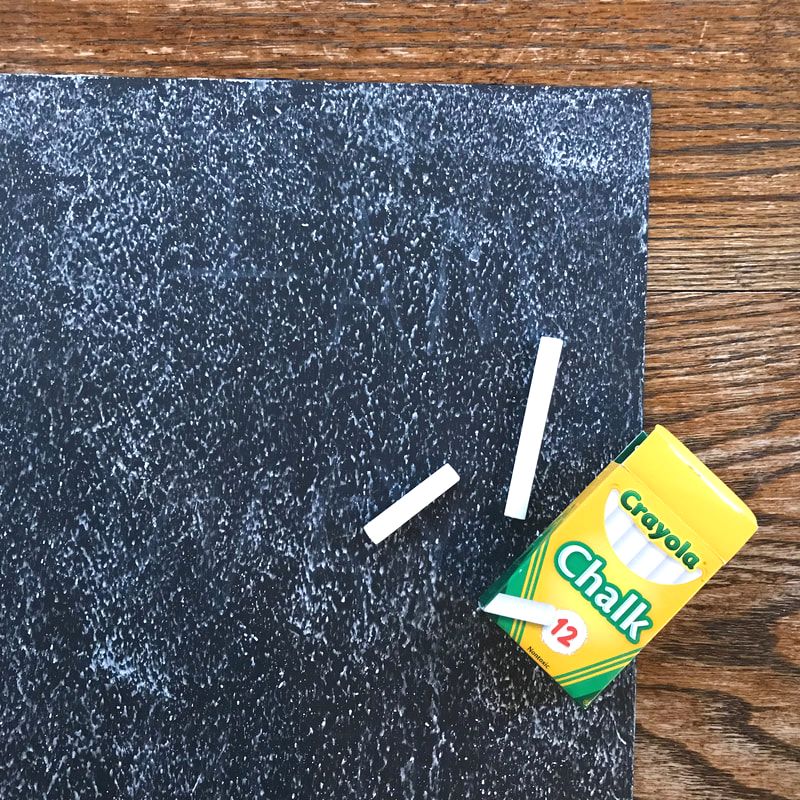 Conditioning your Chalkboard: Wait! Sorry but you will need to wait 3 days for the paint to cure before writing on it. After 3 days, it's time to Condition your Chalkboard. Conditioning is accomplished by rubbing the side of a piece of chalk over the entire surface of your chalkboard and then erasing. This creates a chalk dust layer on the chalkboard surface allowing for greater ease in erasing later. (Do not wipe with a damp cloth until after day seven of painting the glass.) Repeat the conditioning step after each cleaning. 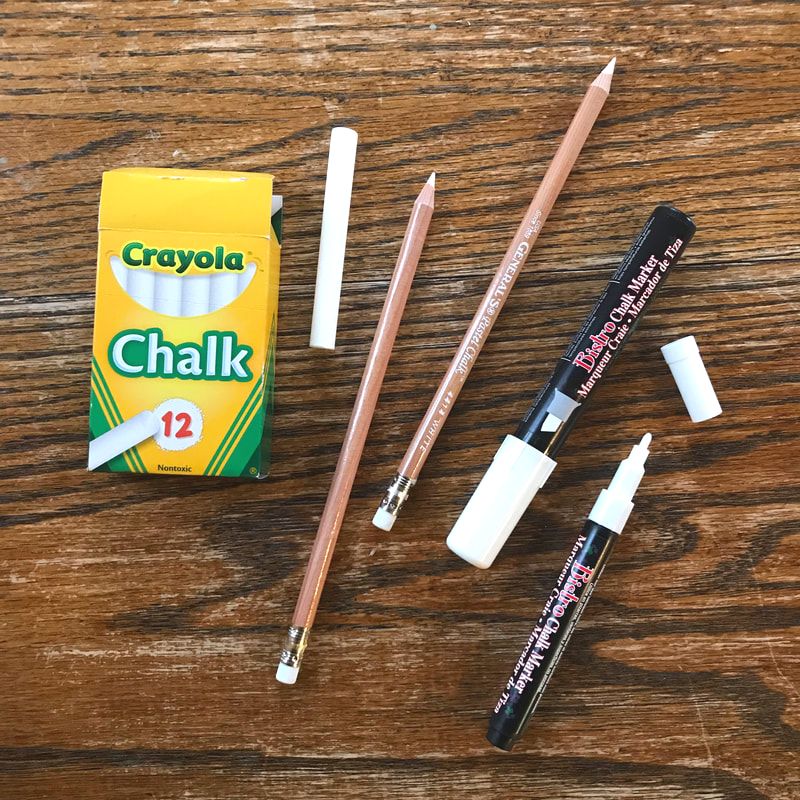 Writing on your Chalkboard: Whether you wanted to create a artistic chalk masterpiece or just make your grocery list, there are 3 types of writing utensils for chalkboards: Traditional Chalk Pros: Least expensive option. Easiest to clean. Cons: Does not create as crisp or heavy designs. Chunky size and hard to use. Chalk Pencils (my favorite!) Pros: Creates delicate, more detailed designs. Good for more exact outlines that can be filled in. Easy to use and clean. Cons: Not as useful for thick lines. Chalk Markers Pros: Creates beautiful, crisp and vibrant lines. Easy to use. Cons: Difficult to remove. 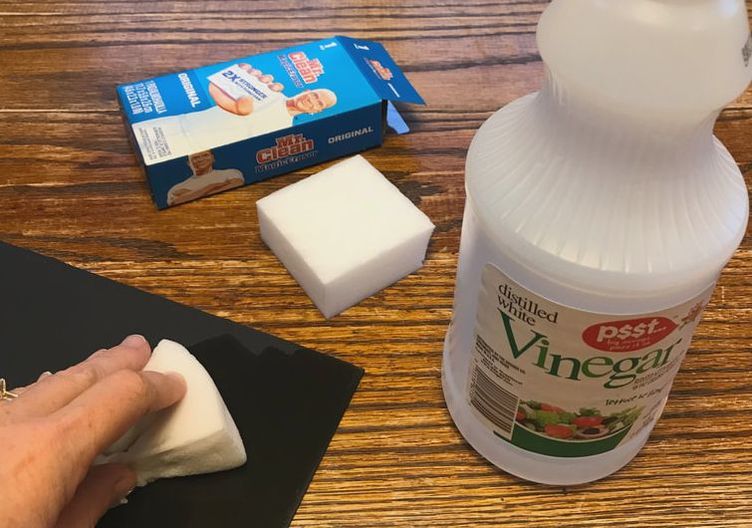 Cleaning your Chalkboard: For traditional chalk and chalk pencil, a damp cloth or a wet wipe are sufficient. However, as I stated previously, Chalk Marker is difficult to clean and often leaves a shadow of your previous design. I've tried several products but the best results I've found to remove Chalk Marker are Distilled White Vinegar and a Magic Cleaner. The combination of these plus a little elbow grease will remove the shadow. Be advised that this may also take a slight amount of the finish with it but your chalkboard will be ready for a new design.  Gather & Wreath Chalk Drawing It not as hard as it looks! I drew the wreath entirely with a chalk pencil and used a combination of chalk pencil and traditional chalk on the word "GATHER". I'll show you how! 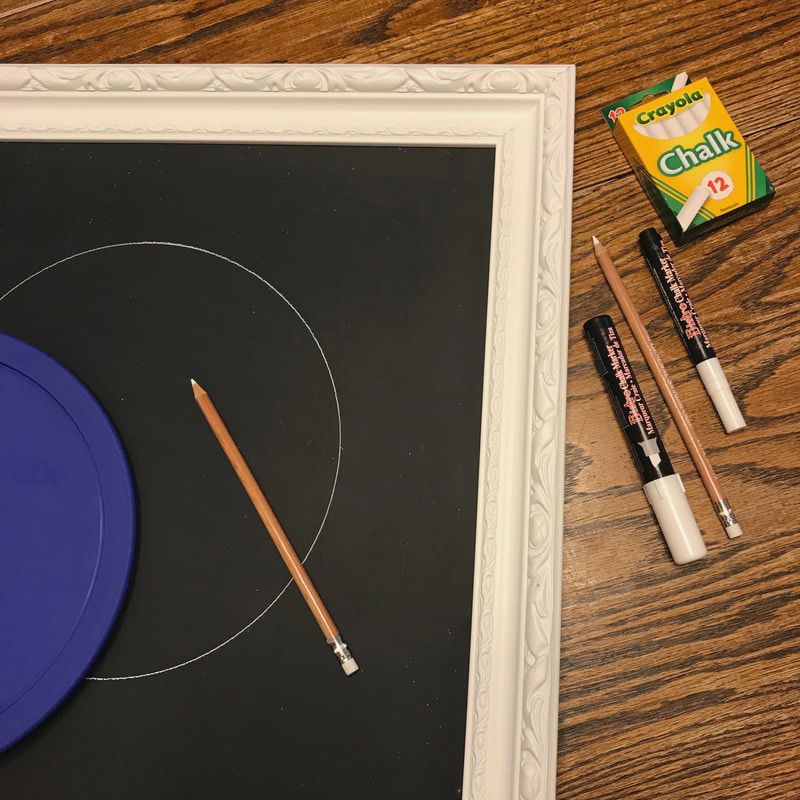 I began with a 2.5 quart Pyrex lid but any circular object will do the trick. With the lid, I created a circle in the top portion of my board. (Never mind the chalk markers you see in the picture above. Honestly, I should probably hide those from myself!) 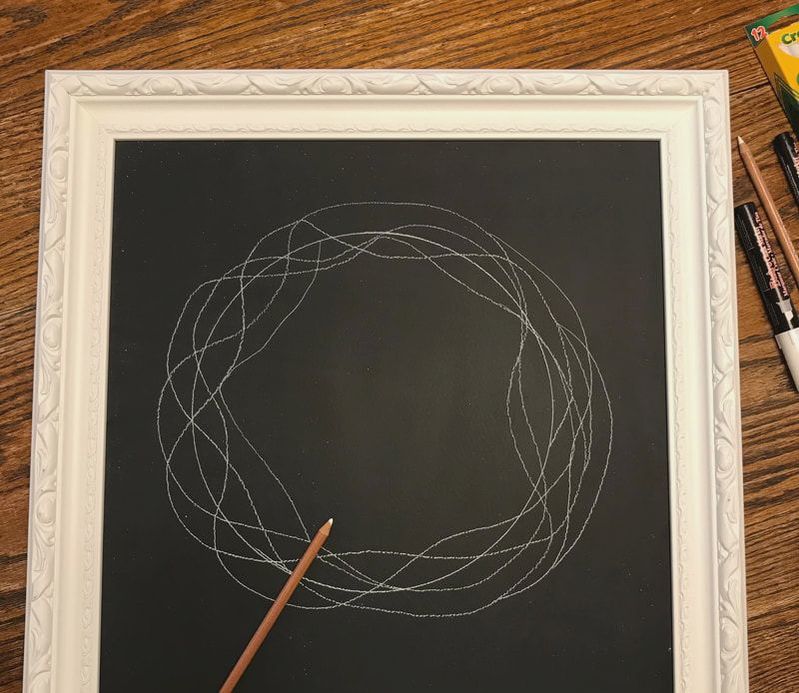 Next, with the chalk pencil draw wavy circles all around and over the original neat and exact circle. It doesn't have to be perfect or exact. 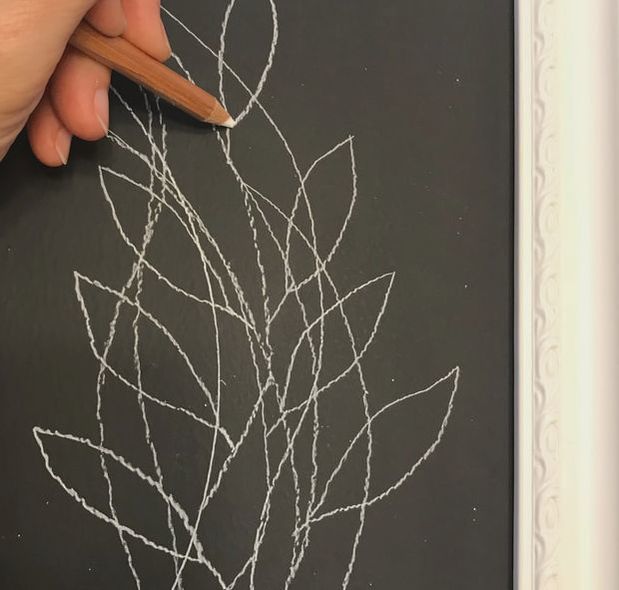 Next, create leaves pointing outward and inward but all pointing in the same general direction. Notice it is not exact and has a whimsical look. 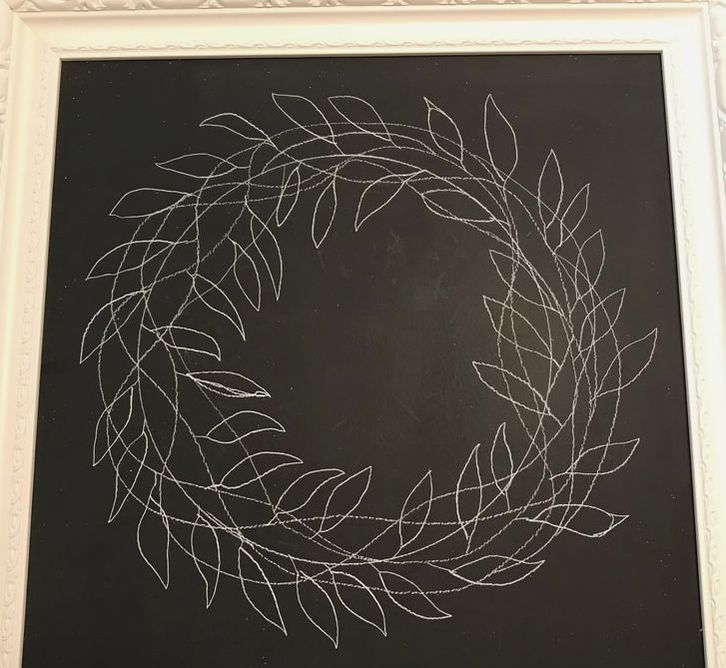 Next, draw a line down the middle of every leaf. Then make v-shaped leaf veins with the tip of each "v" intersecting with the middle line you have drawn. Again, this is not exact and will have a whimsical look. 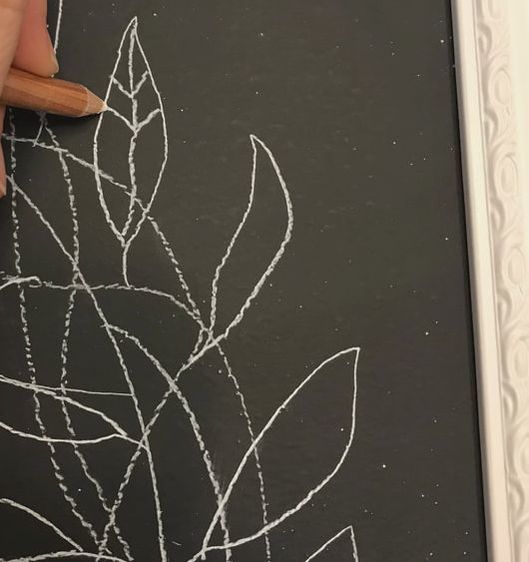 Now to draw the word "GATHER". Use a chalk pencil and write the word below the wreath. Then go back over the word with the chalk pencil and create an outline of where you would like thicker lines. If you make a mistake, use a damp q-tip to erase what you consider a mistake. 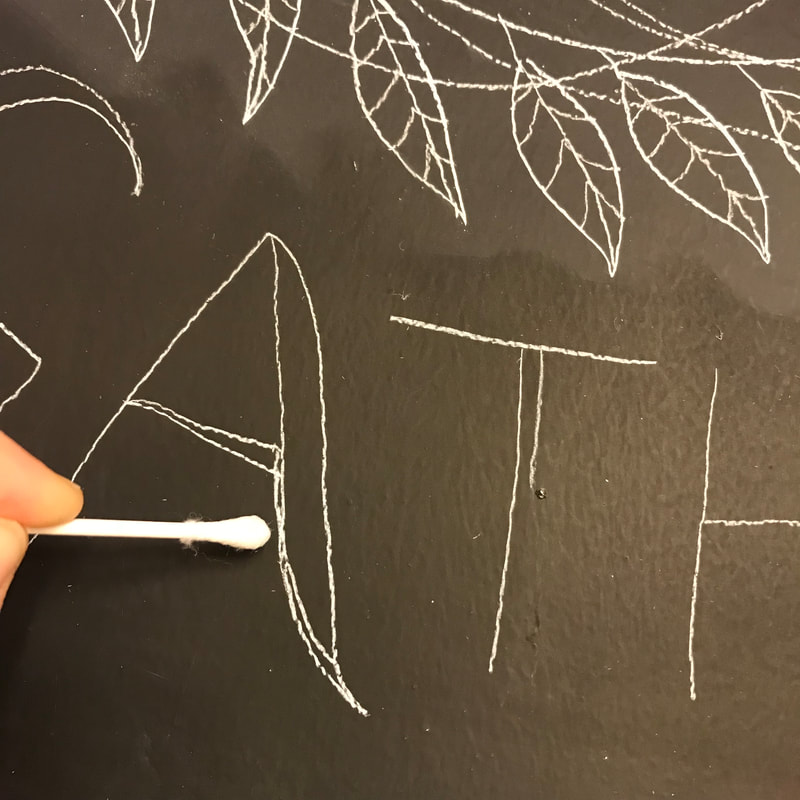 Next, fill in the outlined areas of the letters with traditional chalk. And finally, go around the entire word with your chalk pencil so the letters look crisp. You may want to check the wreath to see if you feel like it needs some extra leaves before you put your supplies away. 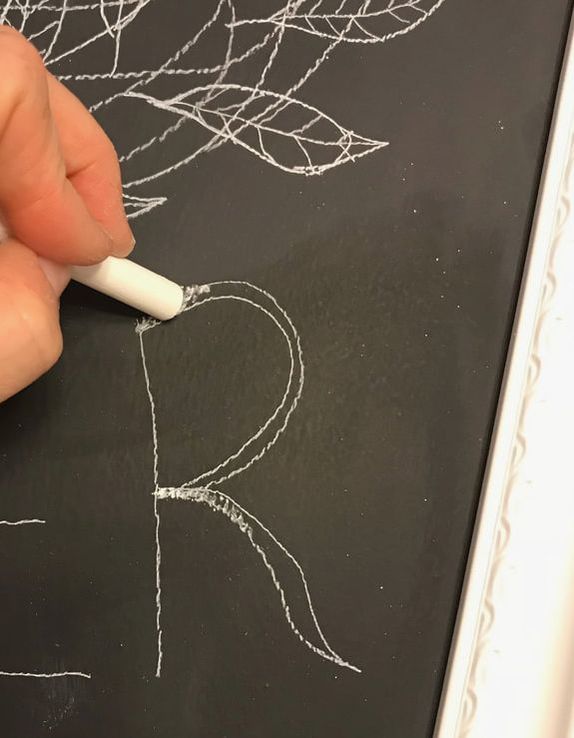 Good job! You and I are not professional artists but a whimsical wreath and hand lettering are not supposed to be exact...just pretty darn cute! 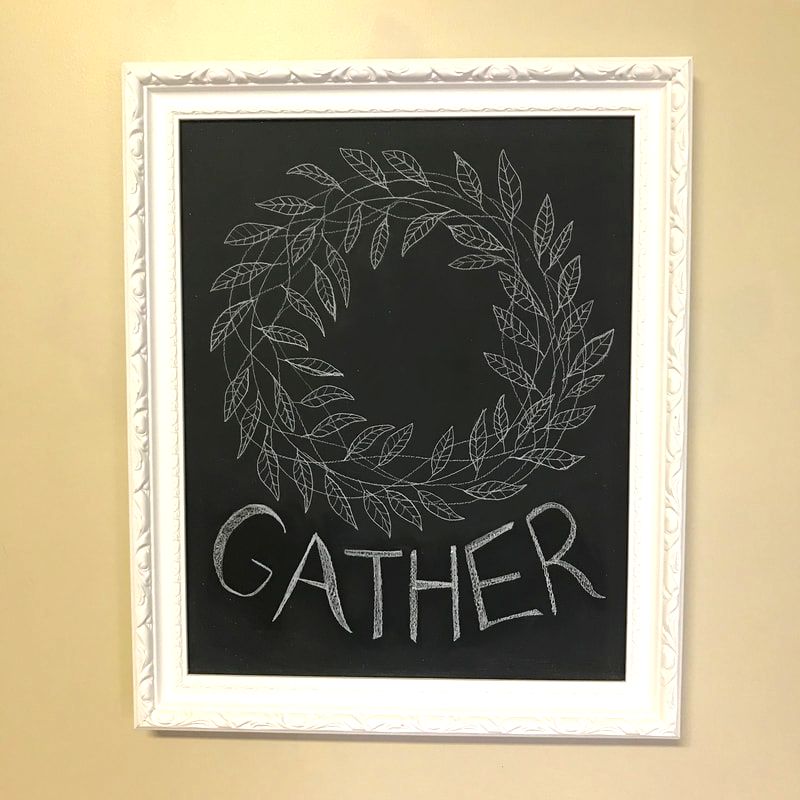
0 Comments
Leave a Reply. |
Sharingour HOME 
Categories
All
|