|
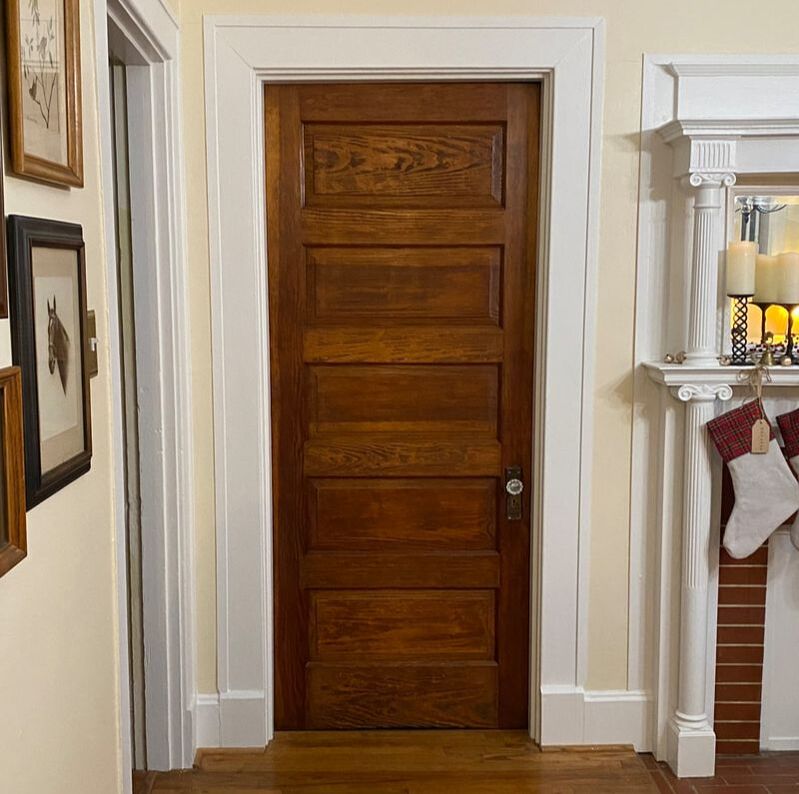
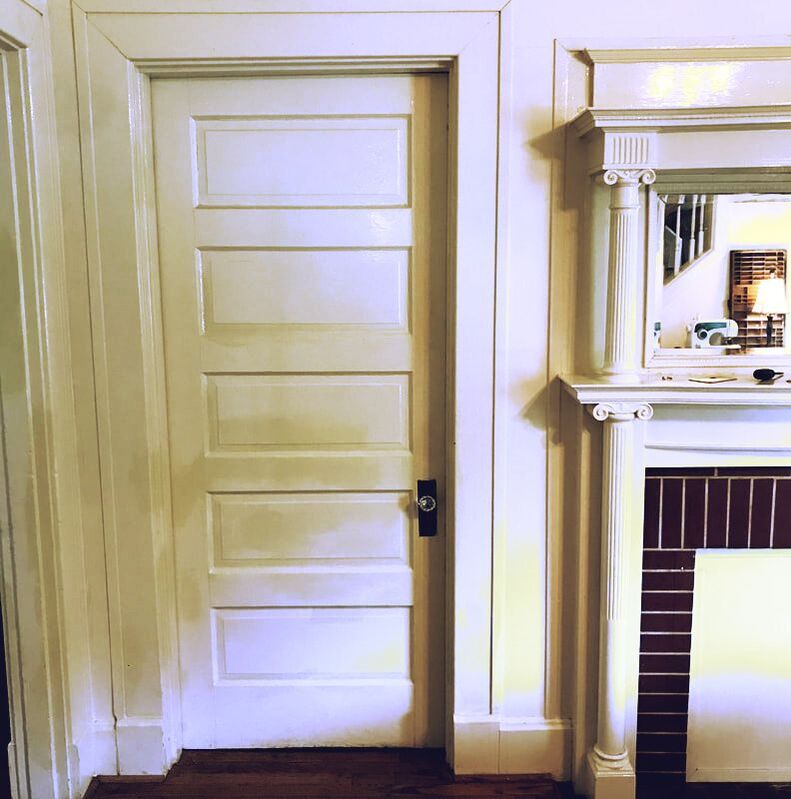
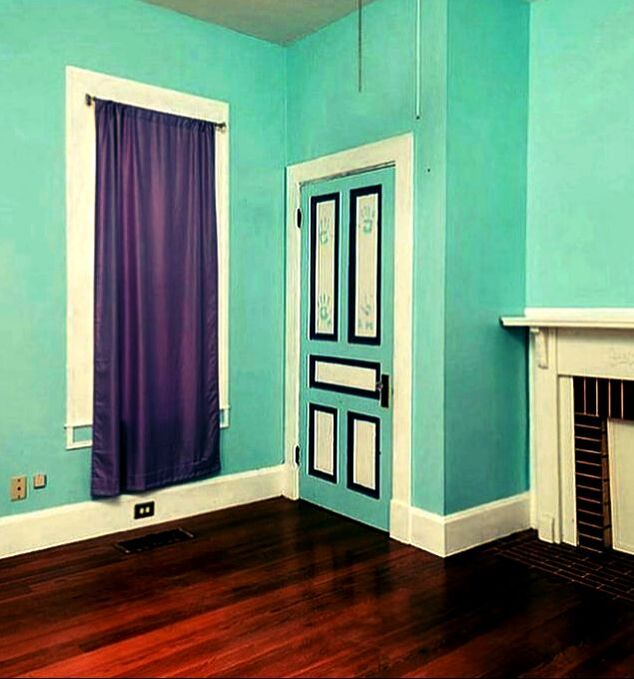
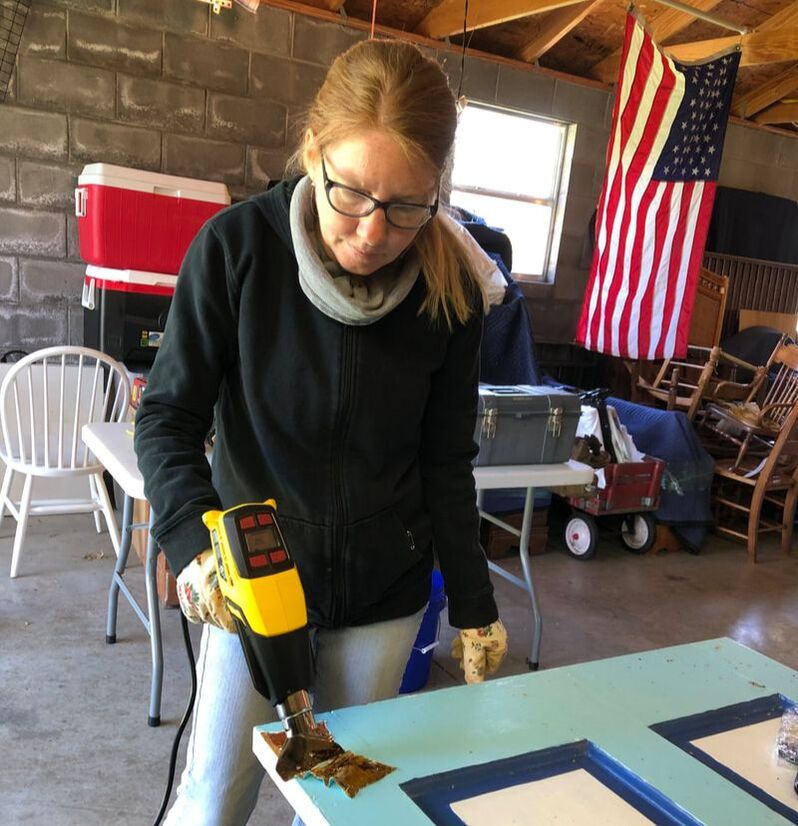
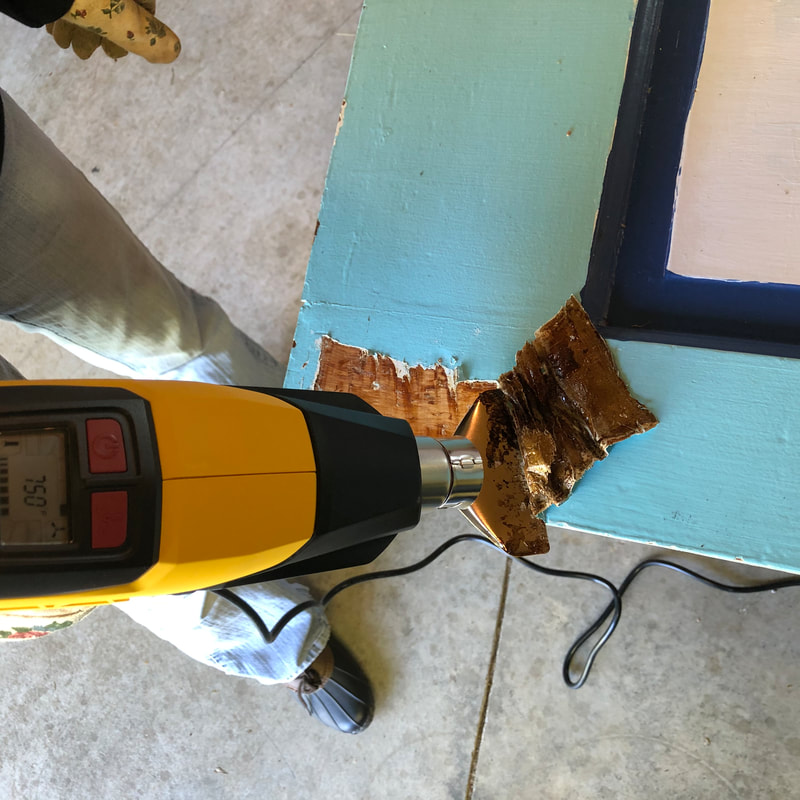
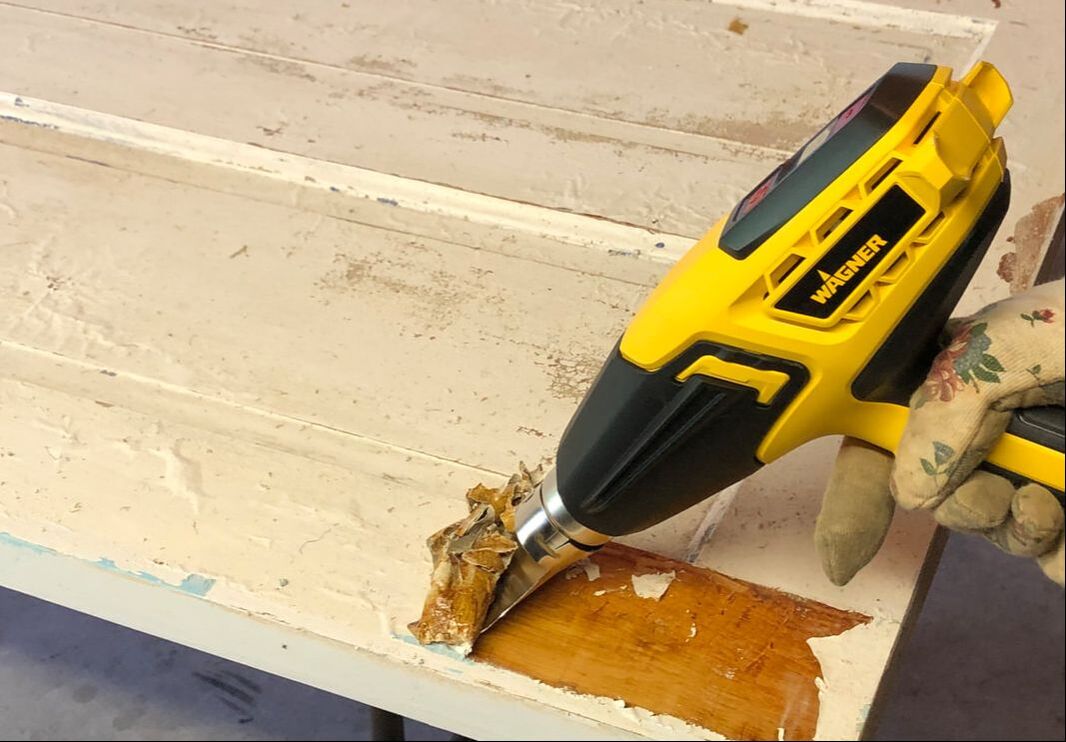
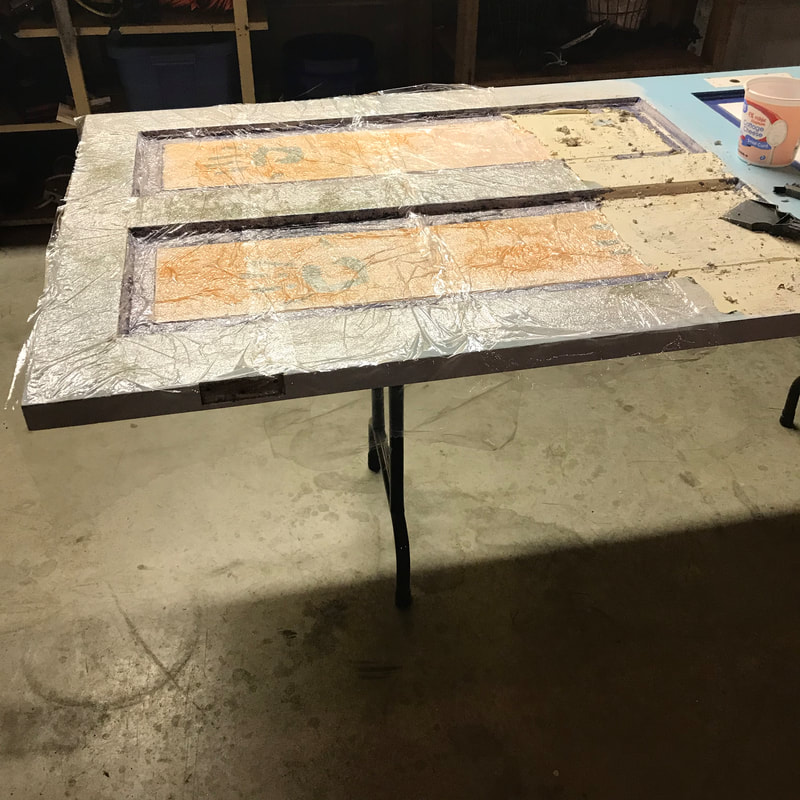
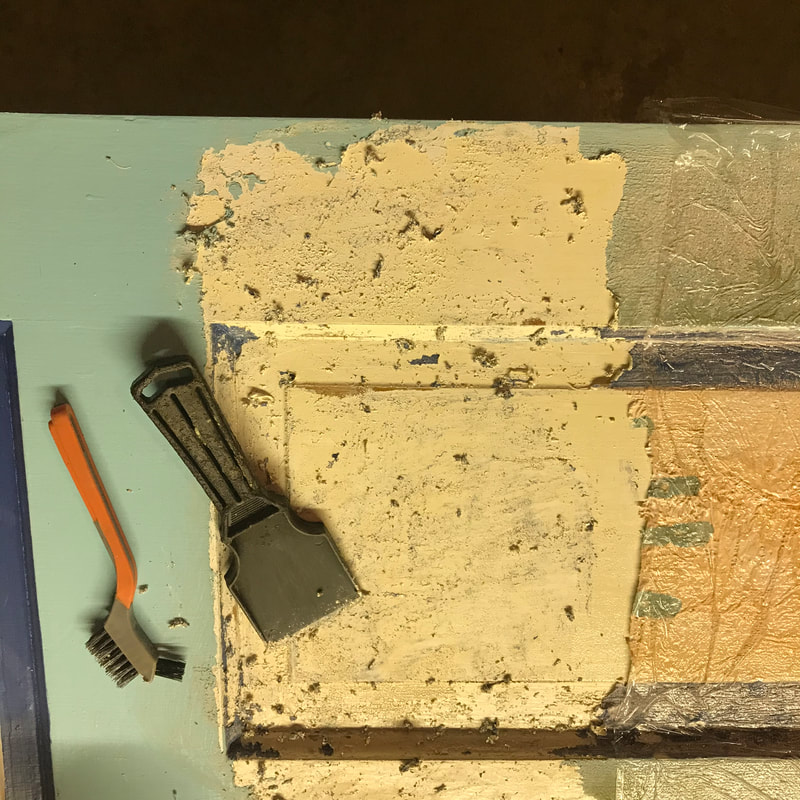
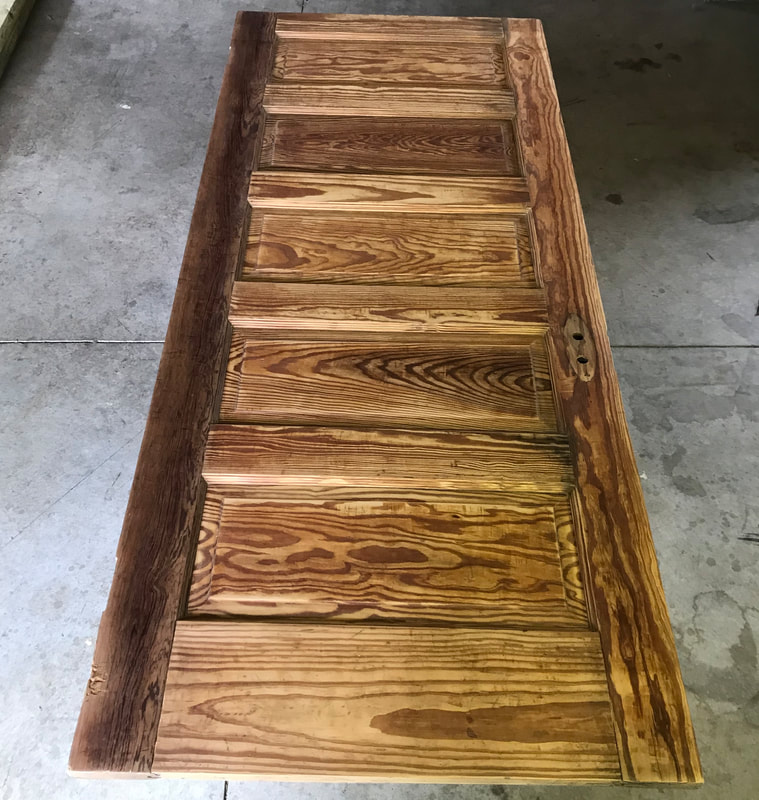
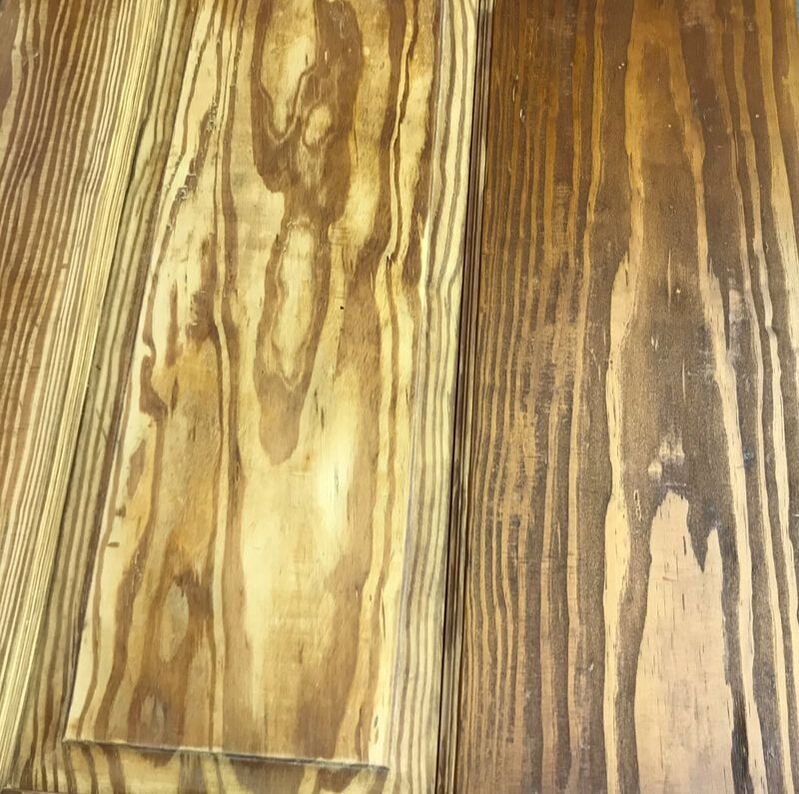
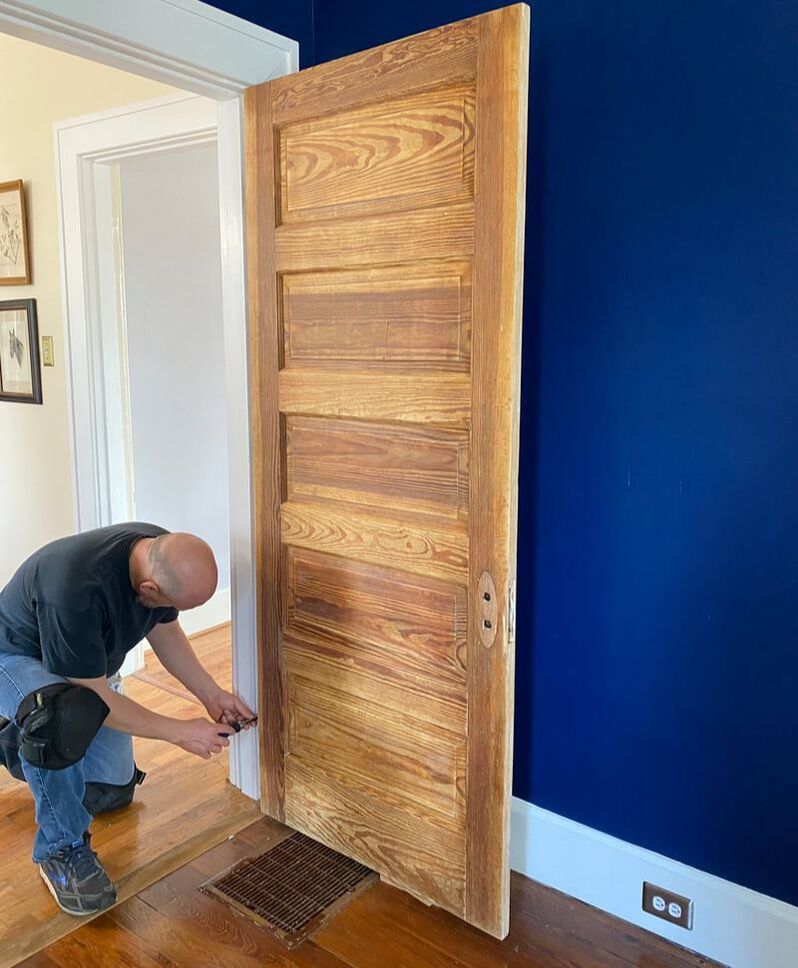
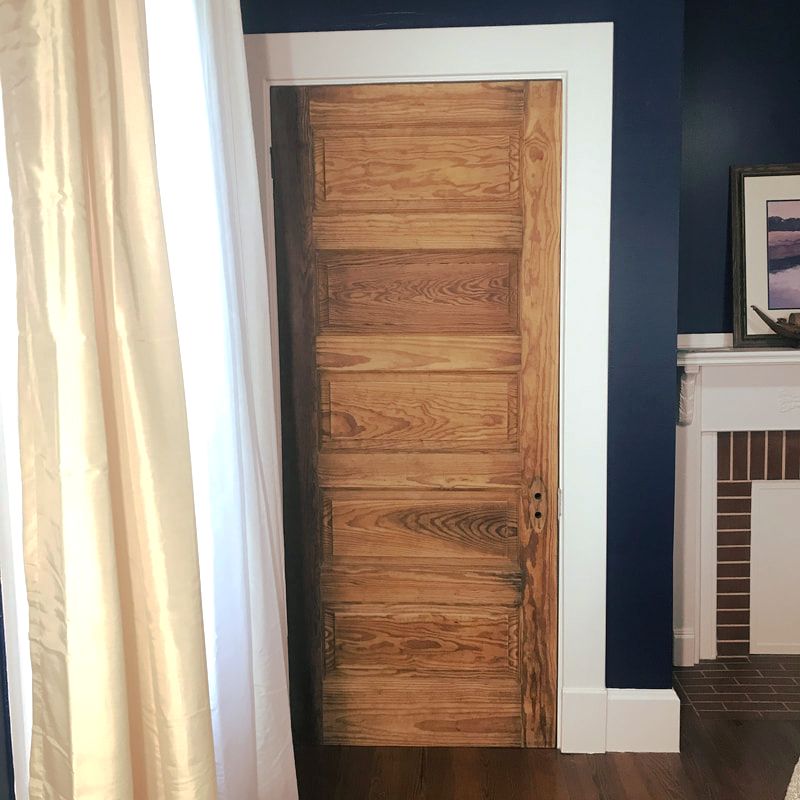
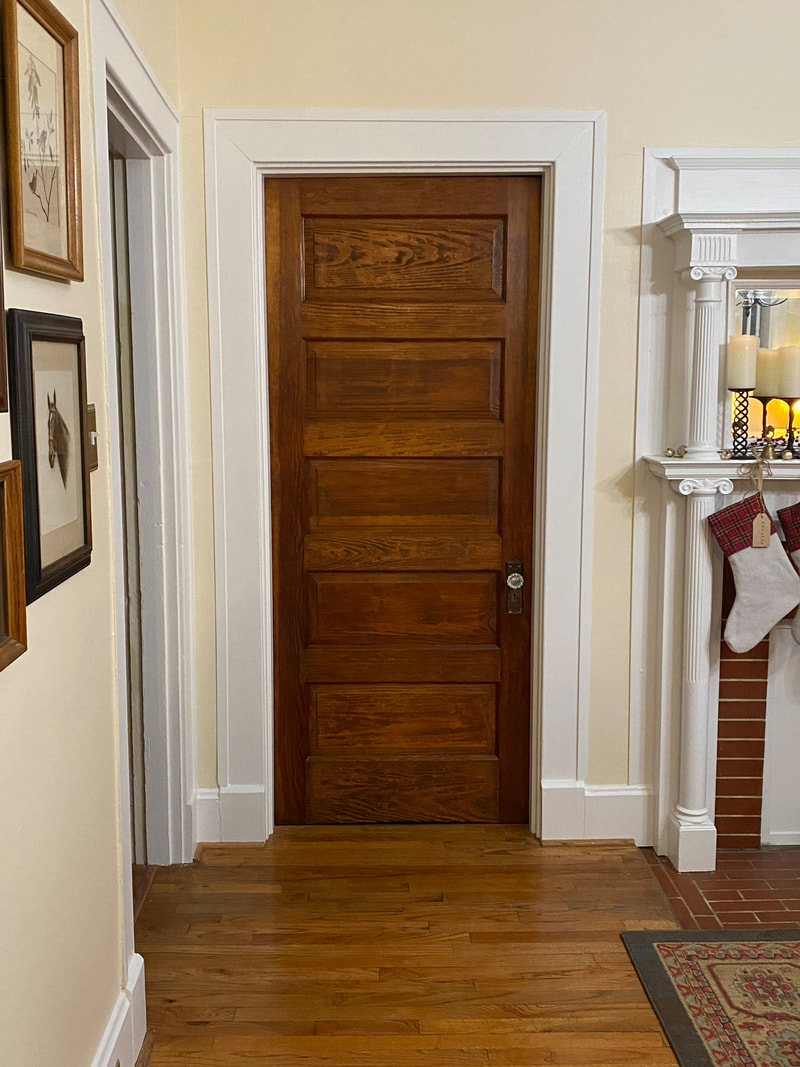
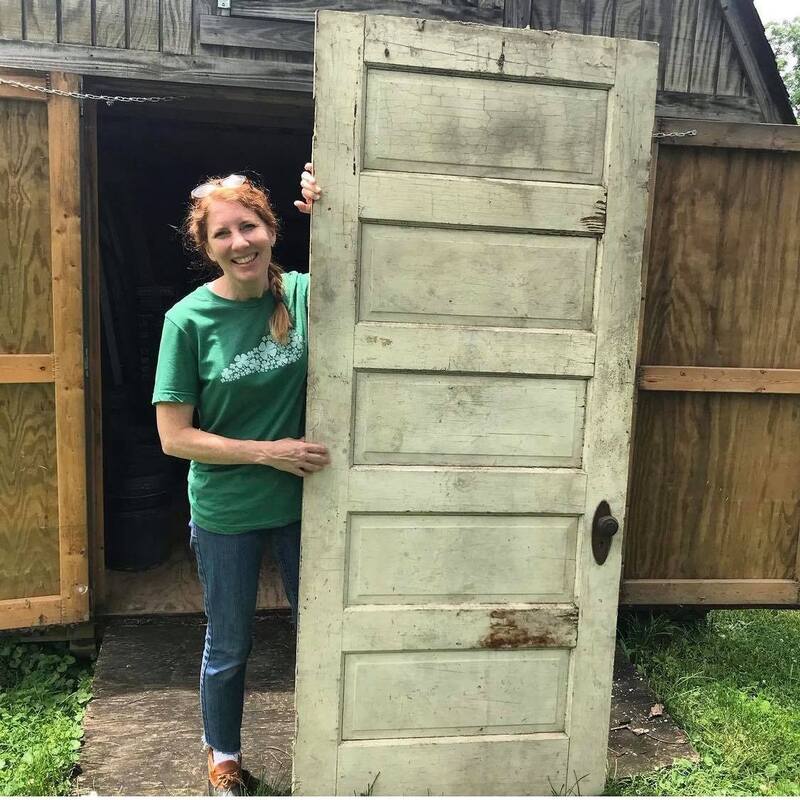
Whether you live in an older home or not, restoring and refinishing antique solid wood doors to include in your decor is stunning! In our case, we had several beauties that needed a complete overhaul to uncover their lovely wood grain. The present condition and what has been done to an old door can greatly impact how much work is needed to bring it back to life. We had three doors that needed a lot of work. With this being the case, I can detail for you several methods to revive any door. Below are some examples of what kind of shape our doors were in to begin with. These are just two examples of where we started! Every door had multiple layers of paint on both sides of the doors. (We currently have three doors that we are in various phases of completing their facelift.) Many old doors have several layers of paint to remove. There are three ways to remove paint from wood...heat gun, chemical stripper and sanding. I used all three on my old doors! Some older paint is lead based. Its important to wear a mask when removing lead based paint and dispose of the removed paint carefully. You can purchase an inexpensive lead based paint test kit at any hardwear store. Working on an old door can be a messy job. We found laying a door on a metal folding table created the perfect height and stability to work on each side of a door. Be sure you are set up in a well ventilated area out of reach of children and pets. 1. Heat Gun. Items needed: Heat Gun Heat Gun Scraping Attachment Metal Scraper Waste Disposal Tub Gloves and Long Sleeves Mask A heat gun is the most aggressive way to remove old paint. You can remove multiple layers at one time. It just melts off and can be removed easily with a metal scraper. I purchased a Wagner Heat Gun and have been happy with it. It's important to add that you should always wear long sleeves and gloves when operating a heat gun. Set your heat gun somewhere between 700-800 degrees with a scraping attachment. (I found if I didn't use an attachment I would get too close and scorch the wood.) In addition to a scraping attachment, I used a hand held scaper as the old paint can be kind of sticky. It is good to have a container or disposal tub close by to collect the removed paint. I've noticed that a heat gun does leave some deeper paint residue behind that has soaked into the wood which I have addessed in other methods of paint removal. 2. Chemical Stripper. Items Needed: CitriStrip Plastic Wrap Metal Scraper Coarse Steel Wool Waste Disposal Tub Thick Plastic Gloves The safest and most effective paint stripper I have found is CitriStrip. This product is easy to find at any hardware store or the paint section of any big box store. I discovered a heat gun worked best to remove multiple layers of paint but CitriStrip was more effective on just one layer or deeper paint residue removal. It is important to use thick gloves when working with CitriStrip or any chemical paint remover. Working on a section at a time, apply CitriStrip use a large old paint brush and spread in a consistant thick layer. Once you have painted a section, cover with plastic wrap and allow to sit for at least 2-3 hours. The plastic wrap helps CitriStrip work into the paint without drying out. Keeping a waste disposal tub on hand, carefully peel back the plastic wrap and place it promptly in the disposal tub. Next scrape paint from the entire treated surface using a metal scraper. Course steel wool is wonderful to get any remaining paint residue the scaper leaves behing. Metal brushes available in hardwear stores are helpful for removing paint from cracks and crevises. Dispose of paint residue and soiled steel wool in the disposal tub. Seal the tub and dispose of in the appropriate way for your area. 3. Sanding. Items Needed: Finishing Sander 100, 150, 220 grit sandpaper Gloves Shop Vac Mineral Spirits Lint Free Cloth Sanding can remove the last bit of paint but it is also essential before staining. I purchased a small finishing sander to get the job done easily but hand sanding is still needed in the detailed grooves and crevices of a door. The higher the number, the coarser the sandpaper. It's best to sand everything with 100 grit and then work your way up to 220 grit paper. The more you sand and the higher the grit you end with, the more the beautiful woodgrain with emerge. Always sand in the direction of the wood grain! Once you have completed sanding the entire door, remove all sanding debris with a shop vac. Remove the final bits of dust with a lint free cloth and mineral spirits. 4. Staining and Sealing. Materials Needed: Clean Lint Free Clothes Pre-Stain Wood Conditioner (We used Minwax) Wood Stain (We used Minwax Penetrating Wood Stain in English Chestnut) Polyurethane (We used Minwax Fast Drying Polyurethane in Clear Stain) Your choice of stain and polyurethane is entirely up to you. Some people prefer bare wood, some like bare wood with a layer of poly and others like wood stain. We used one coat of Minwax Penetrating Wood Stain in English Chestnut to match our hardwood floors. The more coats of wood stain you use, the richer and darker your door will look. As far as polyurethane goes, I prefer a low gloss poly and steer away from super shiny or glossy finishes. One trick I have learned is it is easier to apply pre-stain conditioner, stain and poly once the door is installed! But wait. Before you move that door from your work area and hang it, apply prestain and then stain to the hinge edge only. Next put your clean hinges on your door. Now it's time to put your door in place! Once your door is in place, apply prestain wood conditioner, wood stain and finally poly with clean, lint free clothes. Make sure to follow instructions and drying times between each coat. I find using a brush to apply these items too messy and much prefer a cloth. Once all coats have been applied and are dry, the final step is to put the door knob in place. Wow, wow, wow!
I just LOVE a restored solid wood door!!! It was a lot of work but worth every bit of time we invested in it.
5 Comments
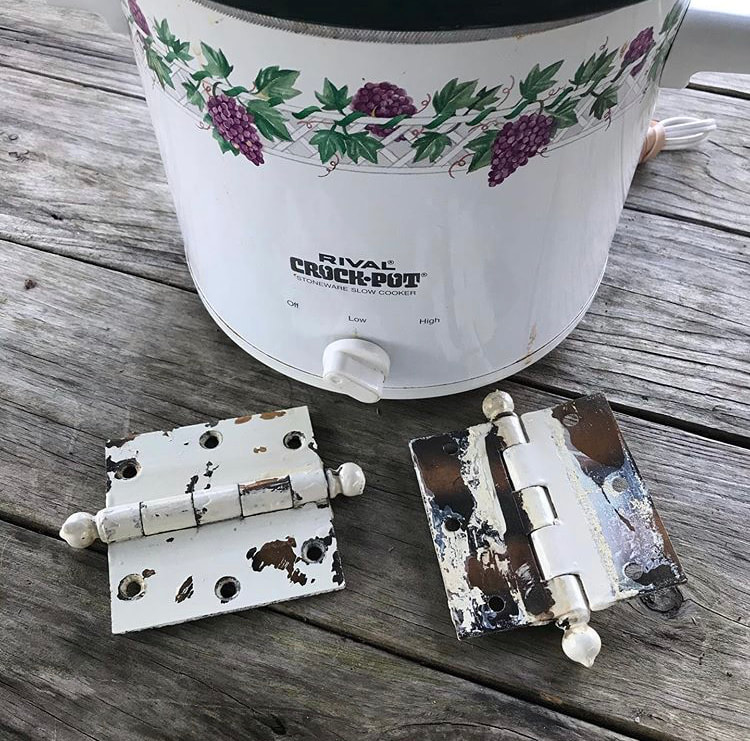
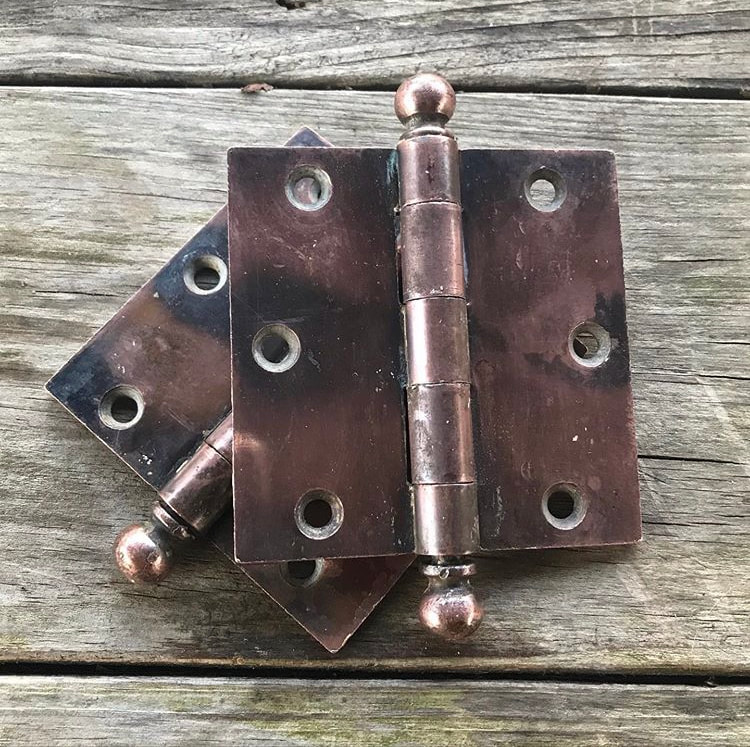
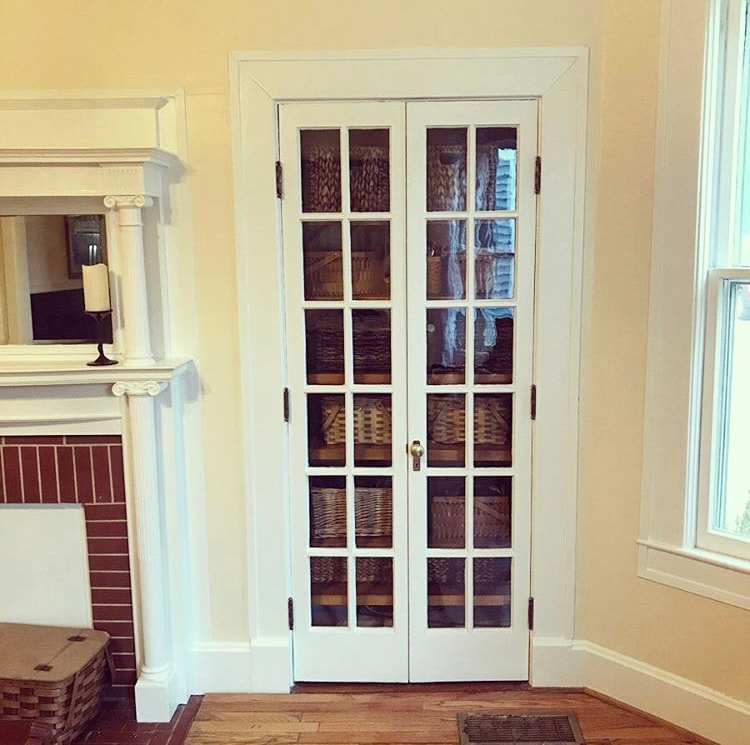
Our turn of the century Folk Victorian home needs some work to achieve her full beauty. One of the blemishes involves doors with 100+ year old hardware caked with layers of paint. It makes the doors look horrible. Instead of the hinges being removed before painting the doors or carefully painting around the hinges, everything was doused with layers of paint. It's a sad site. Poor old house! However, after some research, I discovered a simple, nontoxic, affordable solution...a slow cooker. Not wanting to use one of my good slow cookers to remove old paint, I headed to my local Goodwill Store and picked up a used one for around $6. You can't beat that price! Look at these beautiful 100 year old hinges! It was time to free them and let them shine! How to remove the layers of paint: Simply cover your hinges in water and cook them on low for 6 hours in a slow cooker. The paint loosens by soaking in the hot water and most of it falls right off. I used an old toothbrush to clean off the little bits of paint that wanted to cling a little longer. (Please never use the slow cooker for food again or the toothbrush for teeth again and dispose of old paint carefully.) Here was the result! I also took an old rag and cleaned each hinge with Brasso to get any existing residue off. Brasso is usually available at your local hardware store. This is the first door I've removed, painted (Sherwin Williams Pure White), cleaned hardware and reattached. The plan for most of the other doors is to be stripped and stained to match the floor. All of the hardware is caked with old paint which will need to be removed. I'm holding onto my old slow cooker and Brasso to work on more doors!
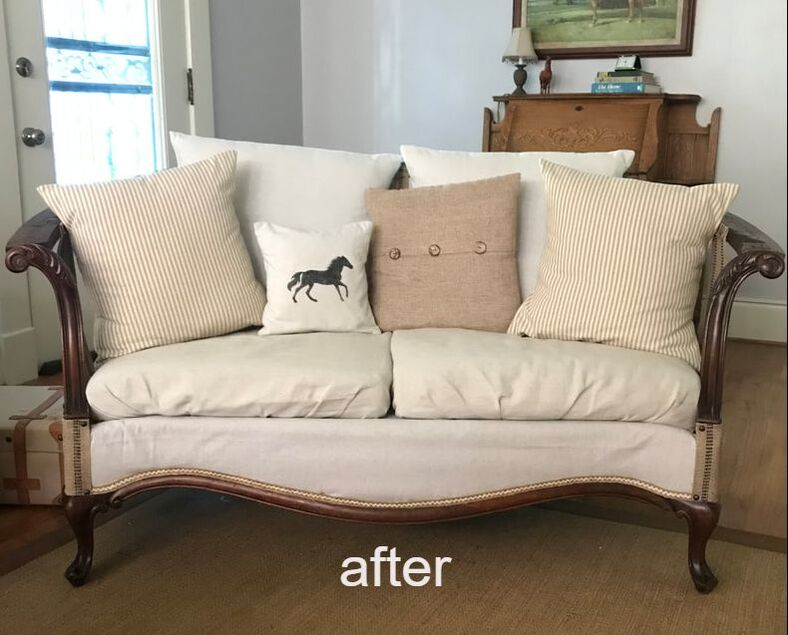
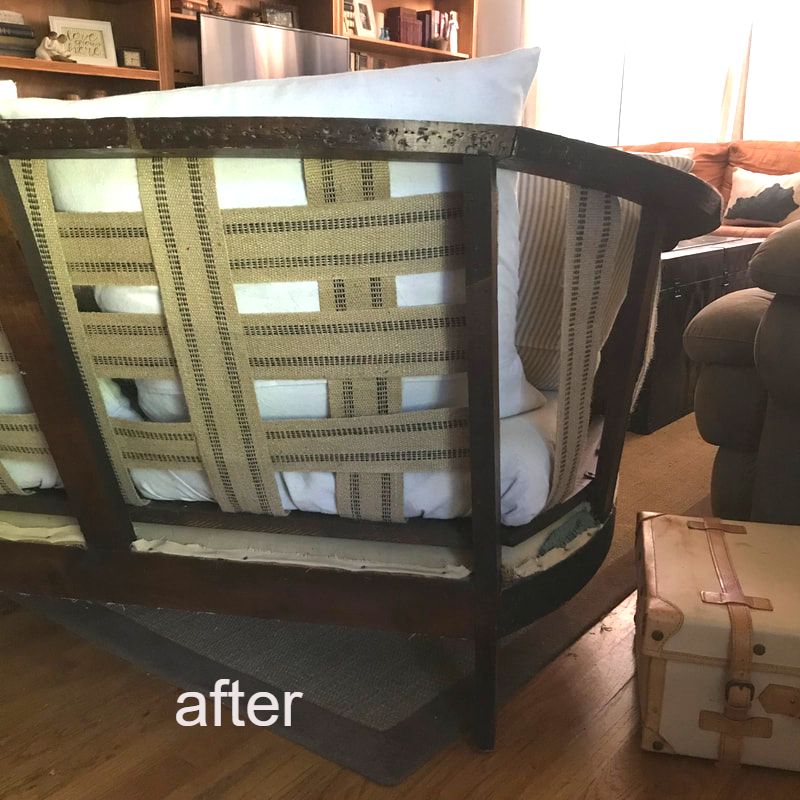
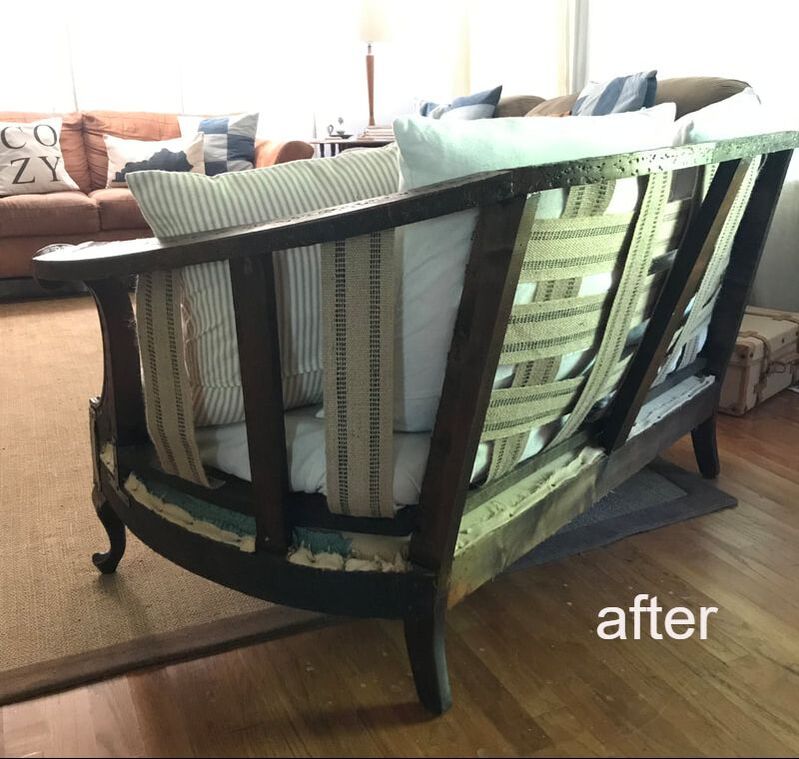
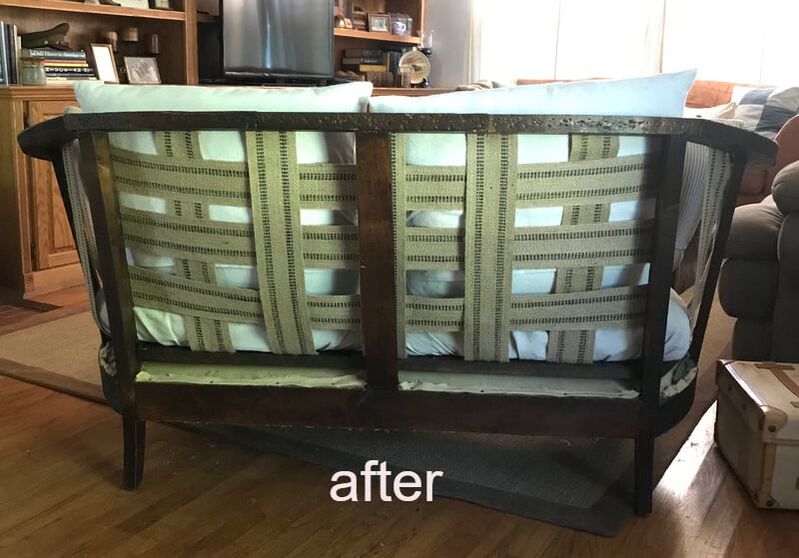
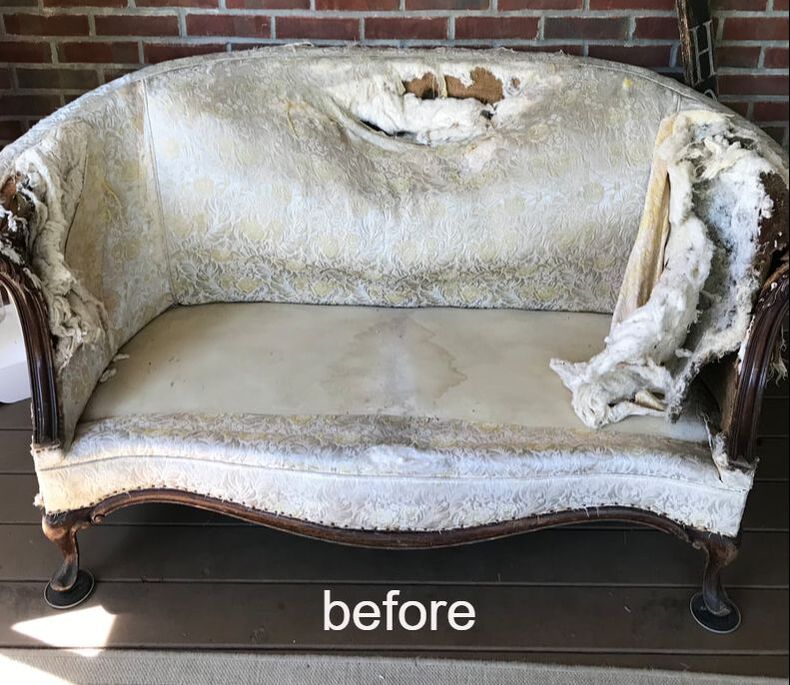
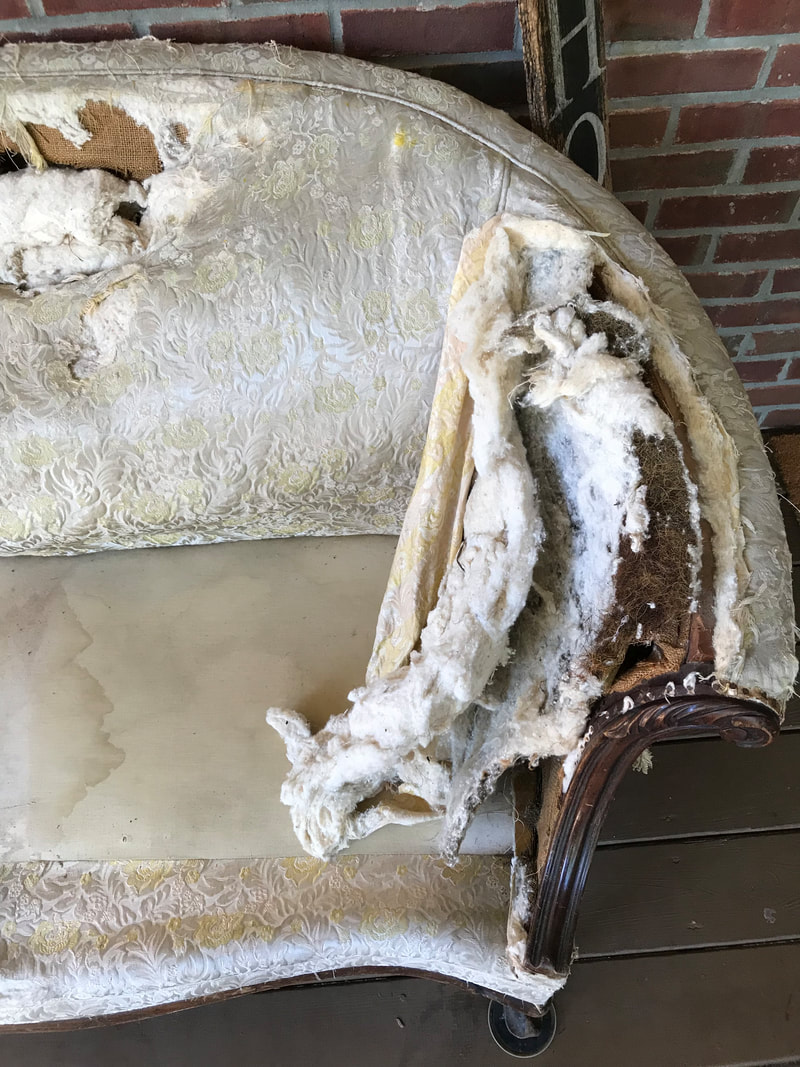
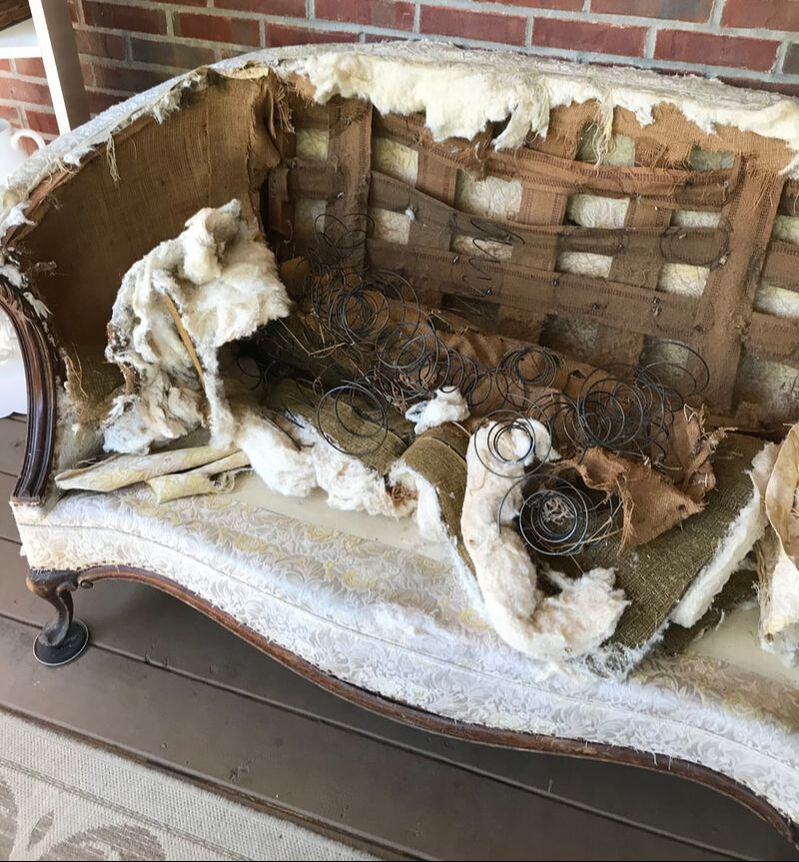
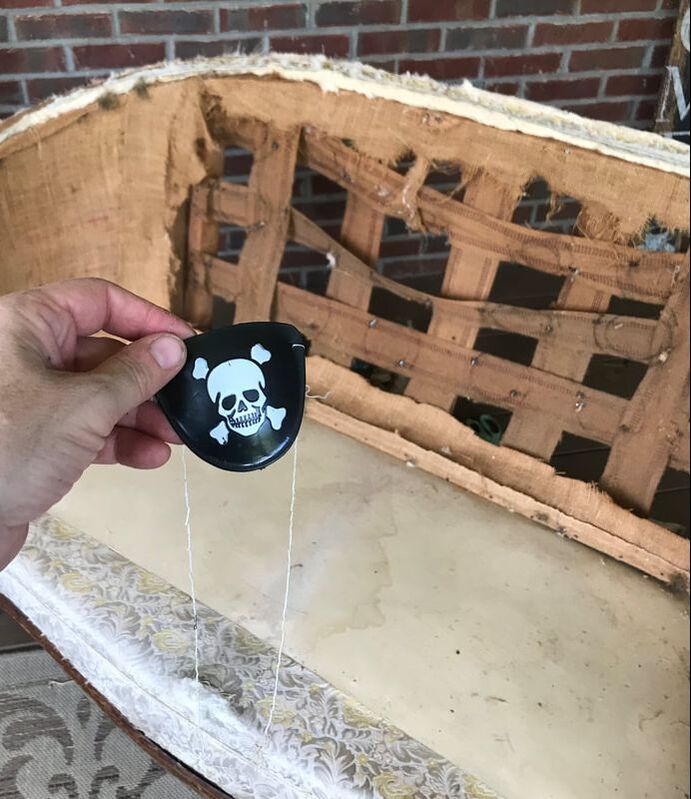
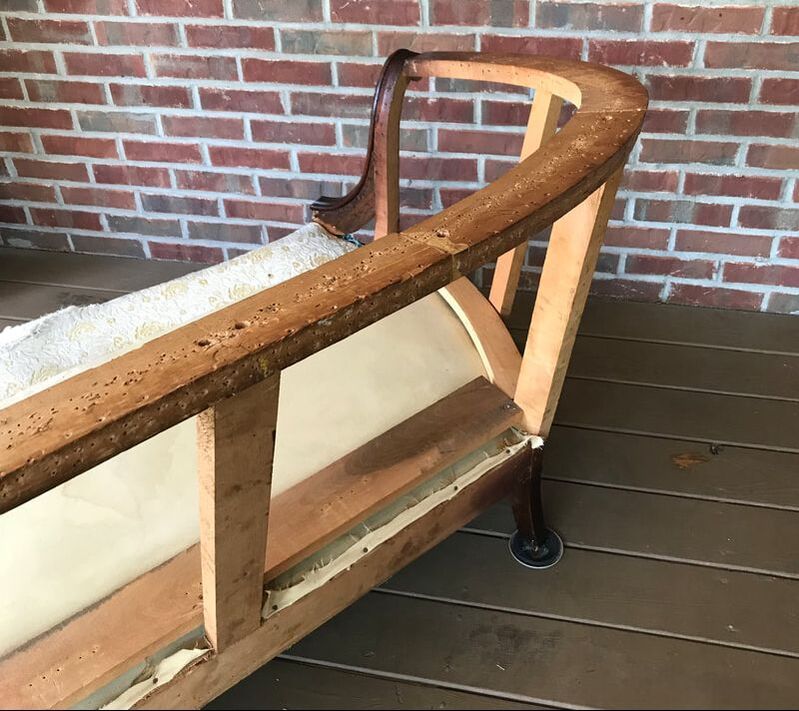
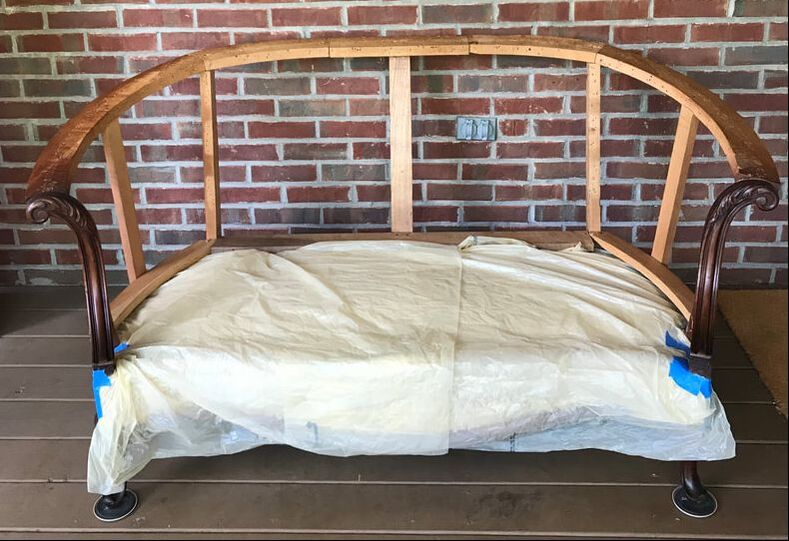
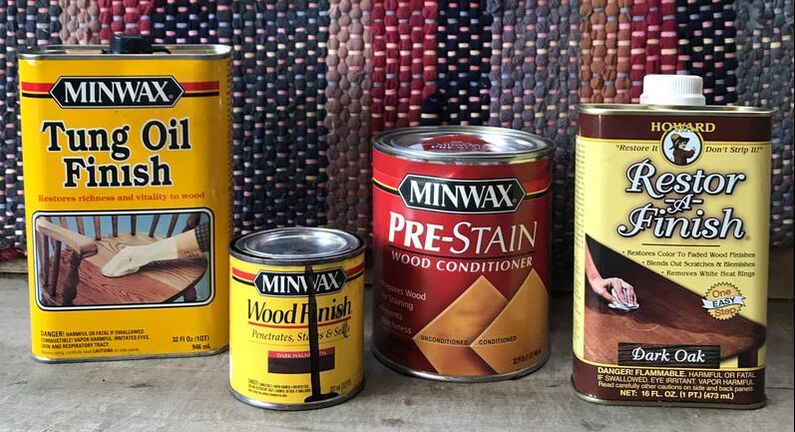
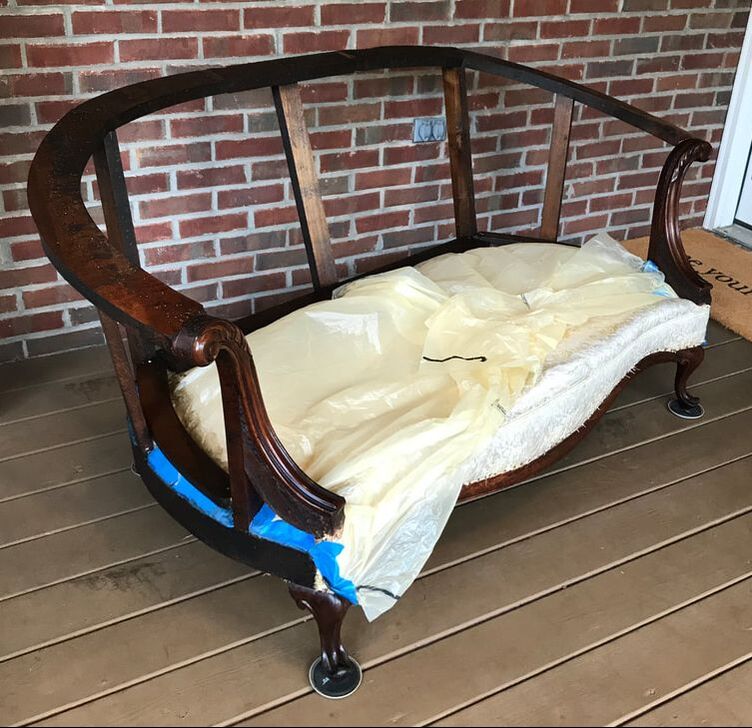
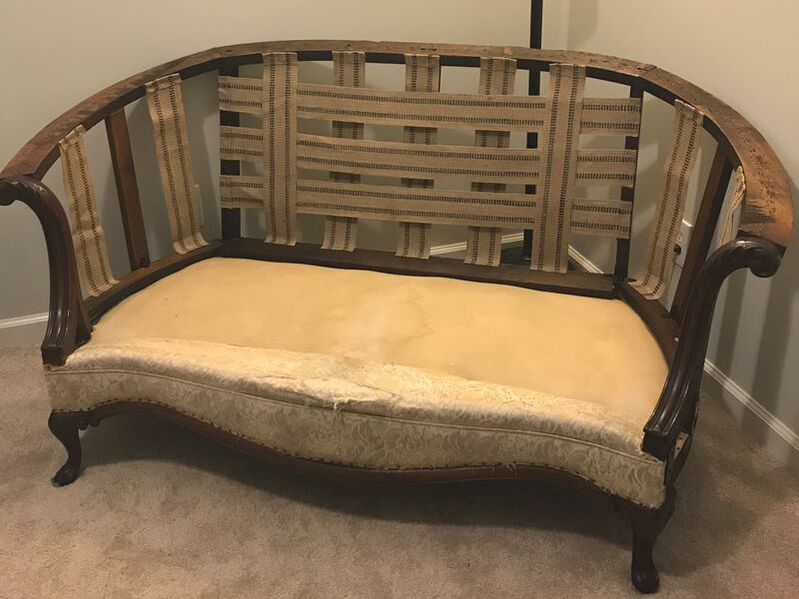
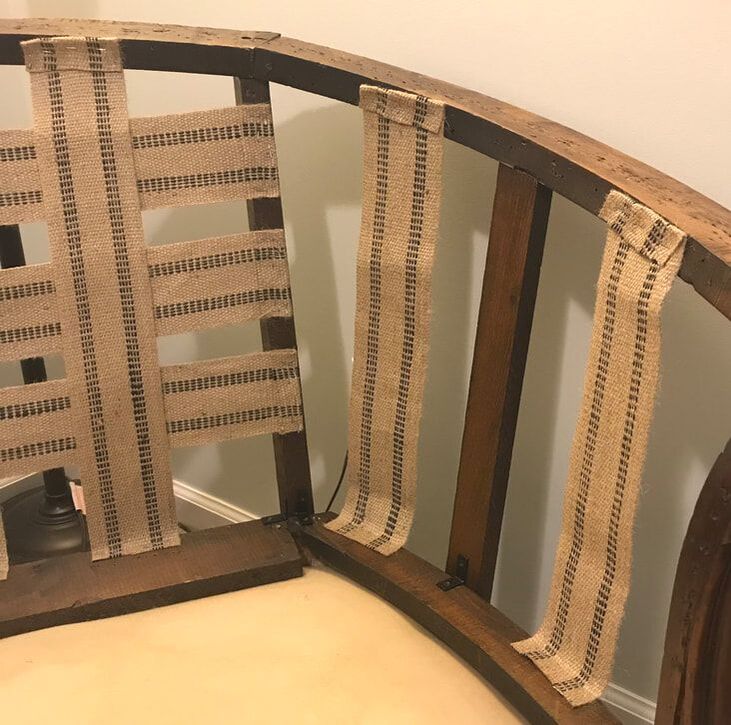
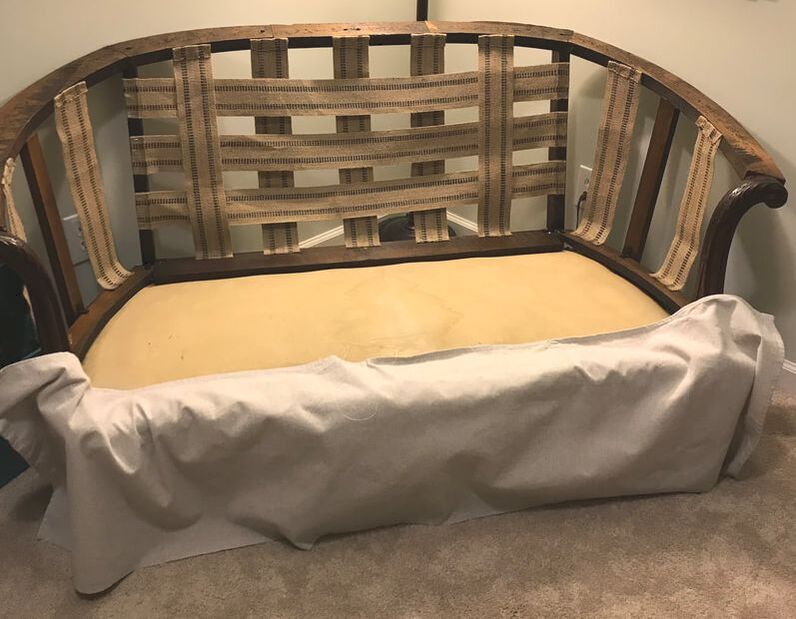
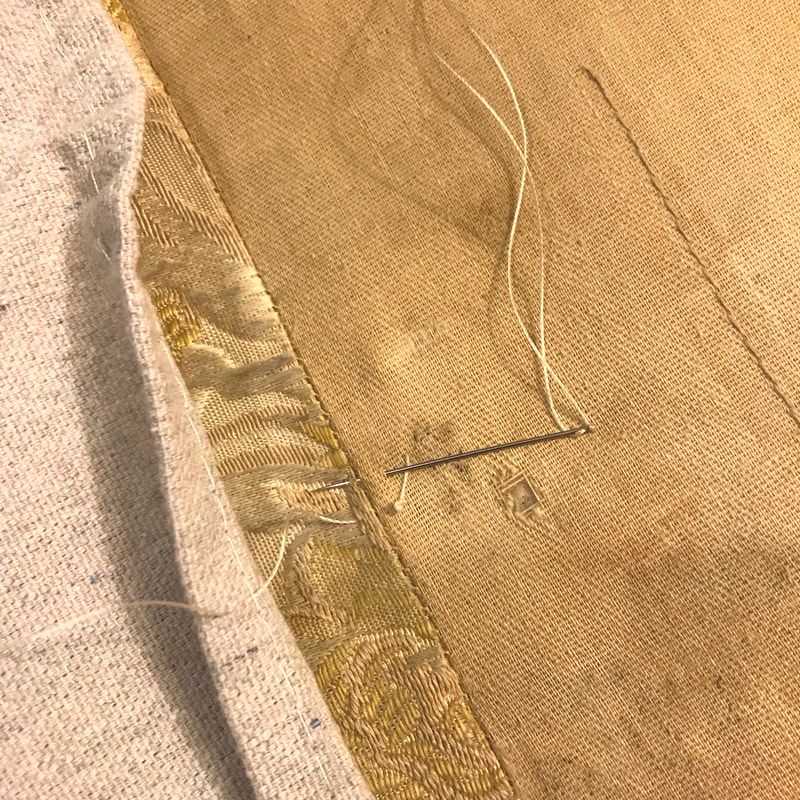
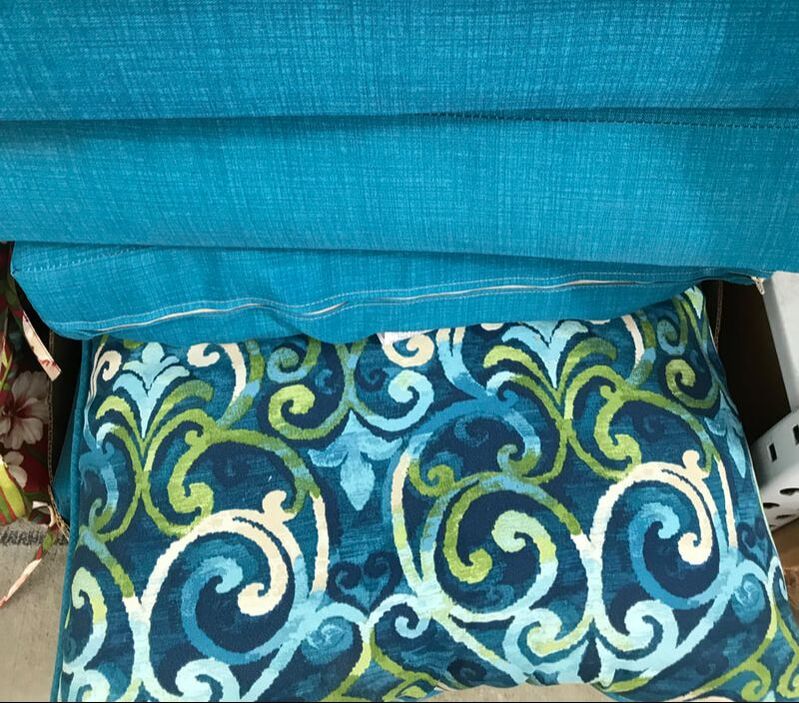
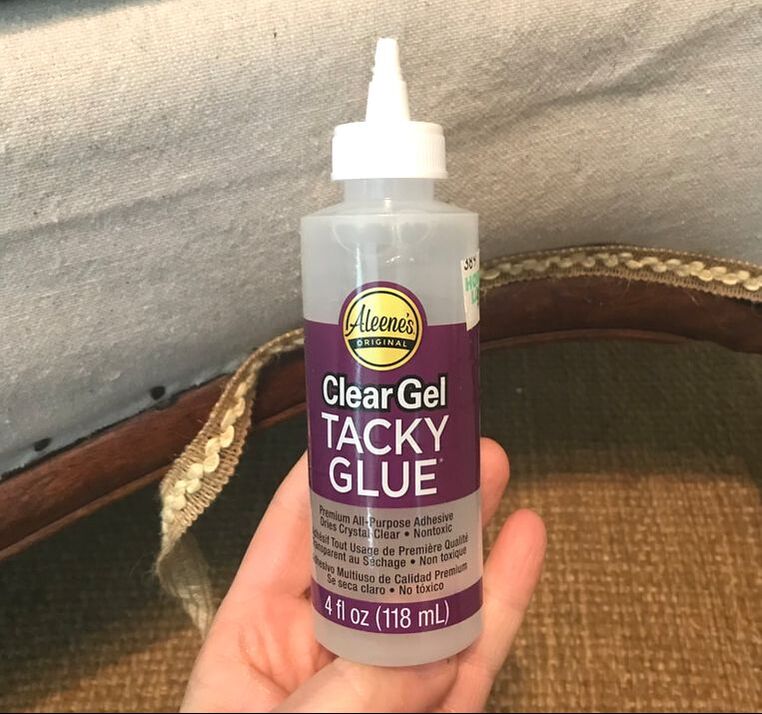
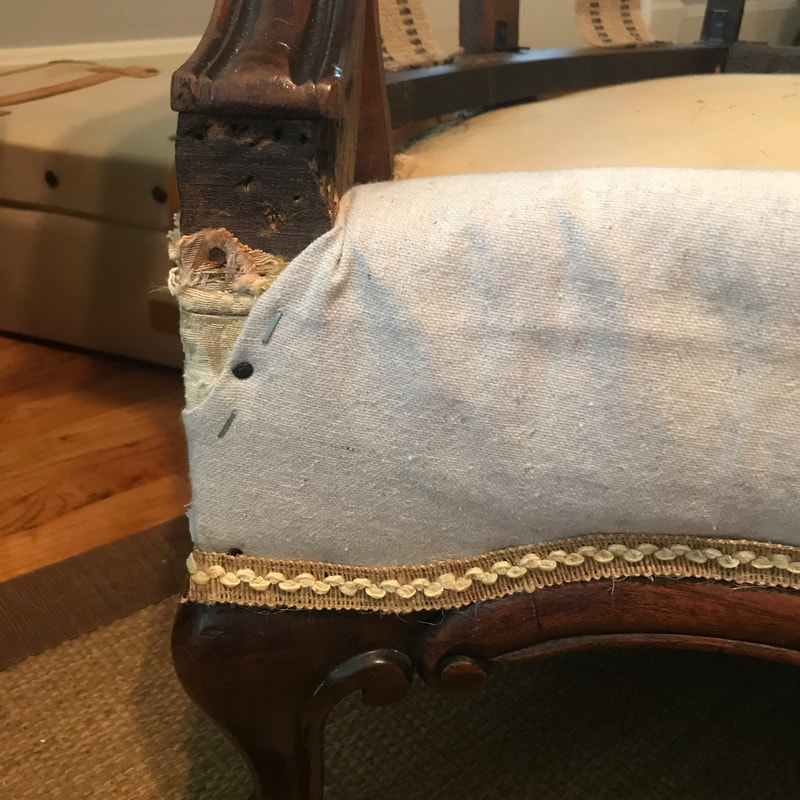
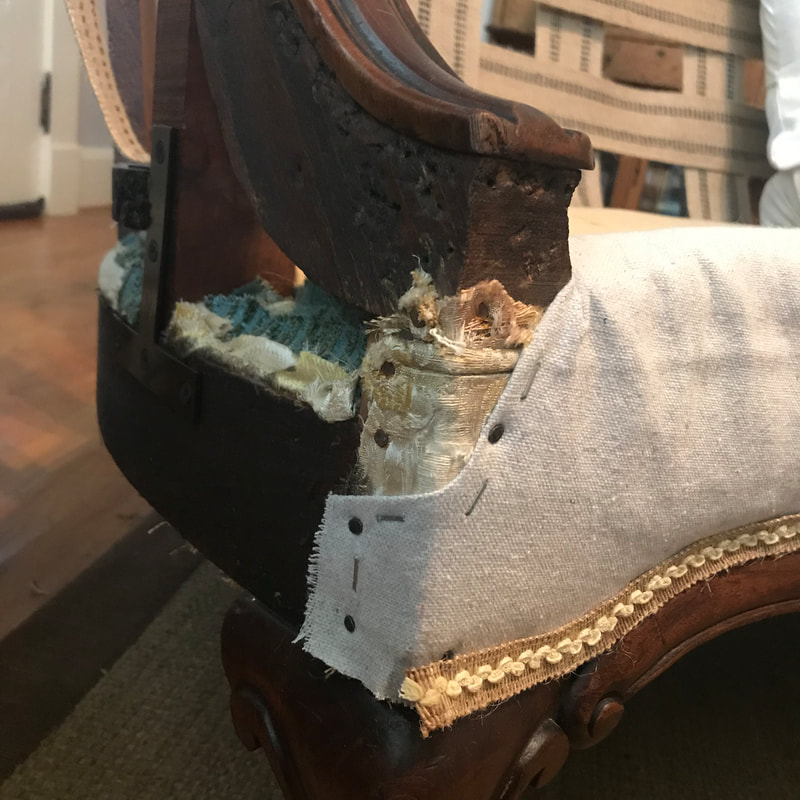
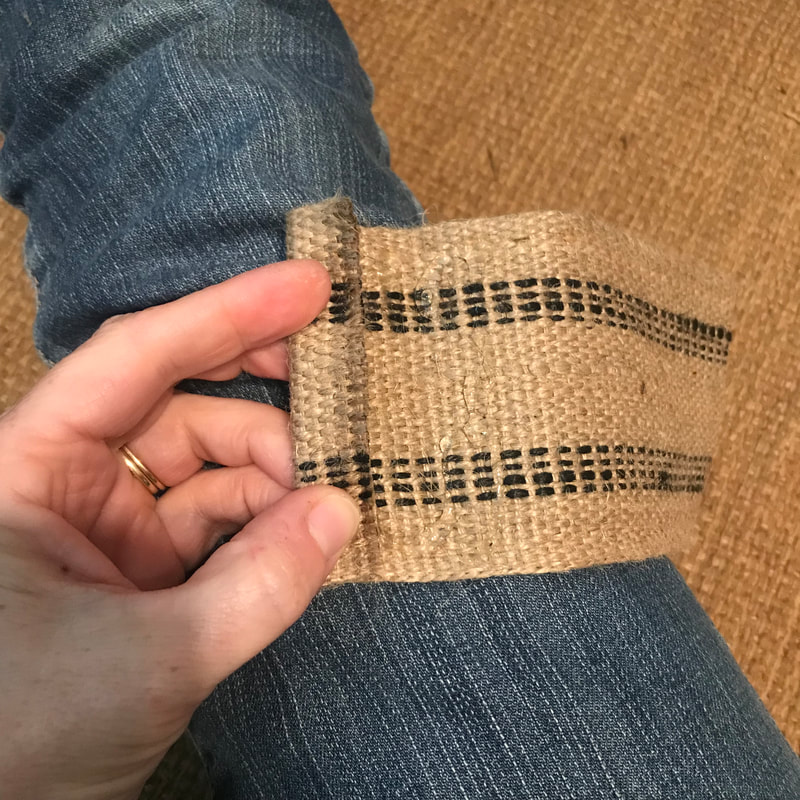
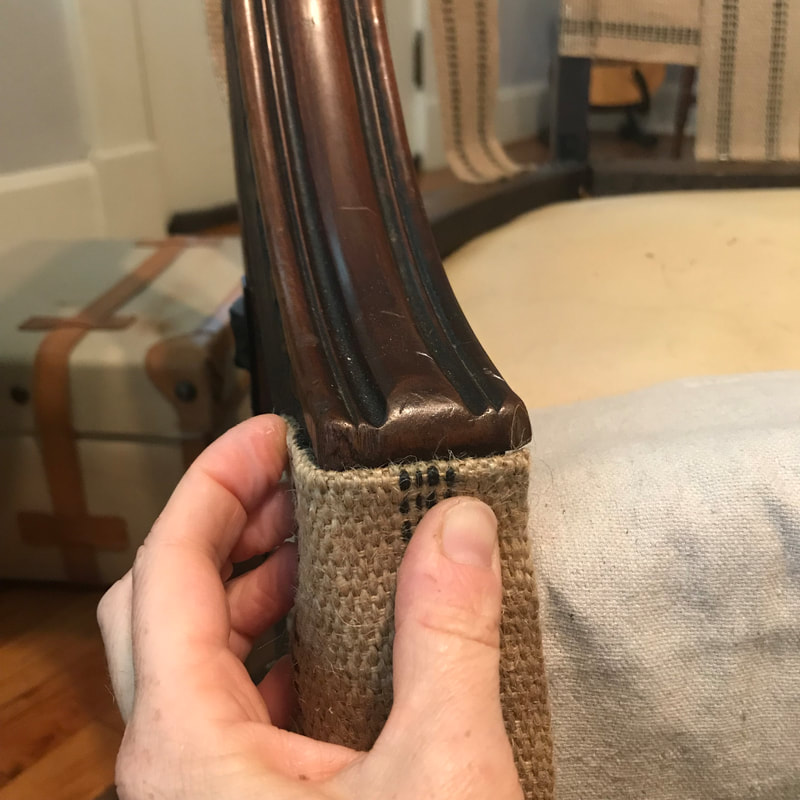
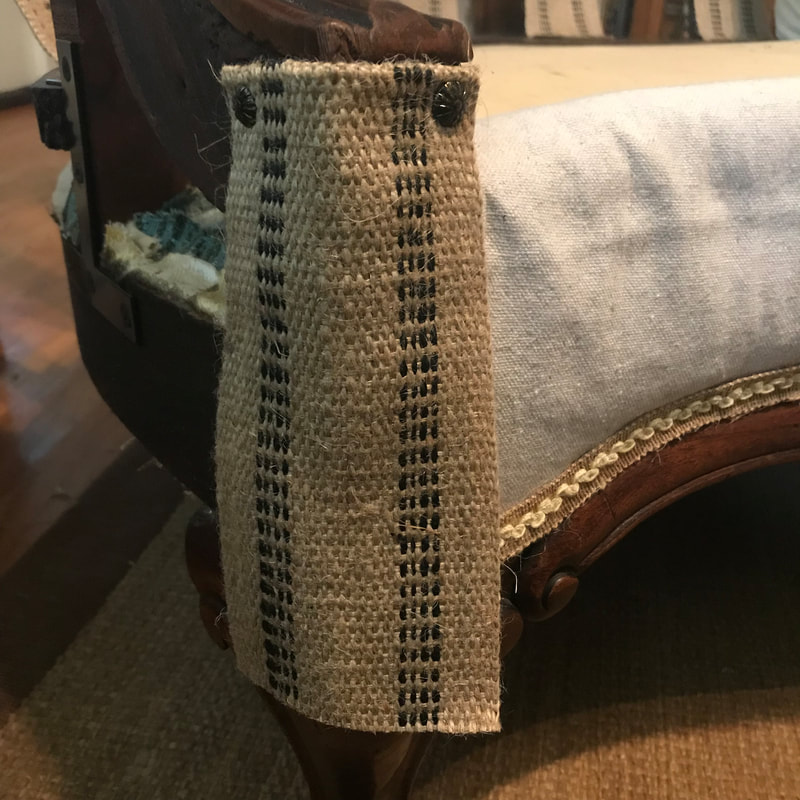
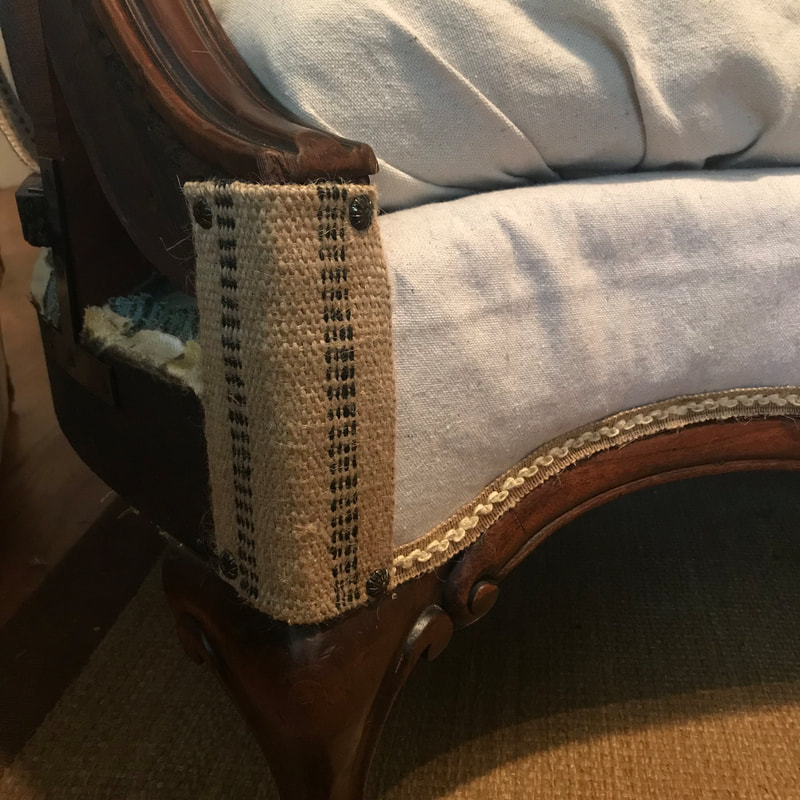
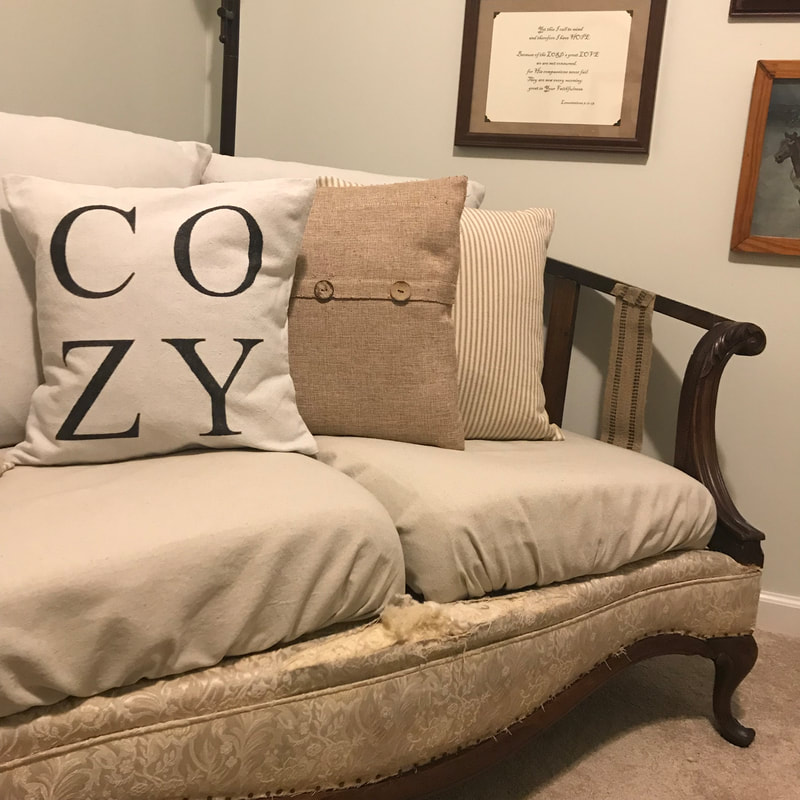
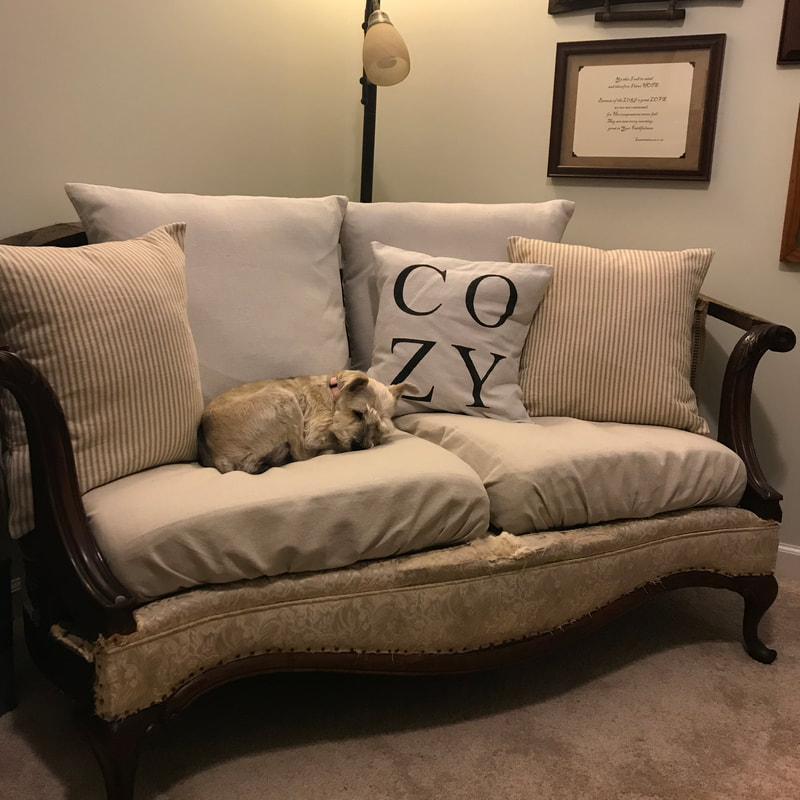
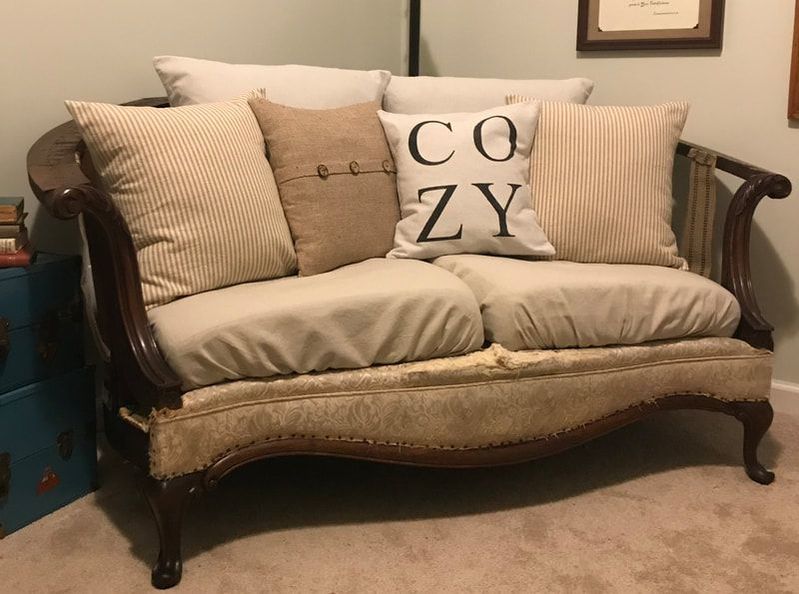
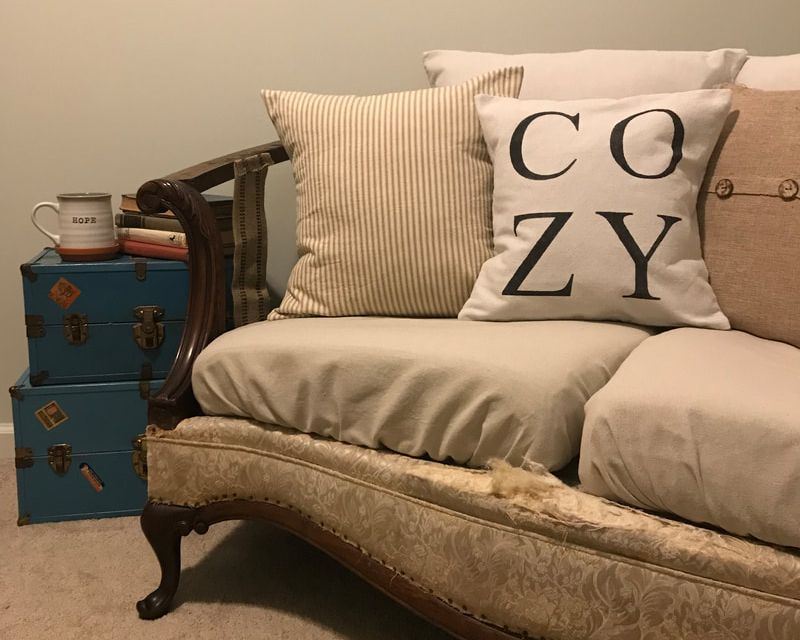
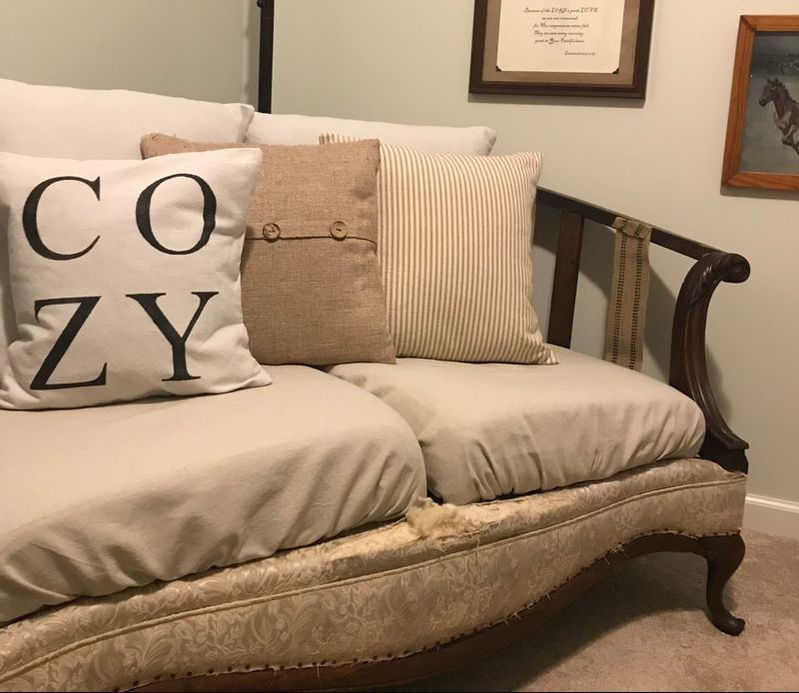
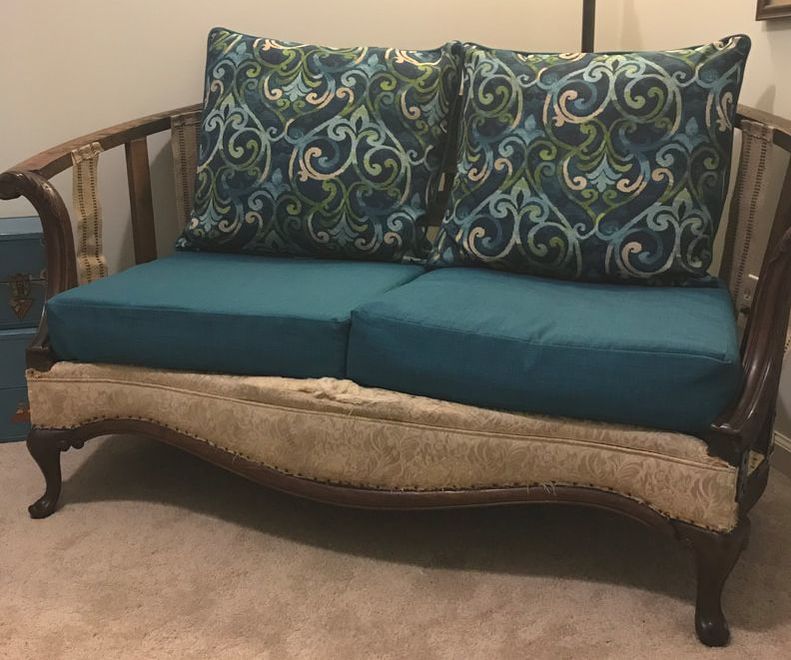
Wow! This post has been a long time coming. I started deconstructing my very worn antique loveseat July 2018 and finished just before July 2019. A lot happened in that year! Truth is, I moved this loveseat three times during that year with the final move being to a new house. I want to share the process with you but first let me start by saying. I didn't know what I was doing. I just started working at it and watched it evolve. And second, there are no "how to" rules regarding furniture deconstruction. It's ART and CREATIVITY! So borrow my ideas, learnings and deconstruct your furniture to suit your own style. Take a look at my finished deconstructed love seat in my new home!: So here's how it all started... My teenage daughter said to me one afternoon, "Mom, when are you going to get rid of this thing!" To be honest, I was getting tired of it too. There it sat on the back screened in porch looking like it belonged by the curb. The dogs used it to lounge on. I would sit on it sometimes but yuck....it was dirty. The seat cushions weren't even salvageable. I knew there was a hidden treasure in there...somewhere. So on July 4, 2018, I began taking it apart! I started by removing all the damaged upholstery, stuffing and coils. I took lots of pictures which became my notes for this project. You never know what treasure lie beneath when you start working with an antique. A little pirate child must have used this furniture vessel as his ship...and it shows! 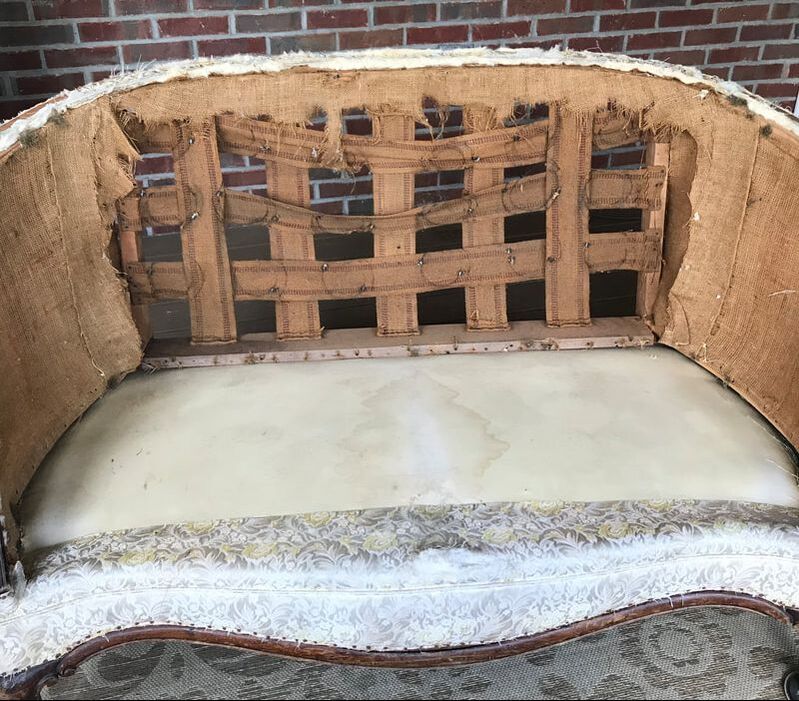 The base was in decent shape and the woodwork on the front...gorgeous! There were water stains on the upholstery but they would later be hidden by cushions. There was also a rip in the front which I would have to address. In addition, there where a few places the wood needed a little reinforcement too. For now, I would focus on the top portion. The old burlap and webbing housed so much dust that it had to go. I also removed all the tiny old nails from the wood. The best tools to get the nails out where a small set of pliers and a upholstery nail remover that I picked up for a few dollars at Joann's Fabric. After some vacuuming and dusting, this is what I had... a slightly worn upholstered base and a top down to the frame. I didn't find this raw wood look on this particular piece very attractive so... I covered the base with plastic and painter tape to work on the wood. 1. I used Minwax pre-stain wood conditioner to prepare the raw wood only. 2. Next I used Minwax Dark Walnut wood stain on the raw wood only. This gave all the wood a consistent color. It also made all the nail holes less noticeable and gave the raw wood a rich, healthy look. 3. Then I sealed the raw wood with Minwax Tung Oil Finish. 4. Finally, I used Restor-A-Finish in Dark Oak to restore the existing stained wood carving on the front. I followed all the packaging directions on these products. Here's what they did for this piece! Wow! I was really please with the way these products brought out the natural beauty in the existing wood! I so valued the way the wood turned out that I moved my love seat project indoors! Remember how I said I took lots of pictures when I removed all the coils, burlap and stuffing? This really was important because I constructed the webbing in the back exactly how it was originally done. I figured they put it together the way they did for a reason and just followed the original blue print. With the sides, however, I put webbing in place also as I didn't think the burlap that was originally there would hold together in the arms without all the original stuffing. Webbing makes furniture secure and is the undergarment for all the rest. Two important things to know: 1. I should have secured the bottom of the webbing with a fold as I did with the top. A fold was included in the original webbing and I should have done this everywhere. I simply forgot when I was stapling the bottom onto the wood. This has not proven to be a problem so far. 2. 1/4 inch staples are completely worthless and do not hold webbing (or probably much else) in place. If stapling, use 1/2 inch or larger. Better yet, use upholstery tacks and skip staples altogether. Tacks really do the job and hold up under daily use. I am slowly replacing lose or missing staples with upholstery tacks. I should have used tacks in the first place for a sturdier piece of furniture. 1/2 inch upholstery tacks can be found at Hobby Lobby. So remember that big gash in the front of the upholstery? I wanted to address this without tearing into the base of the loveseat. So I covered it! Using painter's drop cloth, I cut a long piece with a nice hem along one of the long sides. I then took heavy upholster's thread and a large needle to hand sew the fabric to the loveseat. Once I had it solidly attached, I cut the rest of the piece of draping fabric to fit the shape of the furniture. I then used mostly upholstery nails and a few staples to nail the fabric to the base just above the decorative wood. This creative fix has held in place well with daily use. The new fabric moves with the underlying old fabric and is securely attached. Yikes! I bet you weren't expecting to see this! It's the end of summer and I'm at Lowe's Home Improvement store browsing through clearance outdoor furniture cushions. I needed to replace the cushions and here was my solution. Outdoor furniture cushions are typically sturdy and, at the end of summer, they are often on sale. I couldn't make them for the cost here. But those outdoor colors...wow! You can find how I covered the large pillowsand the seat cushions here: https://www.ourgingercottage.com/decorating-on-a-dime/category/sewing-projects Finally, I attached trim I purchased at Hobby Lobby to the front to cover the upholstery tacks and staples which hold the fabric in place above the decorative wood. Aleene's Clear Gel Tacky Glue has held the trim on quite well with daily use. The Glue was also purchased at Hobby Lobby. Okay...almost done but what do I do about this. Hmmm. Looking good! I just took a few inches of the leftover upholstery webbing. I folded under one end about 1/2 inch. Then I nailed it in place with some decorative upholstery tacks from Hobby Lobby. I cut the webbing to the correct length, folded the end under about 1/2 inch and nail the bottom into place with 2 more decorative upholstery tacks. Tada! Some other things I should mentioned.
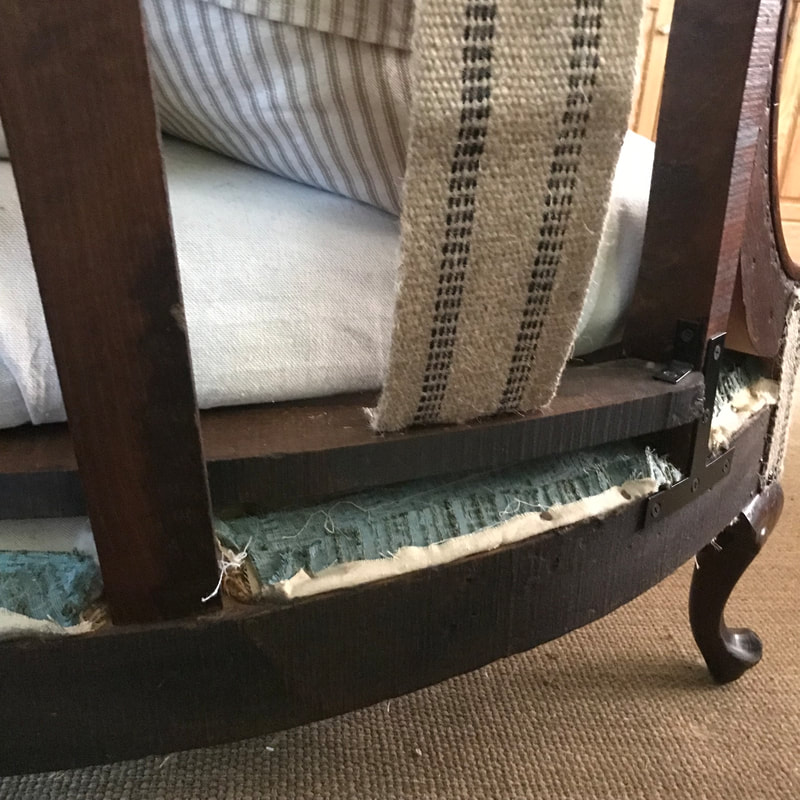
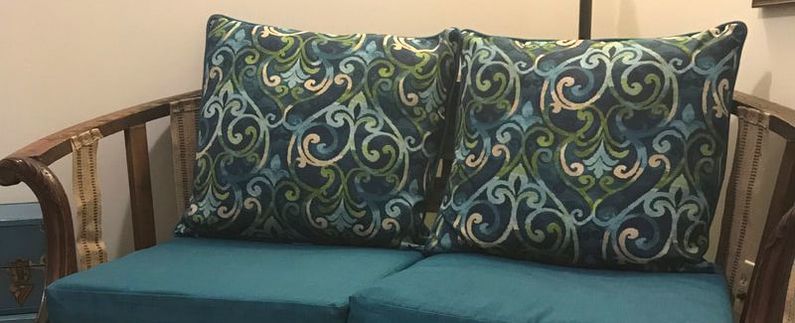
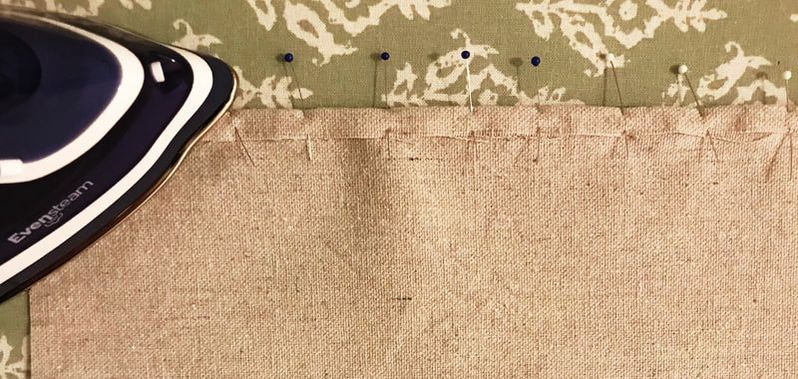
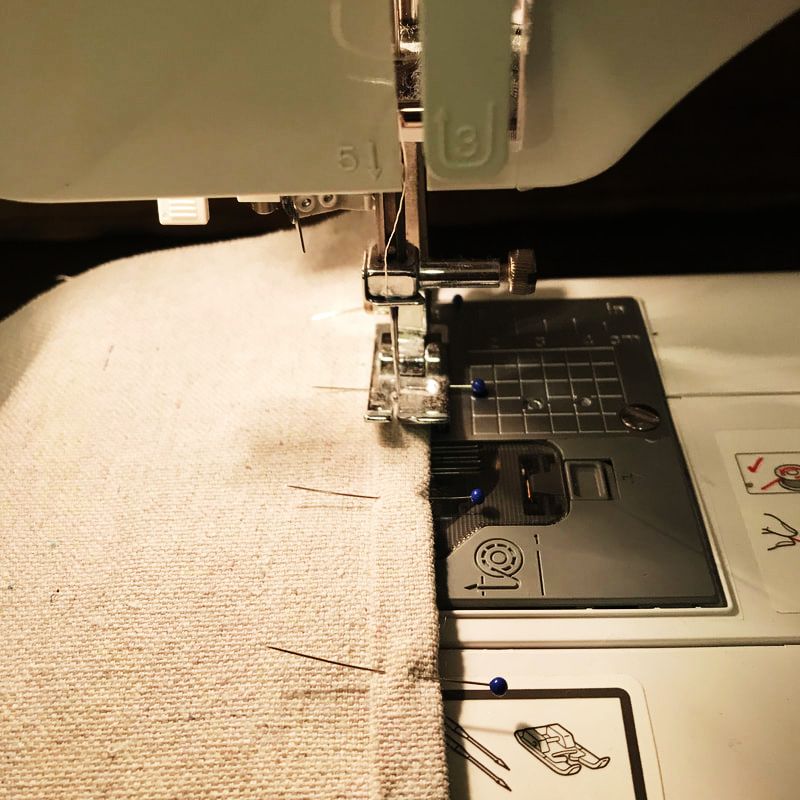
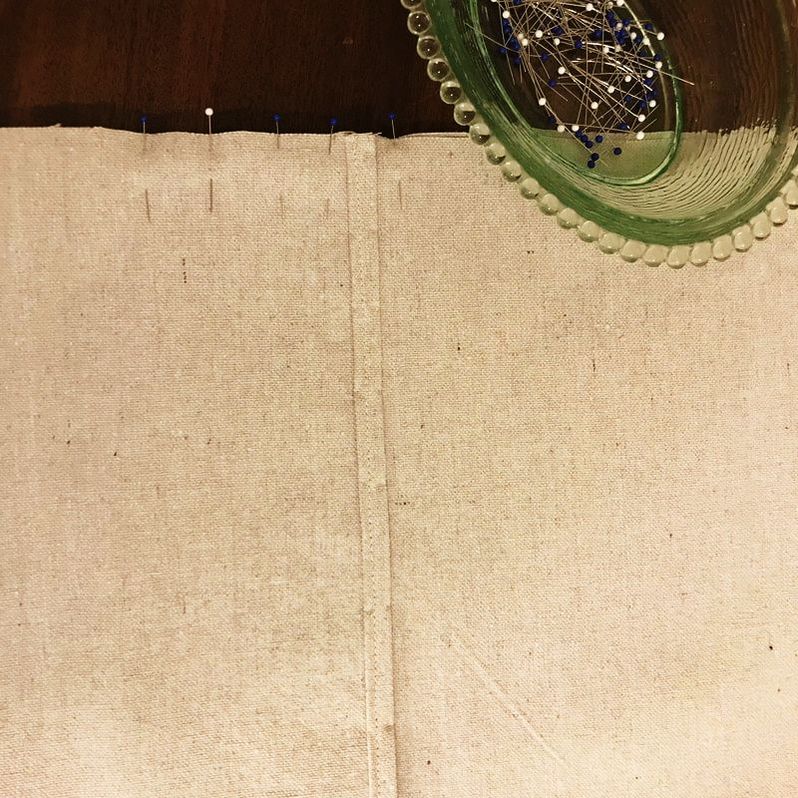
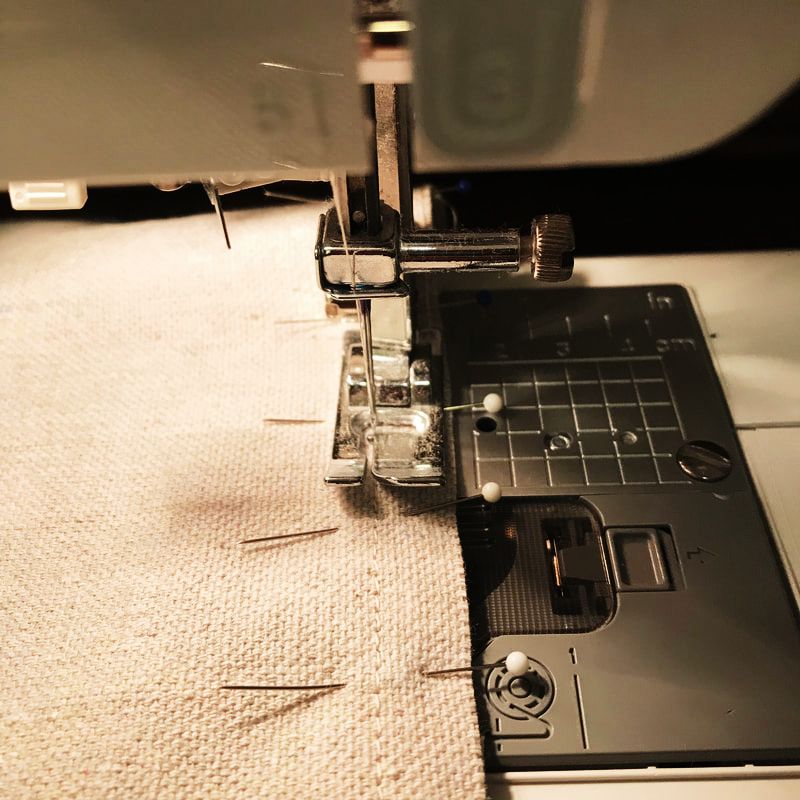
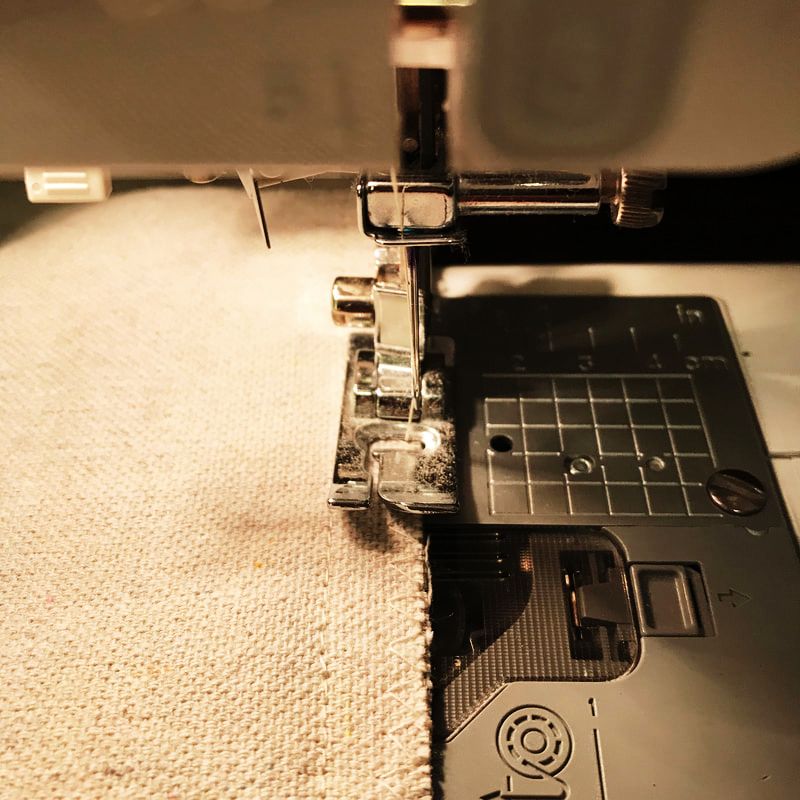
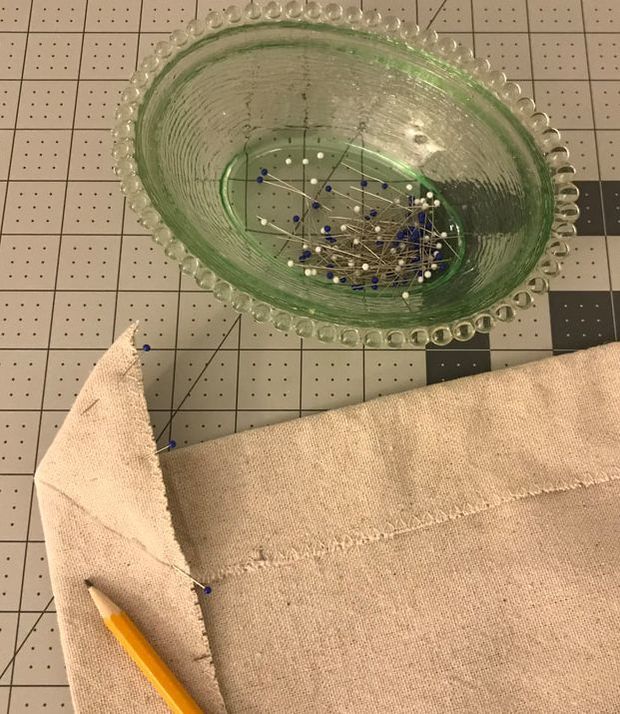
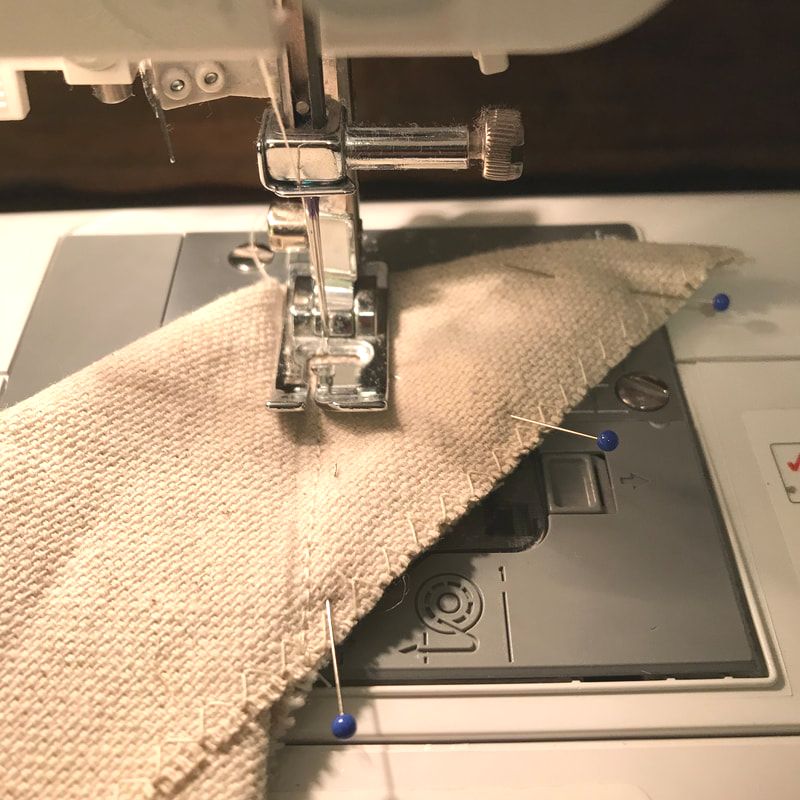
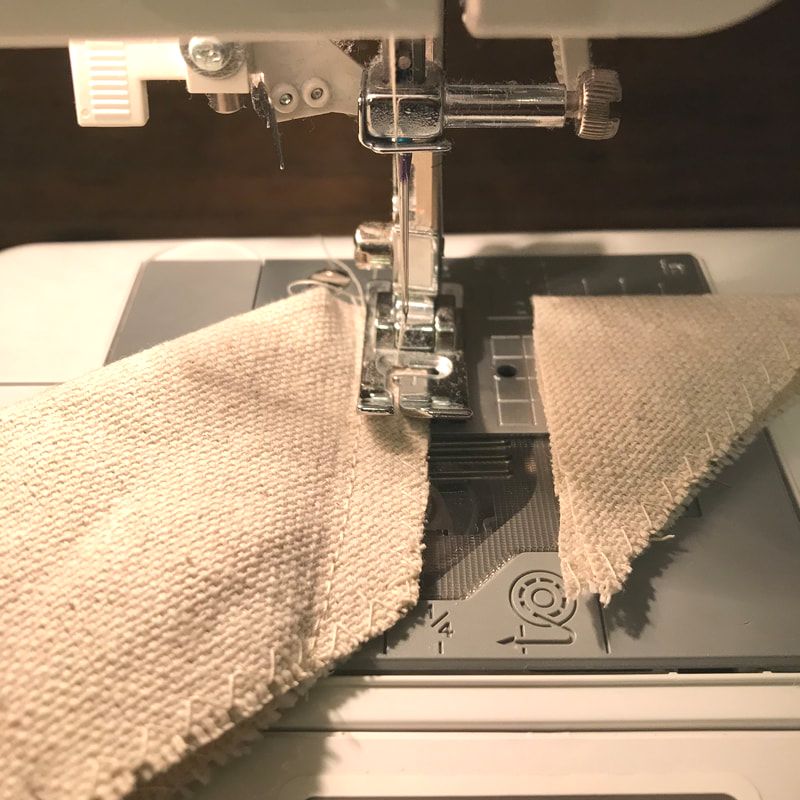
I loved the unique and aged color of this light teal fabric peaking out around the back of the base. I left it and the original nails alone. I kind of wonder if this piece has been reupholstered before and the teal is the original...just a thought. Looks like I need to trim a few threads sticking out but I love this raw look of dark wood, old fabric and webbing around the back. Also pictured here are a few places we felt we should reinforce the old wood. When I say "we", I am referring to my wonderful husband's participation in this project. We used black hardware to give it an industrial look but it's almost invisible on the dark wood so as not to highlight the repair. So what do you think? Ready to tackle your own furniture deconstruction?! My advice is be resourceful and creative! My simple envelope closure pillow covers are a smaller project inside a much larger one...a deconstructed love seat or old fashion settee. Once I am finished with the deconstructed love seat (it obviously still needs work) I will put together DIY instructions on the entire project. I have already created the DIY for the Drawstring Seat Cushion Covers also under Decorating on a Dime Sewing Projects. So why Envelope Closure Pillow Covers?: Several reasons: 1. No zippers. They are hard to sew in and often malfunction. 2. Easy to remove the cover and launder. (This is a must for anyone with kids and pets!) 3. You can swap out your pillow covers any time for a seasonal change or fresh look. This project is easy and you can complete it in an afternoon. All you need is a sewing machine, ironing board and iron, pillow insert, fabric and tread. Whoa! I bet these bright colors got your attention! I actually like teal but this wasn't the color I was desiring for the old settee's pilows. I could have shopped at Joann's Fabric or Hobby Lobby for pillow inserts. However, Lowe's Home Improvement had these outdoor furniture cushions and pillows on their end of summer clearance rack...and they fit perfectly!!! So now to cover these pillows! (Again, you can find the DIY for the seat cushions covers under Decorating on a Dime Sewing Projects.) Step by Step Instructions: 1. Calculate fabric needed. Measure and cut three pieces. The amount of fabric you need depends on the pillow insert you have. For an 18 x 18 inch pillow insert you will have a finished pillow cover of about 17 x 17 inches. By creating a cover slightly smaller than the insert, the pillow will look full and not slouch. (The more cushy and fluffy the insert, the more true this will be. For fluffy inserts, your cover provides structure and shape.) You will need three pieces of cut fabric for a envelope closure pillow: 1. The front piece 2. Two back pieces...either a top and bottom if square shaped or two sides if rectangle shaped. The front piece you will want to be the measurements of the pillow insert. In this way, the final cover, with all the seams, will be slightly smaller than the insert as discussed above. So for an 18 x 18 inch insert cut the front piece 18 x 18 inches. The two back pieces should be the same size. For a square pillow: the width of the insert (in my example 18 inches) and the height (18 inches) divided in half, plus 5. (So for my example 18 x 14 inches.) For a rectangle pillow: the height of the insert and the width divided in half, plus 3. So for a 12 x 22 inch rectangular insert, you will have two 12 x 14 inch pieces for the back of the pillow cover. 2. Pin and iron back panels. Next, you will need to create hems on the two back panels. Each back panel will have one side hemmed. For a square pillow...pick a side, any side since they all measure the same. For a rectangular pillow, it will need to be one of the short ends. (So with my previous example for a rectangular pillow, one of the 12 inch sides. Fold the desired end over 1/4 inch and pin (as pictured below). Iron to keep fold in place. Fold over again (1/4 inch) and pin. Iron again to keep fold in place. 3. Sew hem of back panels. (Pictured below.) 4. Pin and sew the three parts together. For a square pillow cover: a. Lay out in front of you the front panel of the pillow cover with visible side facing up. b. On top of this, lay down the top panel of the back with visible side facing down and hemmed side in the middle. Line up the edges to the top of the front panel. c. Next, lay on top the bottom back panel with visible side facing down and hemmed side in the middle. Line up the edges to the bottom of the front panel. d. Finally pin all the outside edges around the square together and sew a 1/4 inch seam. For a rectangular pillow cover: a. Lay out in front of you the front panel of the pillow cover with visible side facing up. b. On top of this, lay down the left side panel of the back with visible side facing down and hemmed side in the middle. Line up the edges to the left side of the front panel. c. Next, lay on top the right side back panel with visible side facing down and hemmed side in the middle. Line up the edges to the right side of the front panel. d. Finally pin all the outside edges around the rectangle together and sew a 1/4 inch seam. (Pictured below.) 5. Zigzag stitch the raw edge. (Pictured below.) 6. Turn pillow cover right side out and place insert inside. Enjoy your New Pillow! Miss Maggie sure will!
My easy drawstring cushion covers are a smaller project inside a much larger one...a deconstructed love seat or old fashion settee. Once I am finished with the deconstructed love seat (it obviously still needs work) I will put together DIY instructions on the entire project. For now, this is a simple solution for any seat cushion you wish to cover. As I write this, I have another love seat in the house I need to create covers for as my sweet Airedale Terrier has worn to threads the one in my living room in his scramble to guard the front door. Do you have kids or pets like I do? Do you have an old upholstered piece that needs a face lift? Do you have a sewing machine to complete this easy project? I have an attractive and practical solution for your needy cushions! Wow! I bet these bright colors got your attention! I actually like teal but this wasn't the color I was looking for to replace the old settee's cushions. I could have shopped at Joann's Fabric or Hobby Lobby for replacements. However, Lowe's Home Improvement had these outdoor furniture cushions on their end of summer clearance rack...and they fit perfectly!!! So now to cover them! (I will also create another small project DIY on how to make the pillow covers! But for now, the seat cushions!) Step by Step Instructions: 1. Calculate fabric needed.
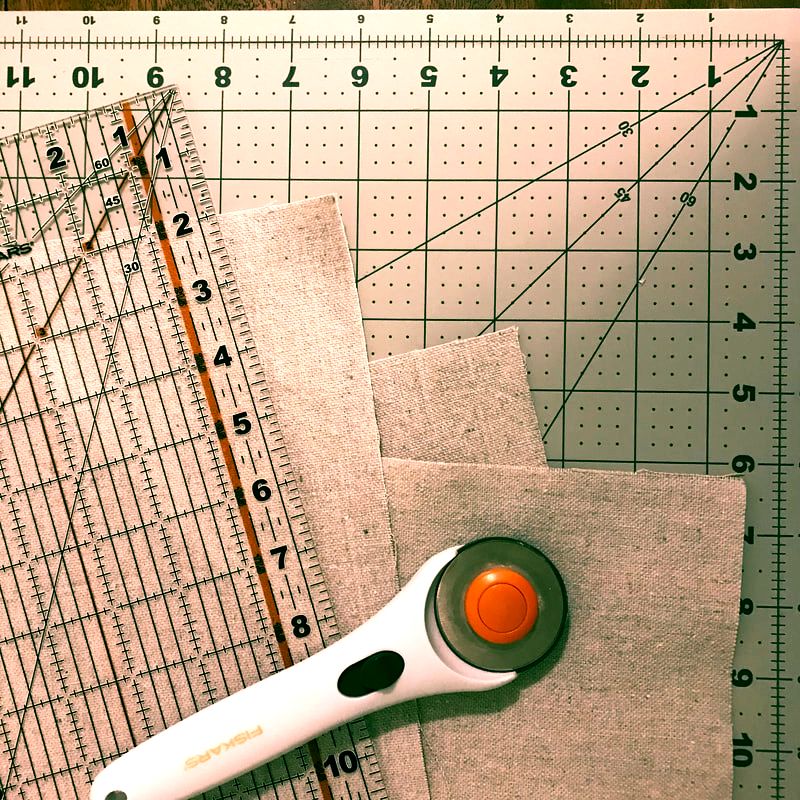
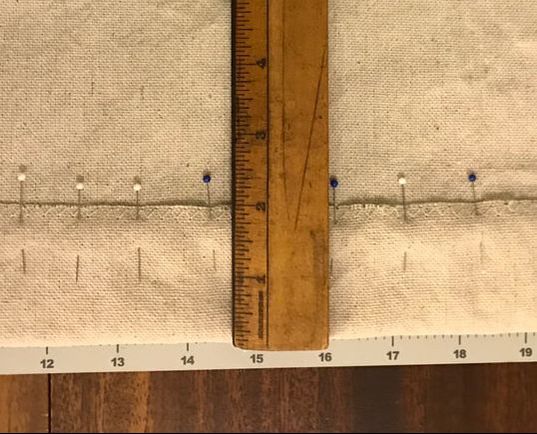
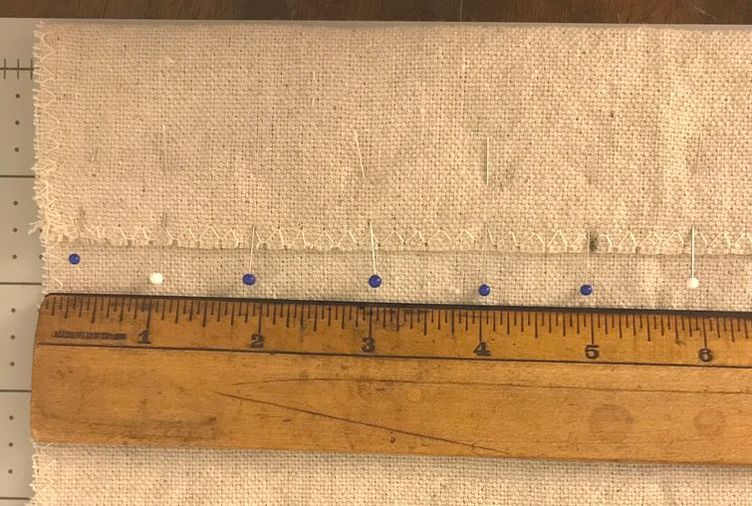
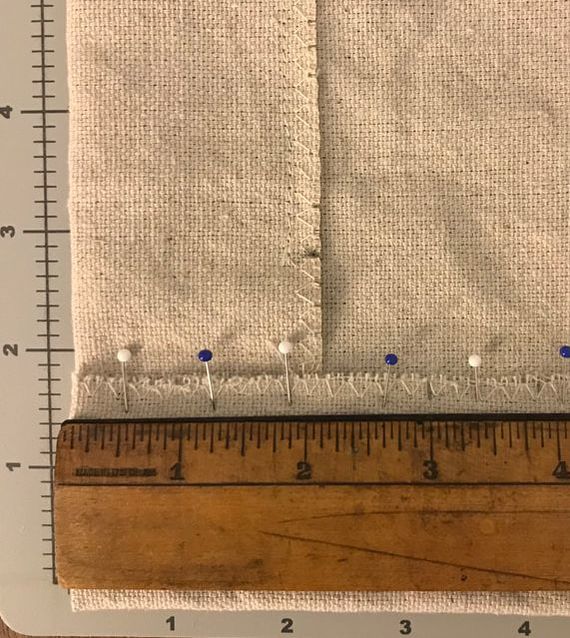
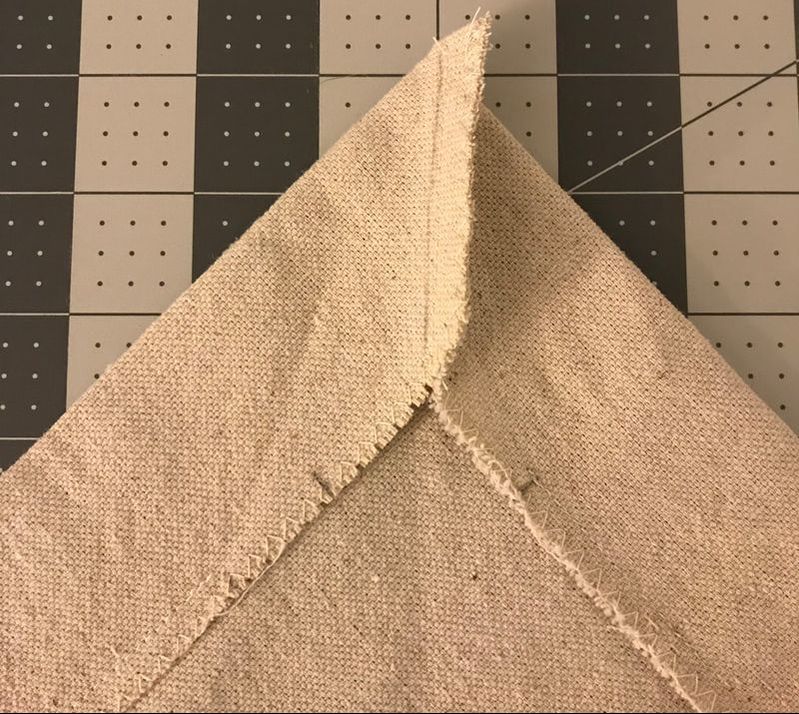
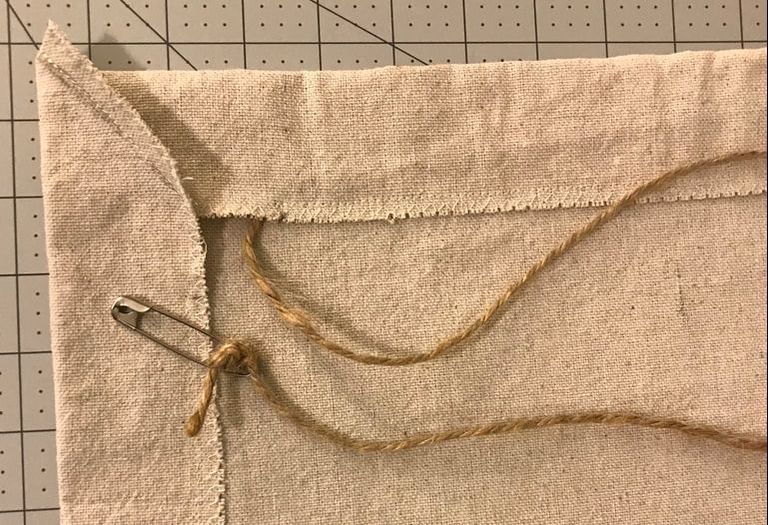
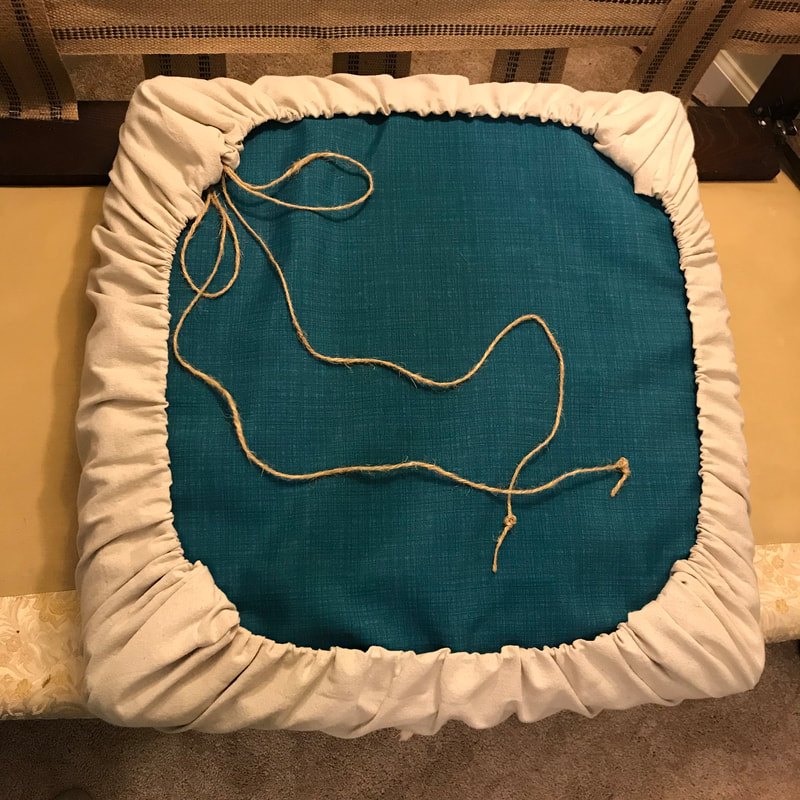
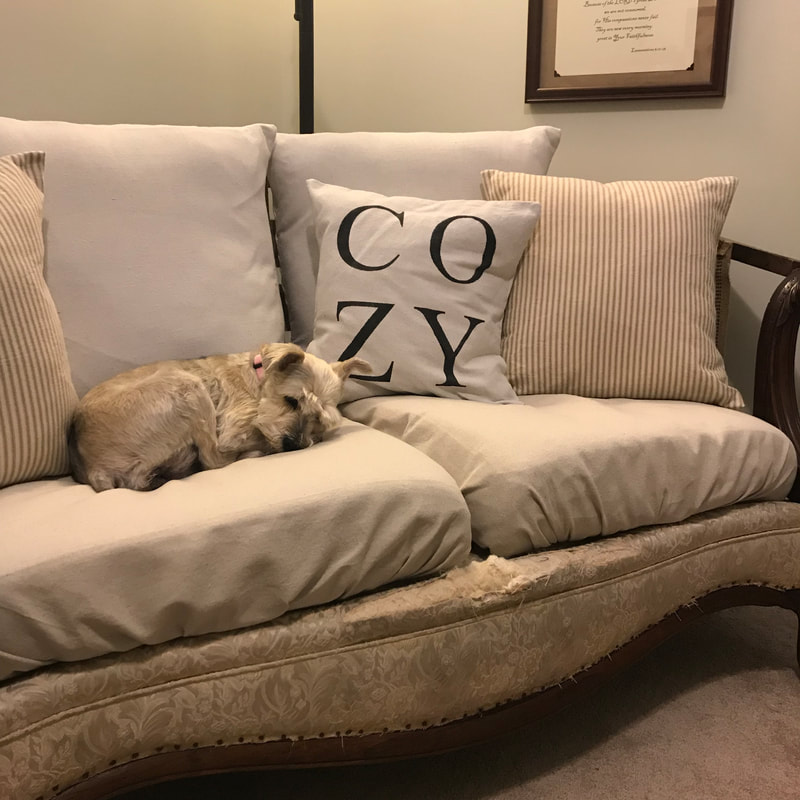
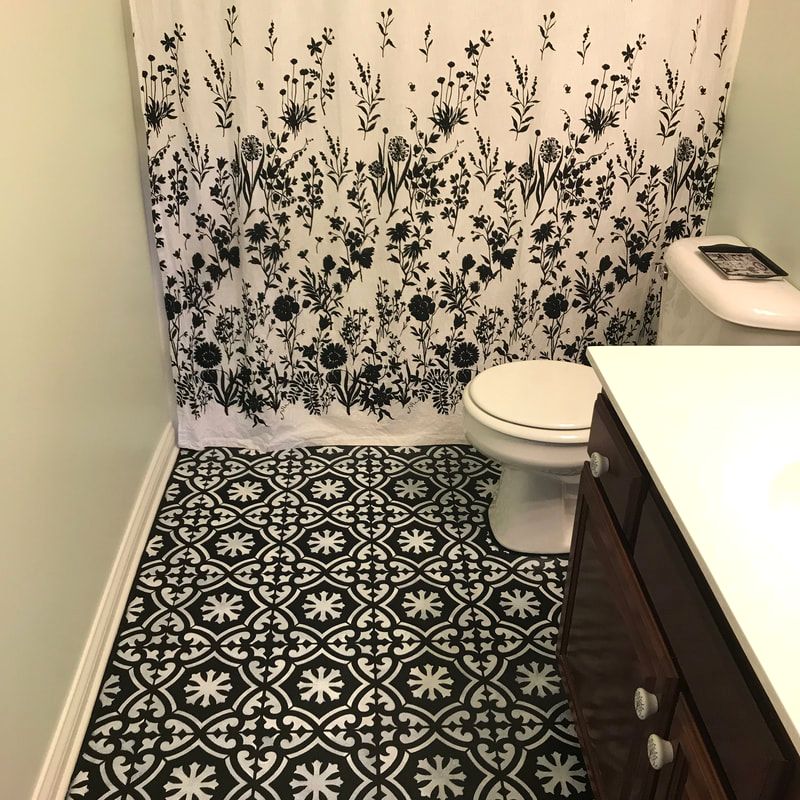
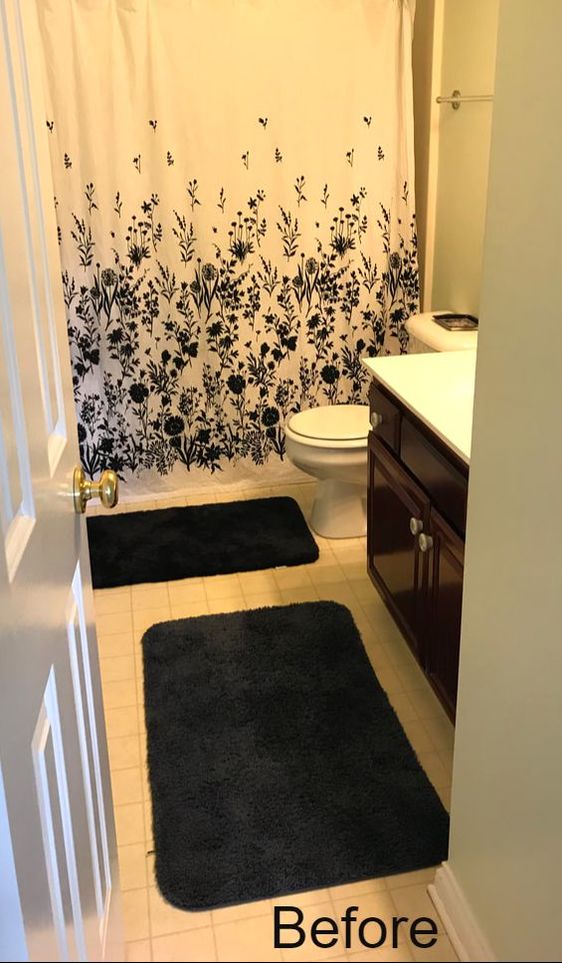
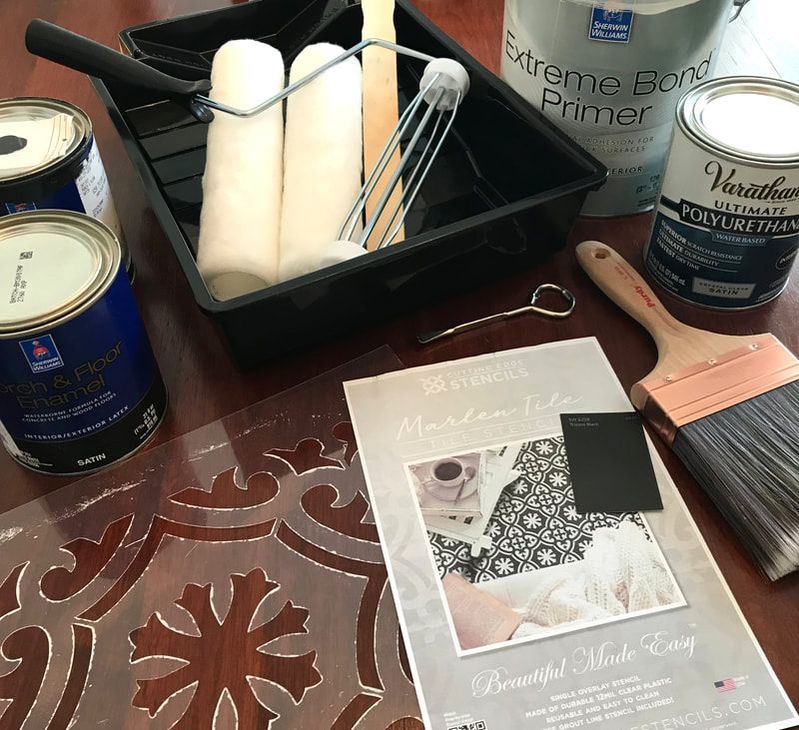
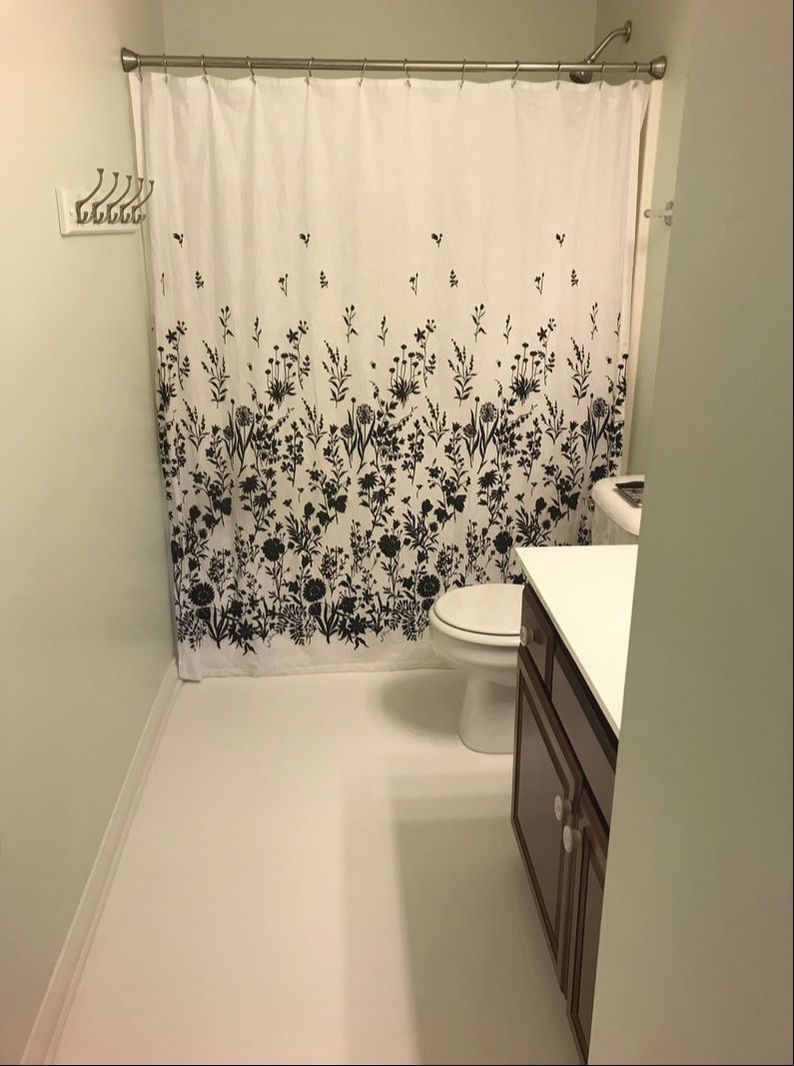
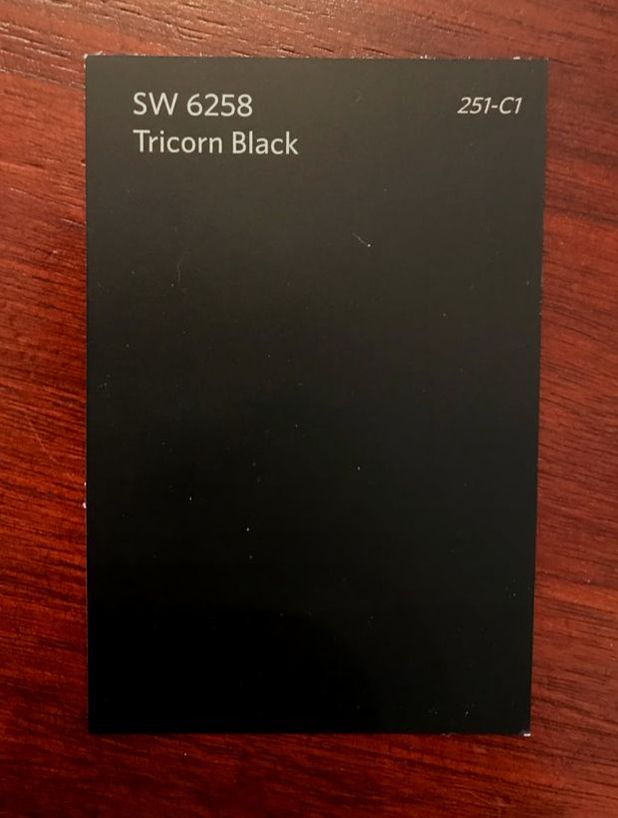
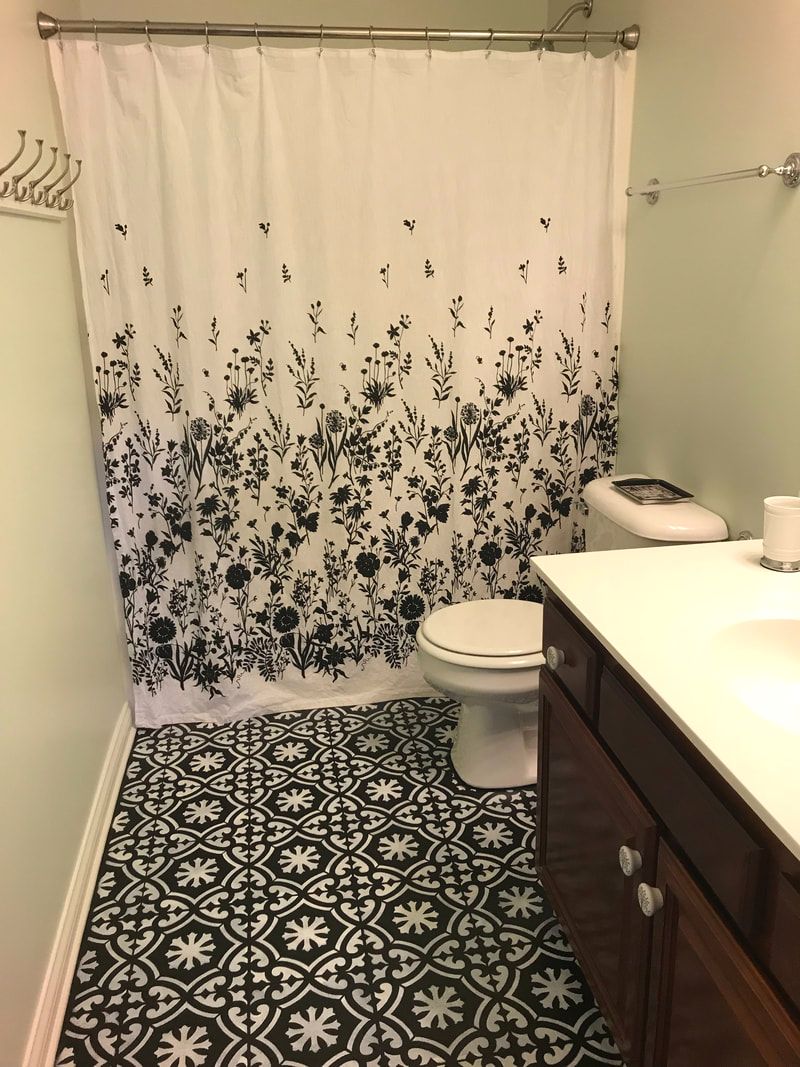
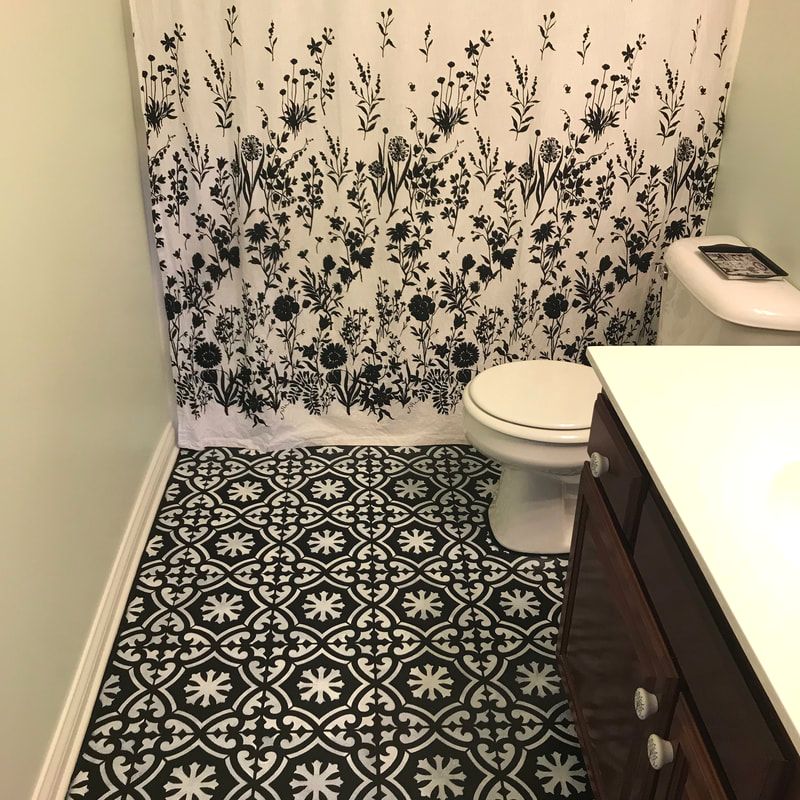
2. Select fabric and drawstring needed. I used a sturdy cotton canvas cloth (like painter's cloth) for my project. This was my choice because of the neutral color, durability and cost. I think a thinner stretchy knit fabric might work better to fit over the cushions. However, this would definitely be more susceptible to rips and tears. I chose a thick jute twine for my drawstring. Again, I was going for neutral, durable and low cost. 3. Cut the size of fabric you need to cover your seat cushion. I have a rotary cutting mat, quilting ruler and rotary cutter. However, a yardstick, carpenter's square and scissors will do. 4. Zigzag stitch the raw edge of your fabric. With your sewing machine, add a zigzag stitch to the raw edge of your cut fabric. This stitch will keep the edge of your fabric from fraying. 5. Pin a two inch hem on two opposing sides of your fabric. (Pictured above.) If the fabric has a front and back side, make sure the front is facing down and you fold and pin the hem on the backside of your fabric. 6. Mark 5 inches in on each end and sew hem. (Marking 5 inches pictured above.) Five inches from each pinned side is where your hem stitching will start and stop. The five inches at each end will remain un-hemmed for now. Don't forget to back stitch to secure your stitching. 7. Pin a 2 inch hem on two remaining sides of fabric. 8. Measure and mark at 3 inches from each end on the two opposing pinned sides from step #7 then sew hem. (Marking 3 inches in from each end of your 2 inch pinned sides pictured above.) Once you have marked 3 inches in, stitch the hem of the two remaining sides beginning and ending at the 3 inch marks. Don't forget to back stitch to secure your stitching. Once this step is completed you should have four un-hemmed corners to work on next. 9. Create, mark and pin a triangle at each un-hemmed corner. (Pictured above) I just use a regular pencil as I have found fabric pencils to be frustrating. 10. Sew a regular straight stitch close to your marked corner, cut the corner about 1/4 inch from your stitch and then zigzag along the raw edge to prevent fraying. (Pictured above.) Complete all four corners in this way. And here is what your finished corners should look like! By making these corners and cutting away the excess fabric we have removed some of the bulk for a better fit. 11. Measure, cut and insert the drawstring into the pocket hem you have created. Measure the amount of drawstring you need by simply laying your seat cushion cover flat and placing the drawstring around the hemline allowing an extra foot of drawstring at each end. Then cut the drawstring this desired length. I tied a good knot in each end of my drawstring. Then I threaded the drawstring using a large safety pin. (Pictured above.) The safety pin makes it much easier to thread your hem pocket and can be removed once you have the drawstring in place. 12. Lay your seat cushion in the center of the cover and pull the drawstring so the fabric conforms around the cushion. (Pictured above.) The drawstring will now seem excessive, but just tuck it out of site. Do not cut it shorter as you will need the entire length if the cover is removed. Finished! Miss Maggie sure loves the new covers! 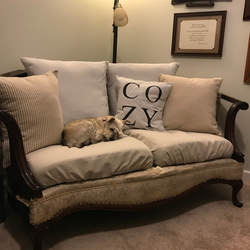 Sometimes DIY enthusiasts will paint you a PERFECT and EASY picture of what a project will be like. Well, I'm NOT going to gloss over a home decor project (at least not this time). Truth is, stenciling our hall bath floor was difficult and ate away at all my home decor insecurities. I want to be honest with you. Hopefully, in doing so, a project like this will be easier for you! With that said, I am glad I stenciled our hall bath floor! Just look at the picture above to see the end result! However, here is an honest look at the situation: The upstairs hall bath flooring was ugly and discolored. While I had a lovely black floral on white shower curtain, playful "Spinach White" Sherwin Williams paint on the walls and little black and white decorative knobs on the vanity, the floor was an eyesore. The aged beige hue could not be hidden by bath rugs. To boot, there were areas around the toilet and shower that held the tall tell signs of gray water damage from heavy use by children. All that said, the vinyl floor was intact and without any evidence of peeling back. Still, the discoloration was horrid and really needed something new. I didn't zoom in to reveal the worst of it, but here she is: We contacted Home Depot and received a quote on mid-range vinyl plank. A light wood tone would have done the trick to give the floor a new look! However, the cost (around $1000) was not in our budget. I finally couldn't stand the way this room looked any longer! (Have you been there?!) So, I took matters into my own hands. I glanced over countless floor stenciling projects tackled by DIY enthusiasts who raved about how easy it was and how little time it took. So I rolled up my sleeves and began gathering my materials. Truth is, the above picture was taken after the project was over. Gathering these supplies wasn't so easy! (But now that you know what I used, this will be so much easier for you!) Let me explain some of the obstacles I encountered: You will need a Stencil Design First, I selected a stencil design. I saw lots of beautiful stencil designs all over Instagram from Cutting Edge Stencil. Their website was well laid out and, with the assistance from their service rep, I picked out a design I was happy with (the Marlen Tile Stencil). It's important to note that since my vinyl floor square pattern was not a perfect 6 inch, 8 inch, etc., I had to custom order my stencils. (Yes, you will need two! It makes the job go smoother.) Their service rep helped me know how to measure the squares to get the correct size. They were also upfront that they couldn't guarantee the preciseness of custom orders. (Warning noted but I proceeded anyway because, I figured, if something is slightly off you can't tell unless you get on your hands and knees to inspect my floor.) I was very happy with the customer assistance and the quality product I received from Cutting Edge Stencils and I would recommend them to anyone. They also gave me instructions on the materials I would need and how to complete this project. Simple enough! You will also need: Adhesion Primer - I used Sherwin Williams Extreme Bond Primer Black Base Coat Paint - I used Sherwin Williams Porch & Floor Enamel in Satin White Stencil Paint - I used Sherwin Williams Porch & Floor Enamel in Satin Water-based Polyurethane - I used Varathane Water Based Ultimate Polyurethane in Crystal Clear Satin Along with two 3/8 inch nap paint rollers, a paint tray, painter's tape, a 1/2 inch stencil brush and a 4 inch good quality paint brush. Now starts the beginning of all my problems. I could not find the brand of Adhesion Primer recommended by Cutting Edge Stencil. I cannot remember what brand it was now but I looked high and low. It simply wasn't available in my area. I could order online, but who wants to pay shipping on a gallon of paint! So I headed to my favorite local paint store...Sherwin Williams. I love them because they are friendly and, with my coupons, I get fantastic paint for a good price. They are normally very helpful. So it really confused me and, as I said earlier, completely tapped in to all my DIY insecurities when they told me my stencil project would not work! They said the paint would peel! They told me the polyurethane would turn yellow and "pop off"! At this point, I had to make a choice. I could believe the reliable experts at Sherwin Williams, abandon my dreams and settle for a dingy floor or I could imagine that very floor being transformed into a beautiful black and white stencil bliss. Of course I chose the latter! I did listen to those kind Sherwin Williams folks a little bit and purchased their Porch & Floor Enamel Paint in Tricorn Black for the base color and also Porch & Floor Enamel Paint tinted to match my white trim for the stenciling. They said the Porch & Floor Enamel would last longer with traffic and water. However, Cutting Edge Stencil says that you can use whatever kind of paint you want for base coat and stencil paints. Then I had to get out of Sherwin Williams because, at this point, they were looking at me like I was a crazy pink and purple spotted lady from Mars who wanted to ruin her floors by painting them. I saved the polyurethane purchase for later since it is the last step. Step 1: On a clean floor use a paint roller and apply two coats of Adhesion Primer. (I always put painter's tape around and then pull it off the entire surface of my rollers before painting as this pulls away any lint.) Allow for dry time between coats per paint can instructions. Below you can see the results of my two coats. Step 2: Using a roller, apply two coats of your base color. In my case, this was the truest black tint that Sherwin Williams has available...Tricorn Black. (Allow for dry time between coats per paint can instructions.) Step 3: Now for the fun part...Stenciling! Beginning in one corner, use a small amount of painter's tape to hold your first stencil down. (Start in the corner farthest from the door and easiest to get to.) You don't have to tape down every edge, just enough tape to keep the stencil from sliding around. Load a stencil brush with your stencil paint color. Dab the paint loaded stencil brush several times on a paper plate or napkin. This assures your brush is not too full of paint. A brush that is too full will cause leakage under the stencil. I use a stencil brush and not a stencil roller. Rollers may get the job done faster but stencil brushes offer more control and less errors. You may be surprised at how fast paint dries when stenciling. Stencil by bouncing the tip of the brush lightly on the floor exposed through the design openings. Do not over apply paint. The stencil paint should not look heavy but light and dusty close up. I stenciled every other vinyl flooring "square" and then went back and stenciled the in between squares once the paint had a few minutes to dry. Hopefully you purchased that extra stencil. You can alternate your two stencils or use one for flat squares and the other to bend around corners and obstacles like toilets. If you make a mistake, NO WORRIES, just paint over it with your base coat, dry and begin again. Remember, if you can't see from 5 feet up what you consider a mistake, it will not be noticeable. Honestly, between all my insecurities with my paint purchase, dry time between coats and trying to make the stencils perfect, this project took me way too long! It took two whole weeks with the kid's bathroom tied up in a painting project! Ugh! Step 4: With a great quality large paint brush, apply three thin coats of Water Based Polyurethane. (Allow for dry time between coats per can instructions.) I couldn't go back to Sherwin Williams but found the polyurethane recommended by Cutting Edge Stencil, Varathane Water Based Ultimate Polyurethane in Crystal Clear Satin, at Home Depot. The quality of brush does matter here because you don't want any streaks or ridges created by a cheap brush. I love Purdy brand. Do not apply the coats too thick or you could have the same problem. This product will go on milky but is clear when it dries. Here is the finished floor! It's been months since I completed this project and it's holding up just fine to teenage bathroom abuse. It looks the same now as the day I finished this DIY project. The total cost was around $150. My girls think it's beautiful! My husband knows I saved us a bunch of money. And, after two weeks, my teenage son sure was glad to have the bathroom back!
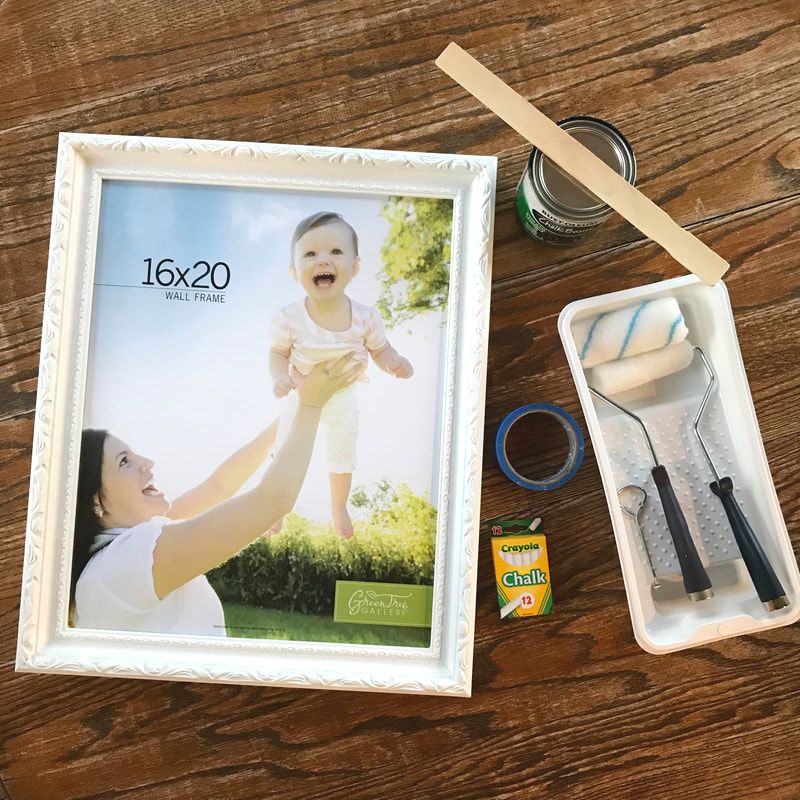
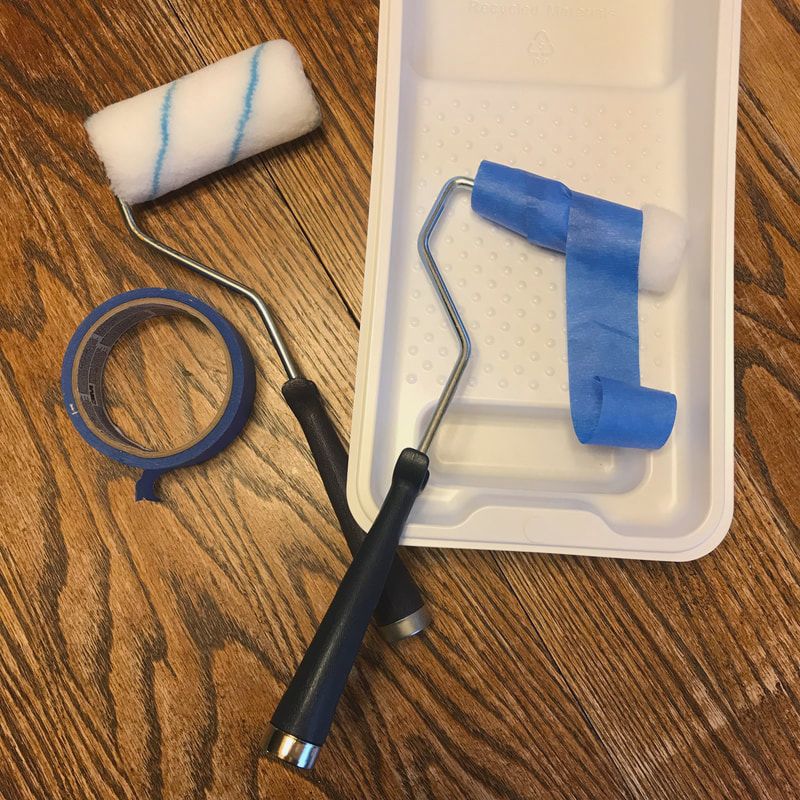
I definitely would do it again even with the challenges along the way! I LOVE the chalkboard craze and really wanted one for my kitchen. So I began the search. However, at every store (in my budget), I could not find the right size and type of chalkboard that would look just right in my kitchen. I hunted but to no avail. Then it hit me, "It's time to stop the search and figure out how to make one". This, of course, is the eureka of every DIY enthusiast! I abandoned the chalkboard section of Hobby Lobby and found myself in the ready made frame section. And there, low and behold, I immediately spotted the perfect frame in the perfect size. (If you shop certain stores frequently, you soon realize you can wait for the next sale or use a 40% off coupon to get a bargain. So that is exactly what I did.) With the perfect frame in hand, I gathered all my supplies. Materials Needed for your Chalkboard:
Creating your Chalkboard:
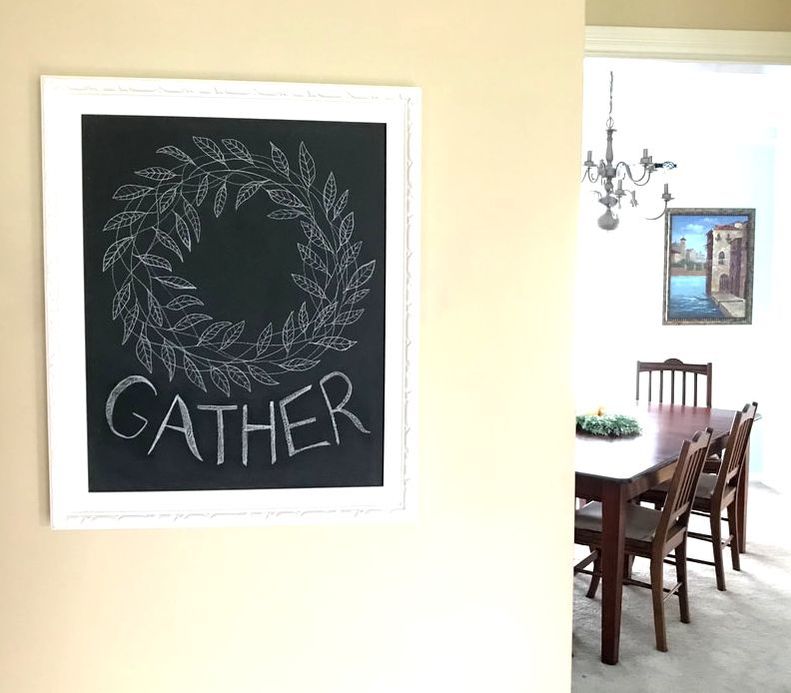
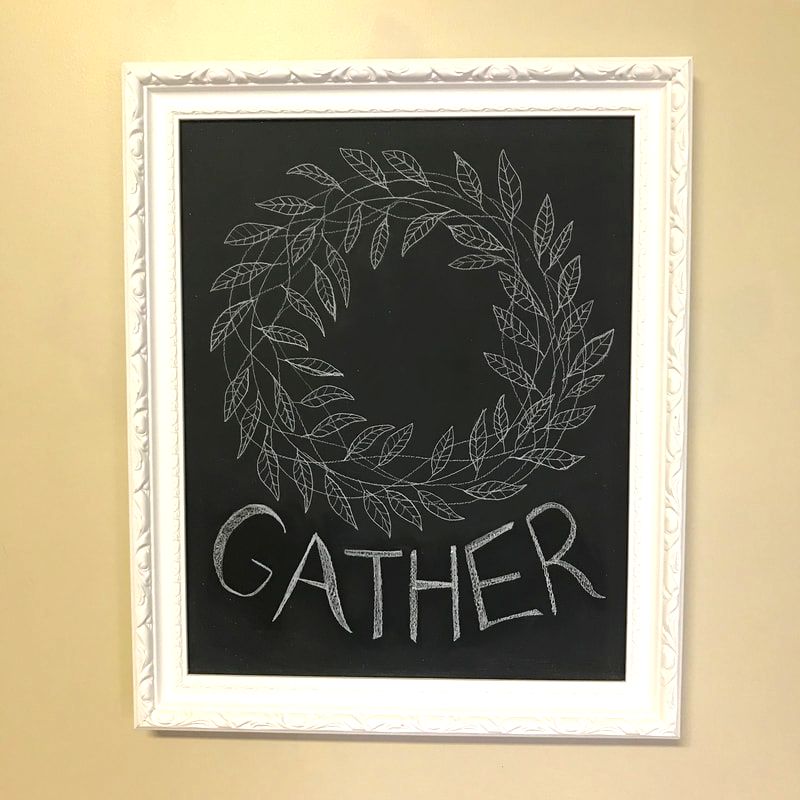
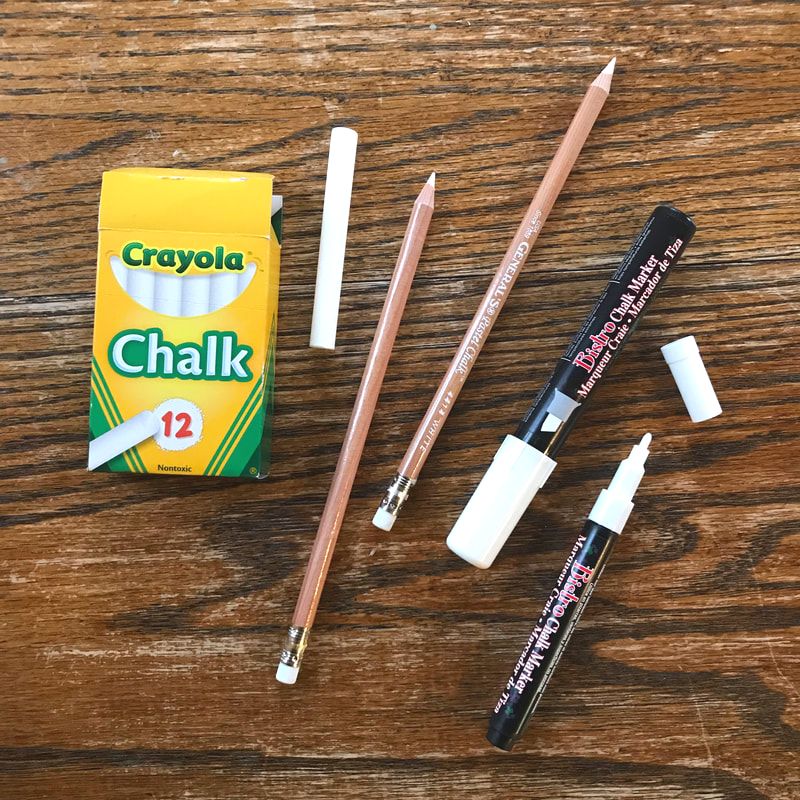
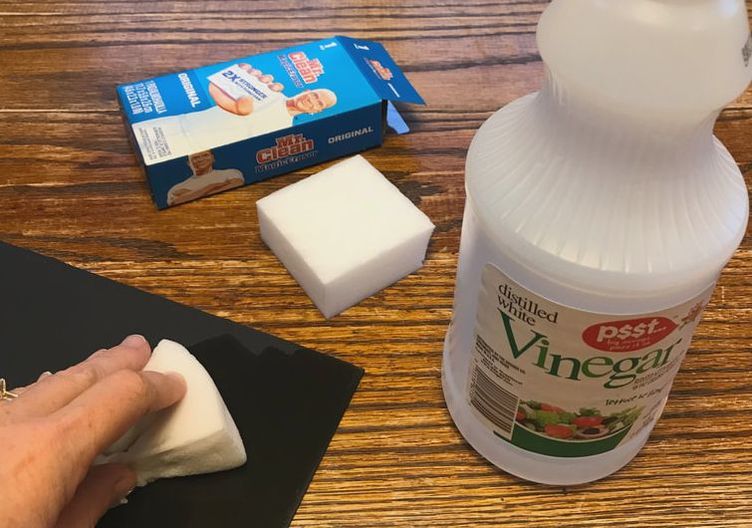
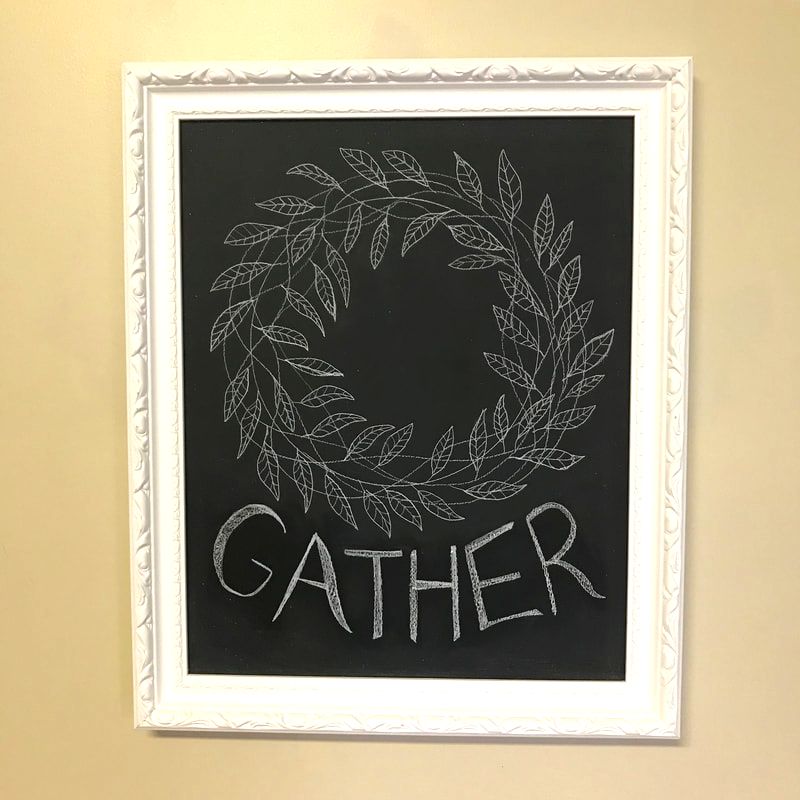
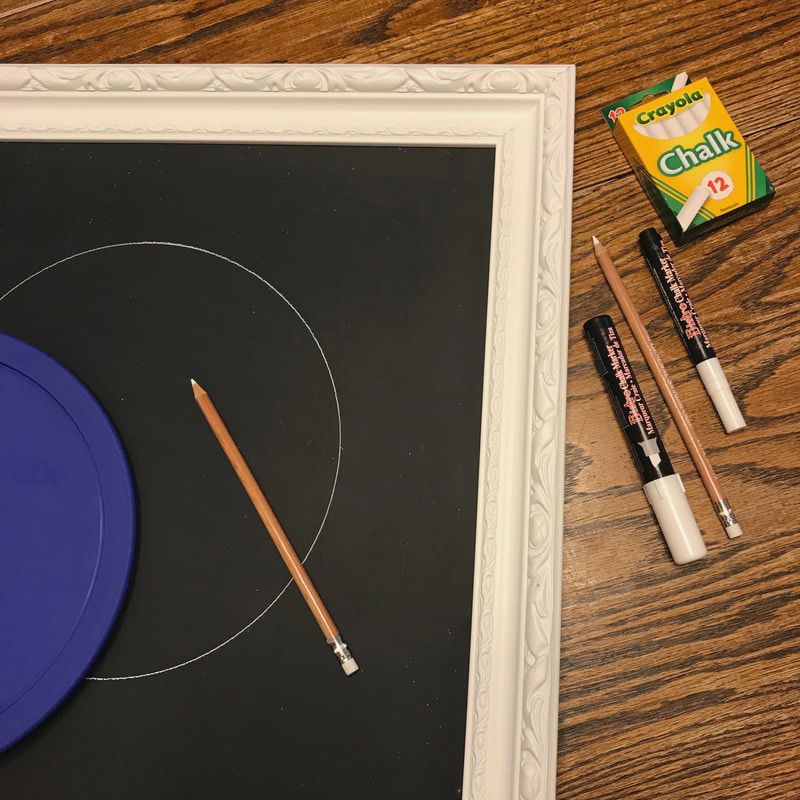
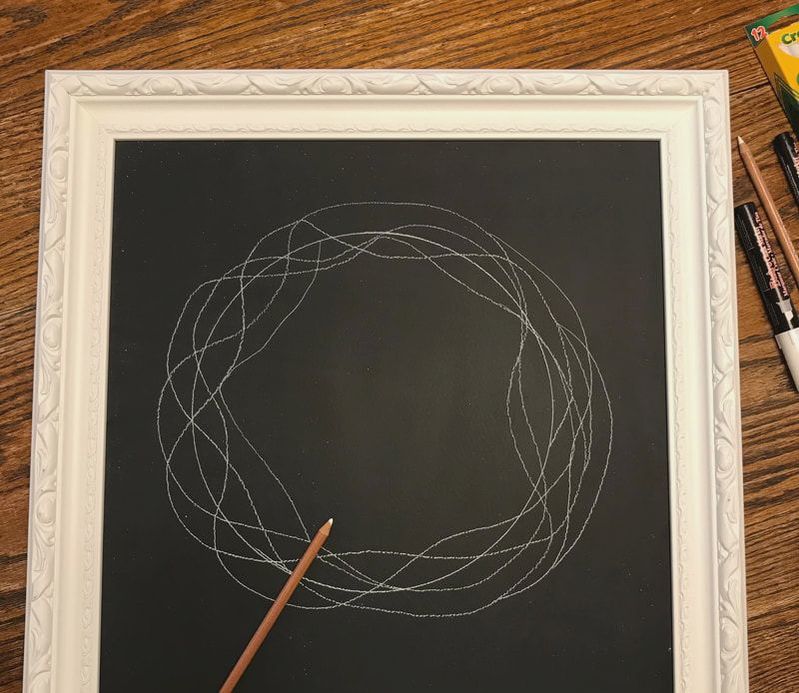
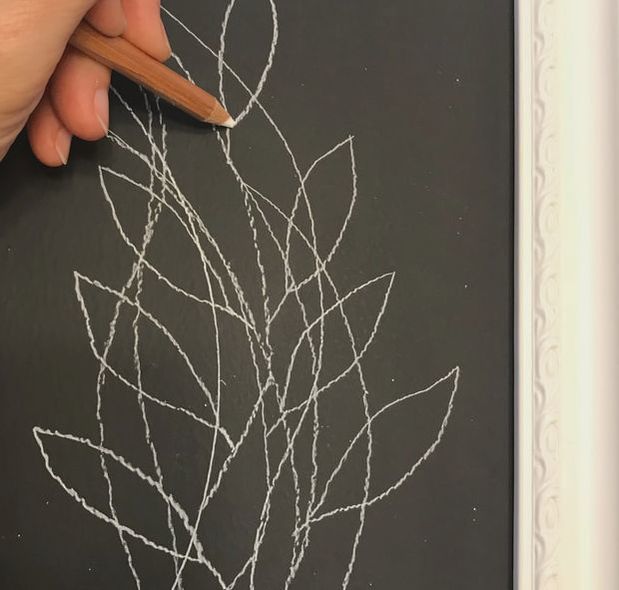
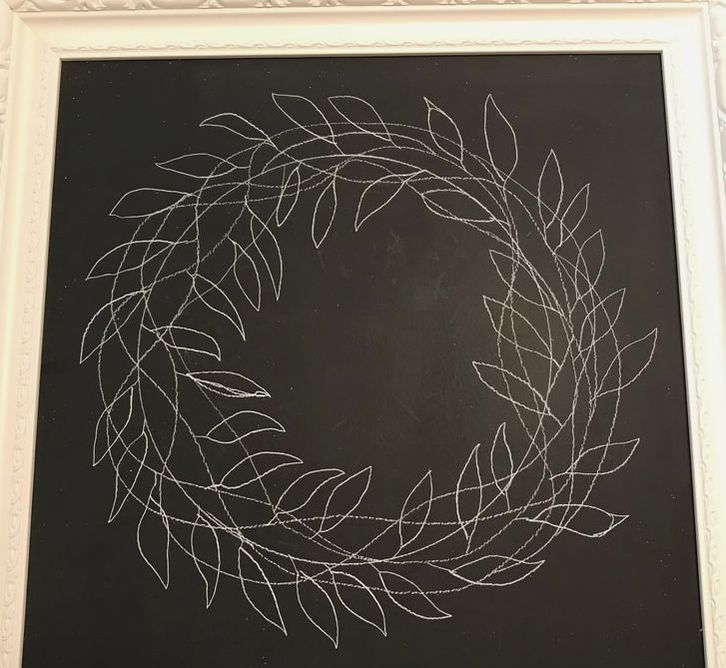
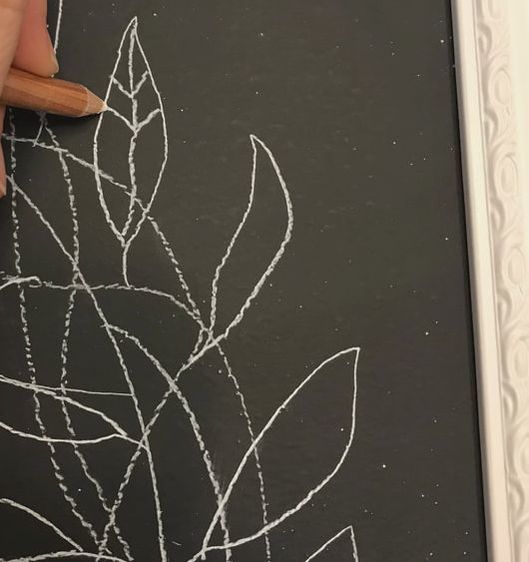
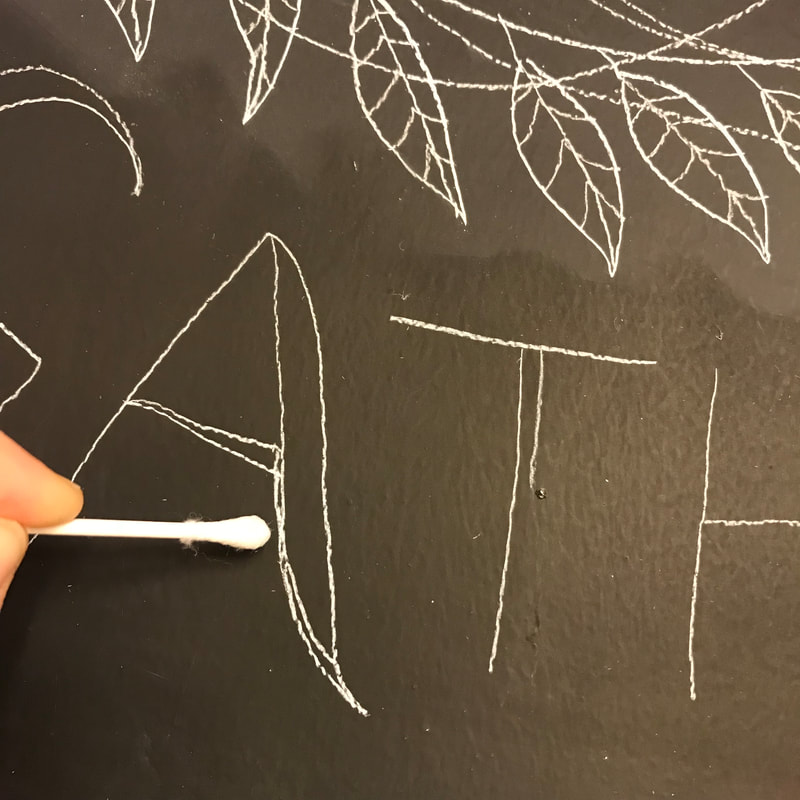
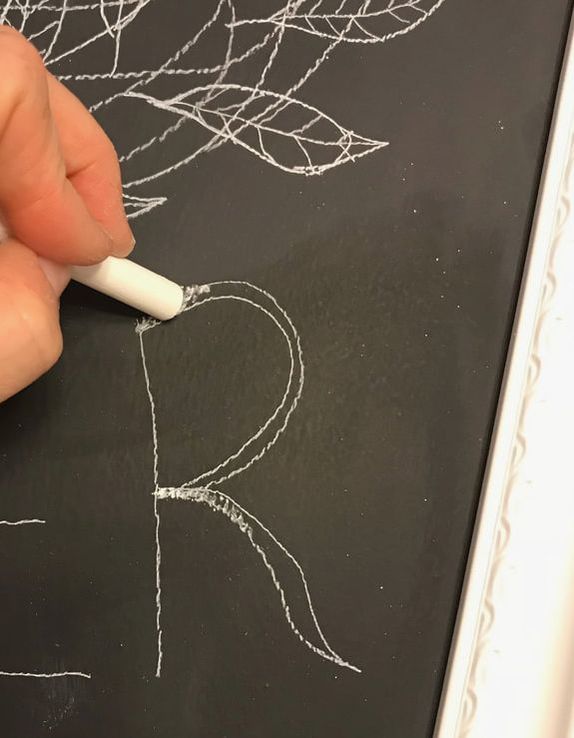
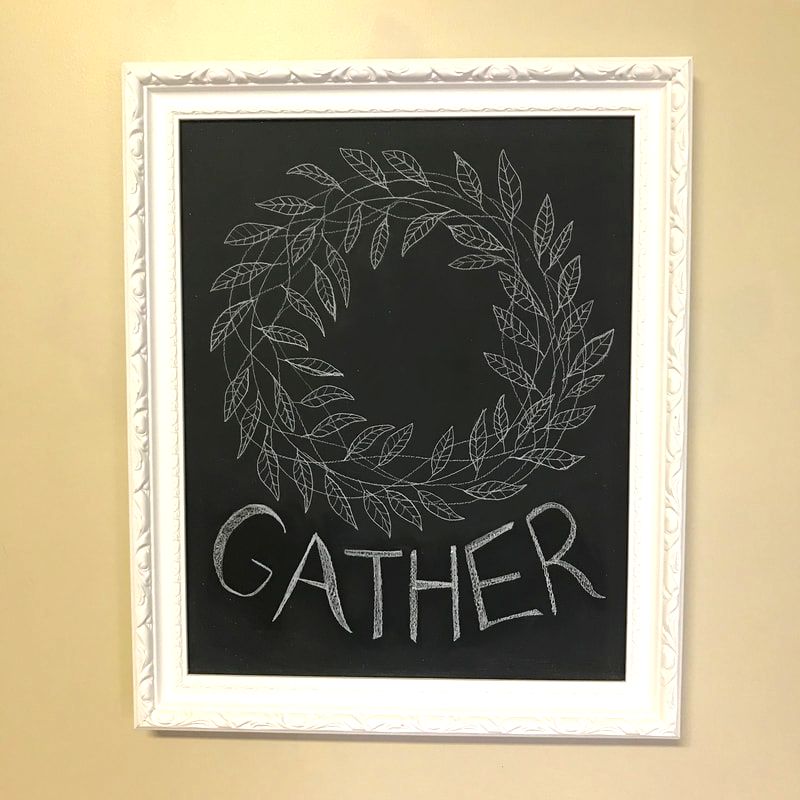
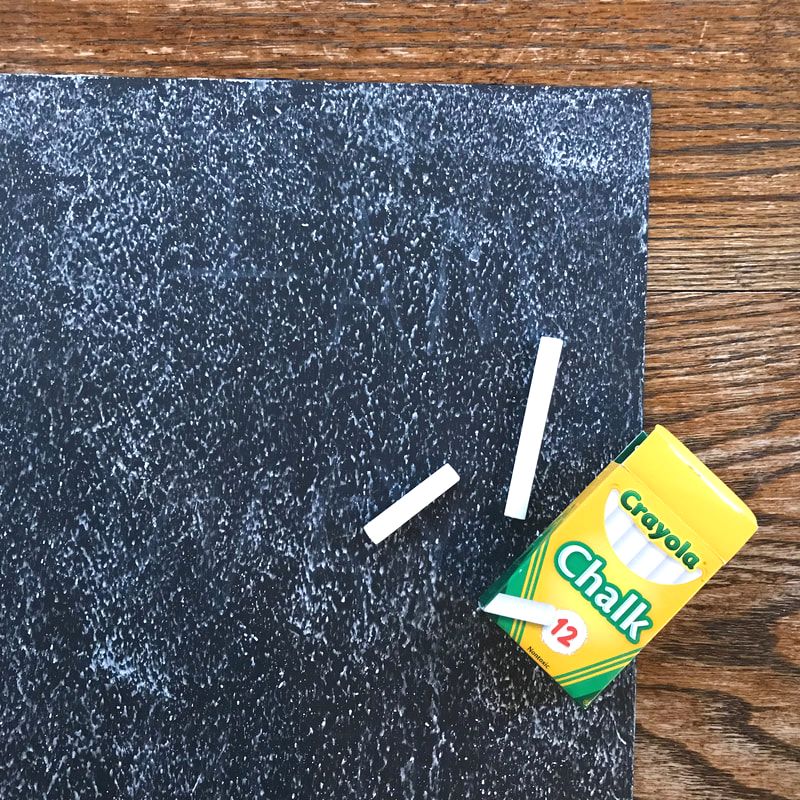 Conditioning your Chalkboard: Wait! Sorry but you will need to wait 3 days for the paint to cure before writing on it. After 3 days, it's time to Condition your Chalkboard. Conditioning is accomplished by rubbing the side of a piece of chalk over the entire surface of your chalkboard and then erasing. This creates a chalk dust layer on the chalkboard surface allowing for greater ease in erasing later. (Do not wipe with a damp cloth until after day seven of painting the glass.) Repeat the conditioning step after each cleaning. Writing on your Chalkboard: Whether you wanted to create a artistic chalk masterpiece or just make your grocery list, there are 3 types of writing utensils for chalkboards: Traditional Chalk Pros: Least expensive option. Easiest to clean. Cons: Does not create as crisp or heavy designs. Chunky size and hard to use. Chalk Pencils (my favorite!) Pros: Creates delicate, more detailed designs. Good for more exact outlines that can be filled in. Easy to use and clean. Cons: Not as useful for thick lines. Chalk Markers Pros: Creates beautiful, crisp and vibrant lines. Easy to use. Cons: Difficult to remove. Cleaning your Chalkboard: For traditional chalk and chalk pencil, a damp cloth or a wet wipe are sufficient. However, as I stated previously, Chalk Marker is difficult to clean and often leaves a shadow of your previous design. I've tried several products but the best results I've found to remove Chalk Marker are Distilled White Vinegar and a Magic Cleaner. The combination of these plus a little elbow grease will remove the shadow. Be advised that this may also take a slight amount of the finish with it but your chalkboard will be ready for a new design. Gather & Wreath Chalk Drawing It not as hard as it looks! I drew the wreath entirely with a chalk pencil and used a combination of chalk pencil and traditional chalk on the word "GATHER". I'll show you how! I began with a 2.5 quart Pyrex lid but any circular object will do the trick. With the lid, I created a circle in the top portion of my board. (Never mind the chalk markers you see in the picture above. Honestly, I should probably hide those from myself!) Next, with the chalk pencil draw wavy circles all around and over the original neat and exact circle. It doesn't have to be perfect or exact. Next, create leaves pointing outward and inward but all pointing in the same general direction. Notice it is not exact and has a whimsical look. Next, draw a line down the middle of every leaf. Then make v-shaped leaf veins with the tip of each "v" intersecting with the middle line you have drawn. Again, this is not exact and will have a whimsical look. Now to draw the word "GATHER". Use a chalk pencil and write the word below the wreath. Then go back over the word with the chalk pencil and create an outline of where you would like thicker lines. If you make a mistake, use a damp q-tip to erase what you consider a mistake. Next, fill in the outlined areas of the letters with traditional chalk. And finally, go around the entire word with your chalk pencil so the letters look crisp. You may want to check the wreath to see if you feel like it needs some extra leaves before you put your supplies away. Good job! You and I are not professional artists but a whimsical wreath and hand lettering are not supposed to be exact...just pretty darn cute!
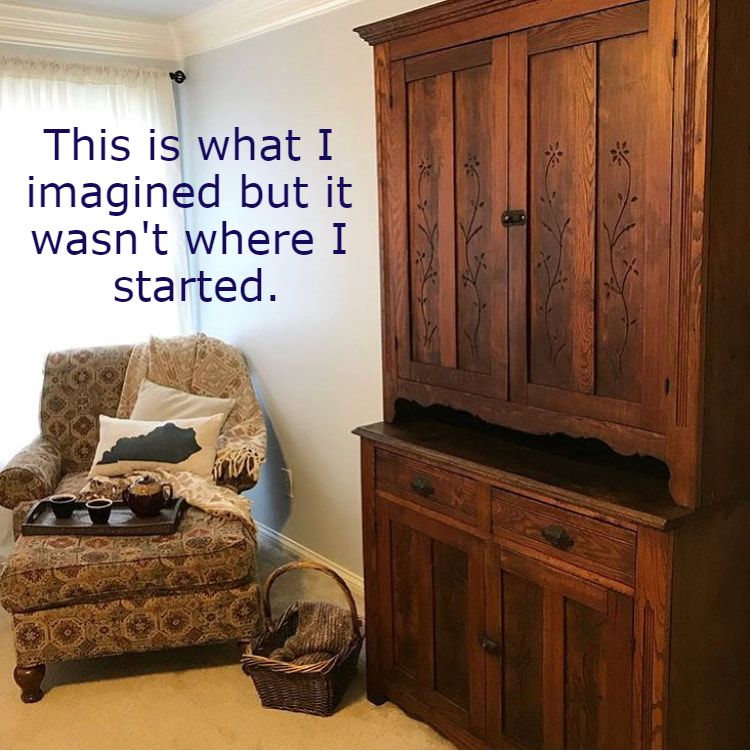
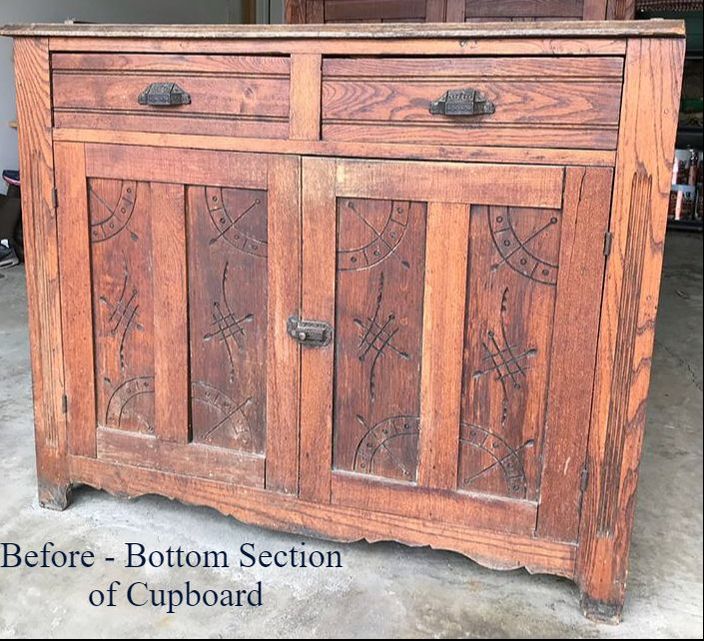
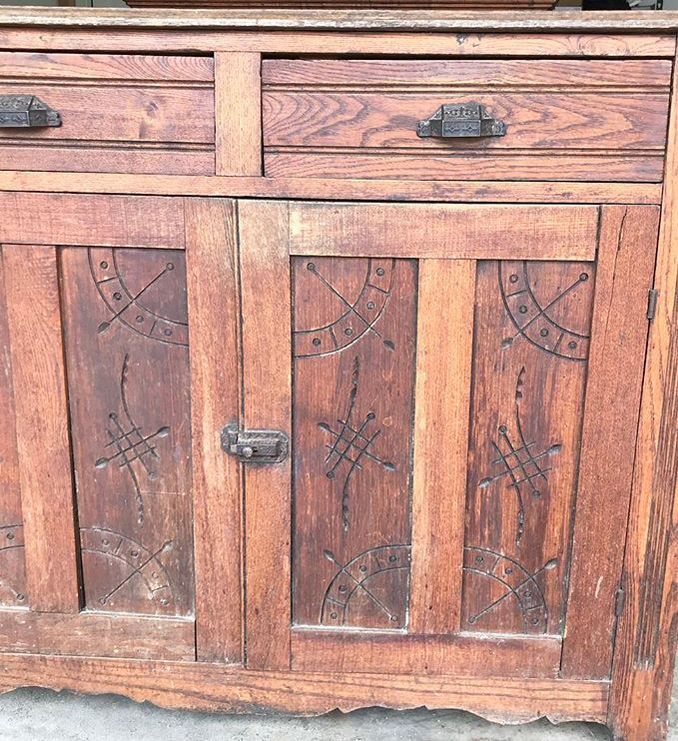
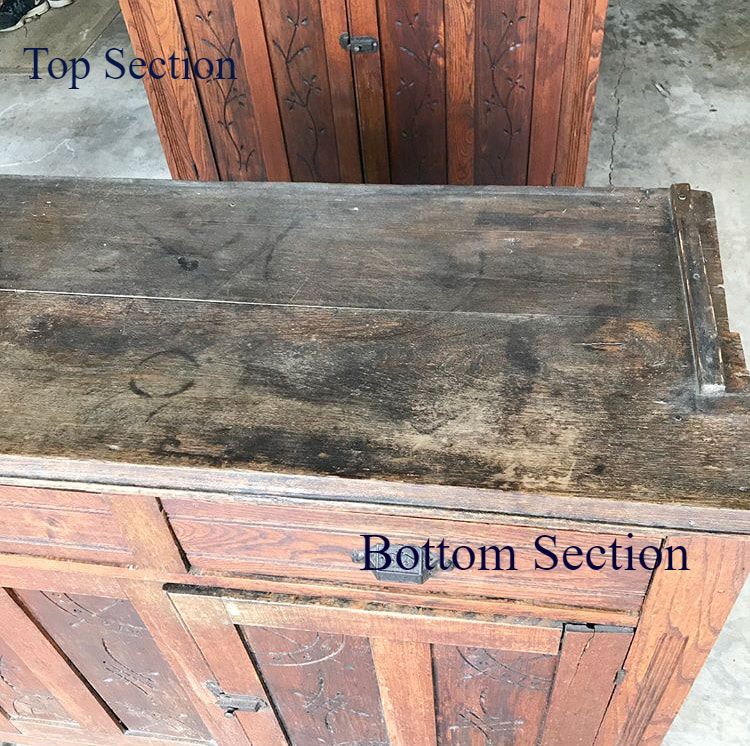
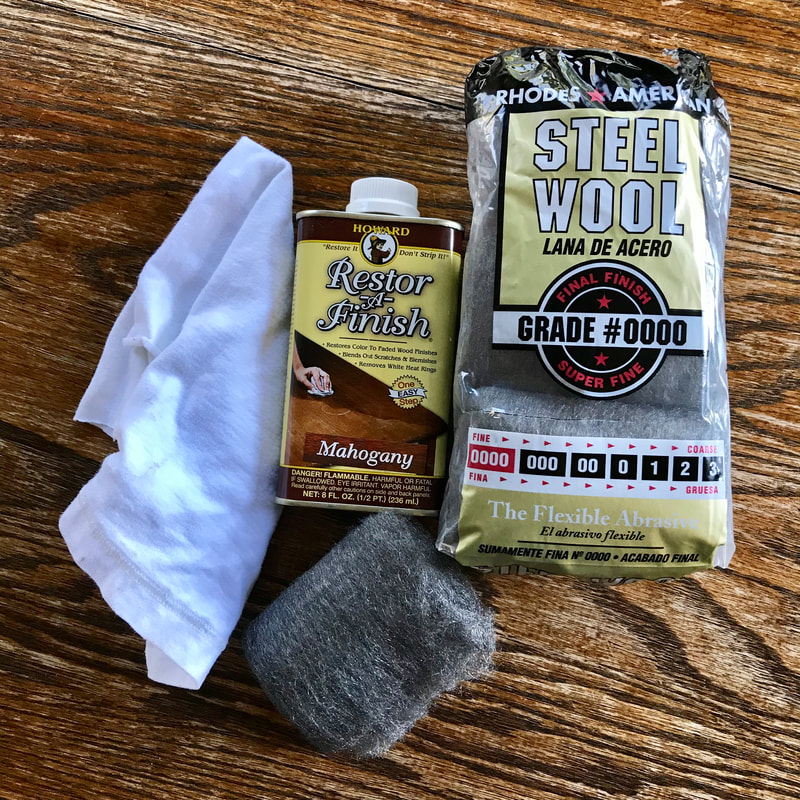
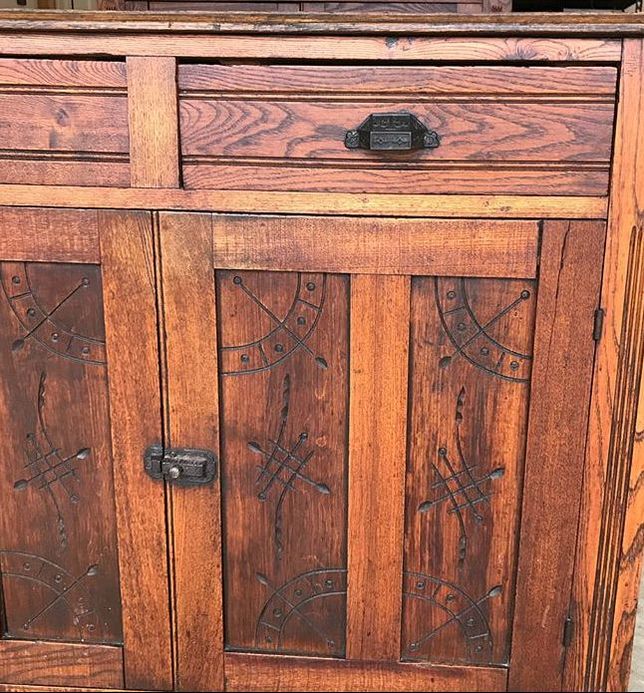
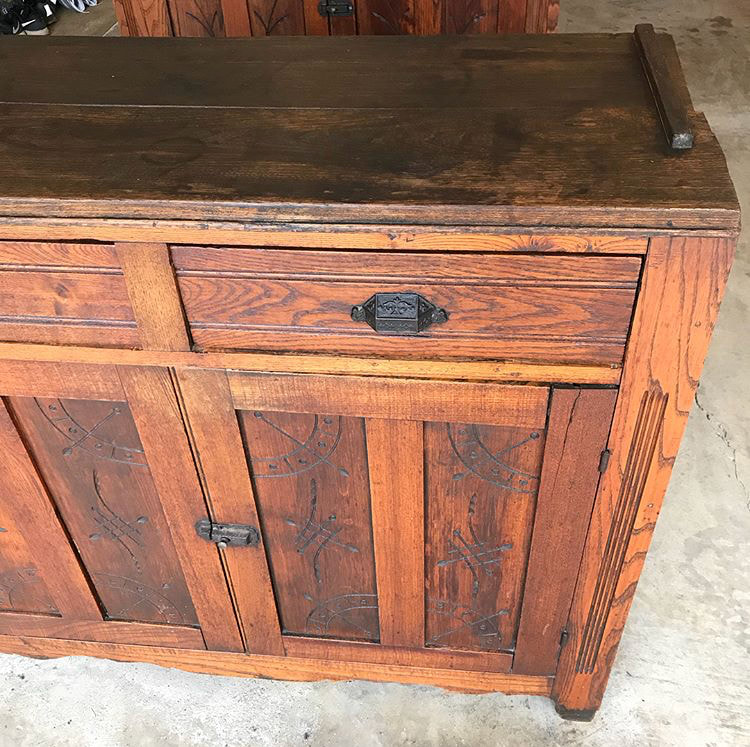
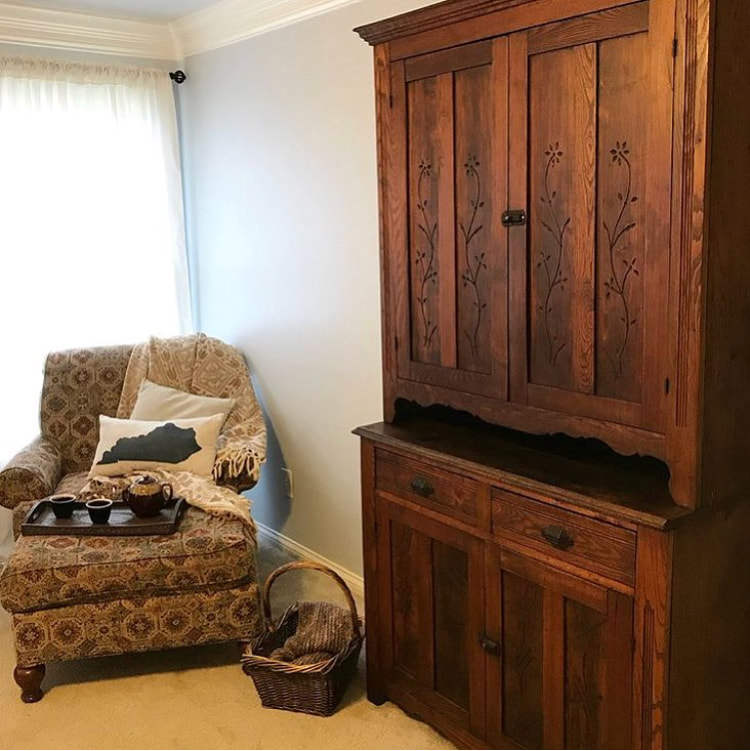
You admire that piece of furniture every time you are at your relative's house. And then the day finally comes. Their need to downsize equals welcoming a family treasure into your home. I've found myself in this spot several times. Once I receive an old furniture friend into my home, it's often in need of some TLC. And that's exactly what I gave the beautiful hand-carved antique cupboard above...TLC with Restor-A-Finish. (No, I am not being paid by this company. The product simply works so I want to tell everyone about it.) It's often hard to know what to do with old furniture that has a tired, worn and scratched finish. There are usually three options.: 1. Refinish. This requires hours of work, sweat (sometimes blood) and a well ventilated work space that can be tied up until you finish the project. 2. Paint. This is a popular choice right now. However, I don't think it's always best in the long run. Once the painting fade ends...then what? (Have you ever tried to remove paint from furniture? It's very difficult. I have an antique trunk that still has faint green deep down in wood grooves even after hours of stripping and sanding. It can never be returned to it's original glory.) I reserve painting to pieces that are not antiques. And if they are, they are so damaged that only paint can hide the damage and make them look lovely again. 3. Restor-A-Finish. This is a far less time consuming option. It works well if most of the finish is still in tact but lacks it's original luster, has light scratches or other areas of surface damage. To put it best and per the back of the product packaging, "unique finish-penetrating formula restores the original color and luster to wood finishes while blending out minor scratches and blemishes" and "permanently eliminates white heat rings, watermarks, scratches, color fade, oxidation, smoke damage...restores finish in one step - without removing any of the existing finish". Restor-A-Finish is exactly what my new-to-me cupboard needed, especially since it was so large, having two parts, with the bottom significantly more worn than the top. Besides, I really only had one afternoon to get it done. Here are some pictures of the worse wear: You can see the top section of the cupboard in the background of the second image of BEFORE pictures. Like I said, it wasn't too bad and just needed a little attention. However, the top and front of the bottom section were in awful shape. It was time to get to work! Materials Needed:
How to use Restor-A-Finish:
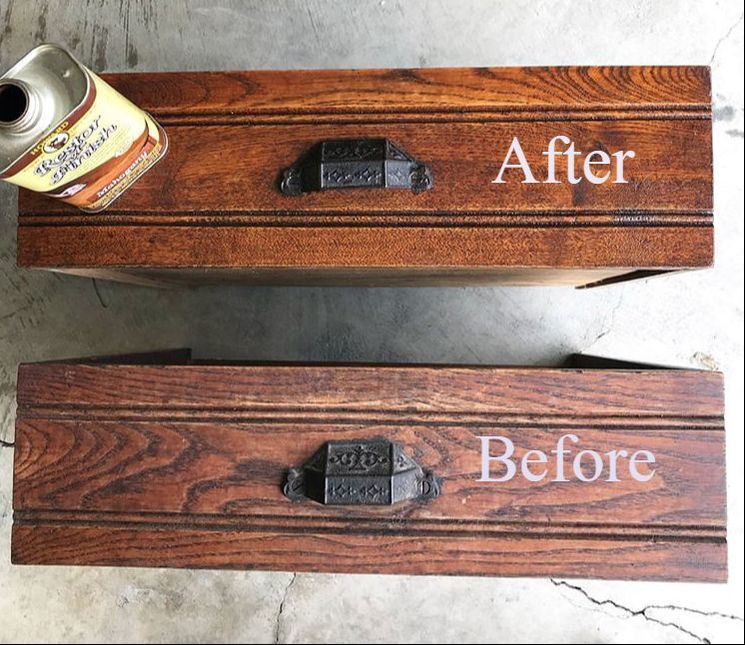
Even though the top section of the cupboard was in significantly better shape than the bottom section, the top was still dull and had numerous scuffs. I used Restor-A-Finish on both sections so the final results would be uniform. Below are some more pictures of how I transformed my worn and scratched cupboard with Restor-A-Finish. 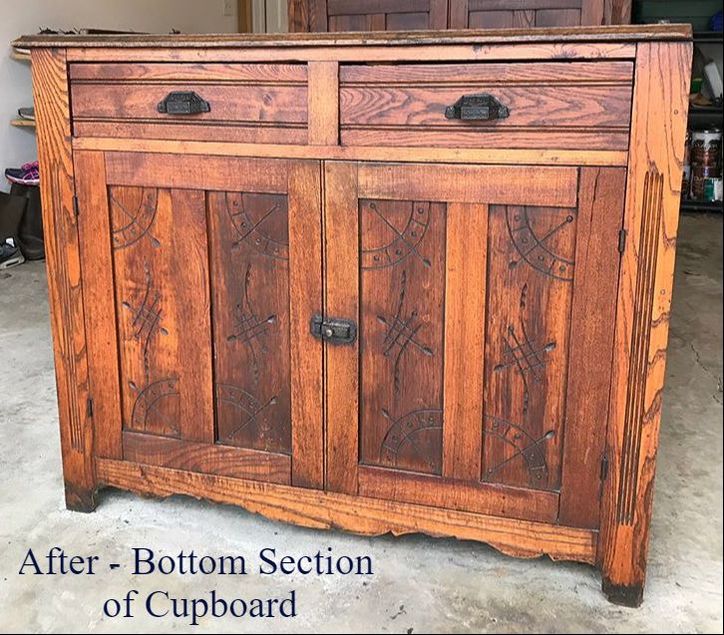 My beautiful, hand carved, antique cupboard went from worn out to a treasured family heirloom in a matter of two hours or less! We will enjoy it for years to come!
|
Sharingour HOME Categories
All
|
